Repousse chased copper model of a custom cuff bracelet from conception to completion in pictures

DSCF3268

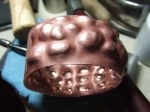
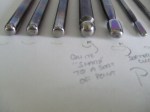
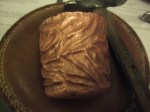
The drawing given to me with the rune alphabet and the caption as wanted. My interpretations at the bottom with the copper blank ready for lining


DSCF3270

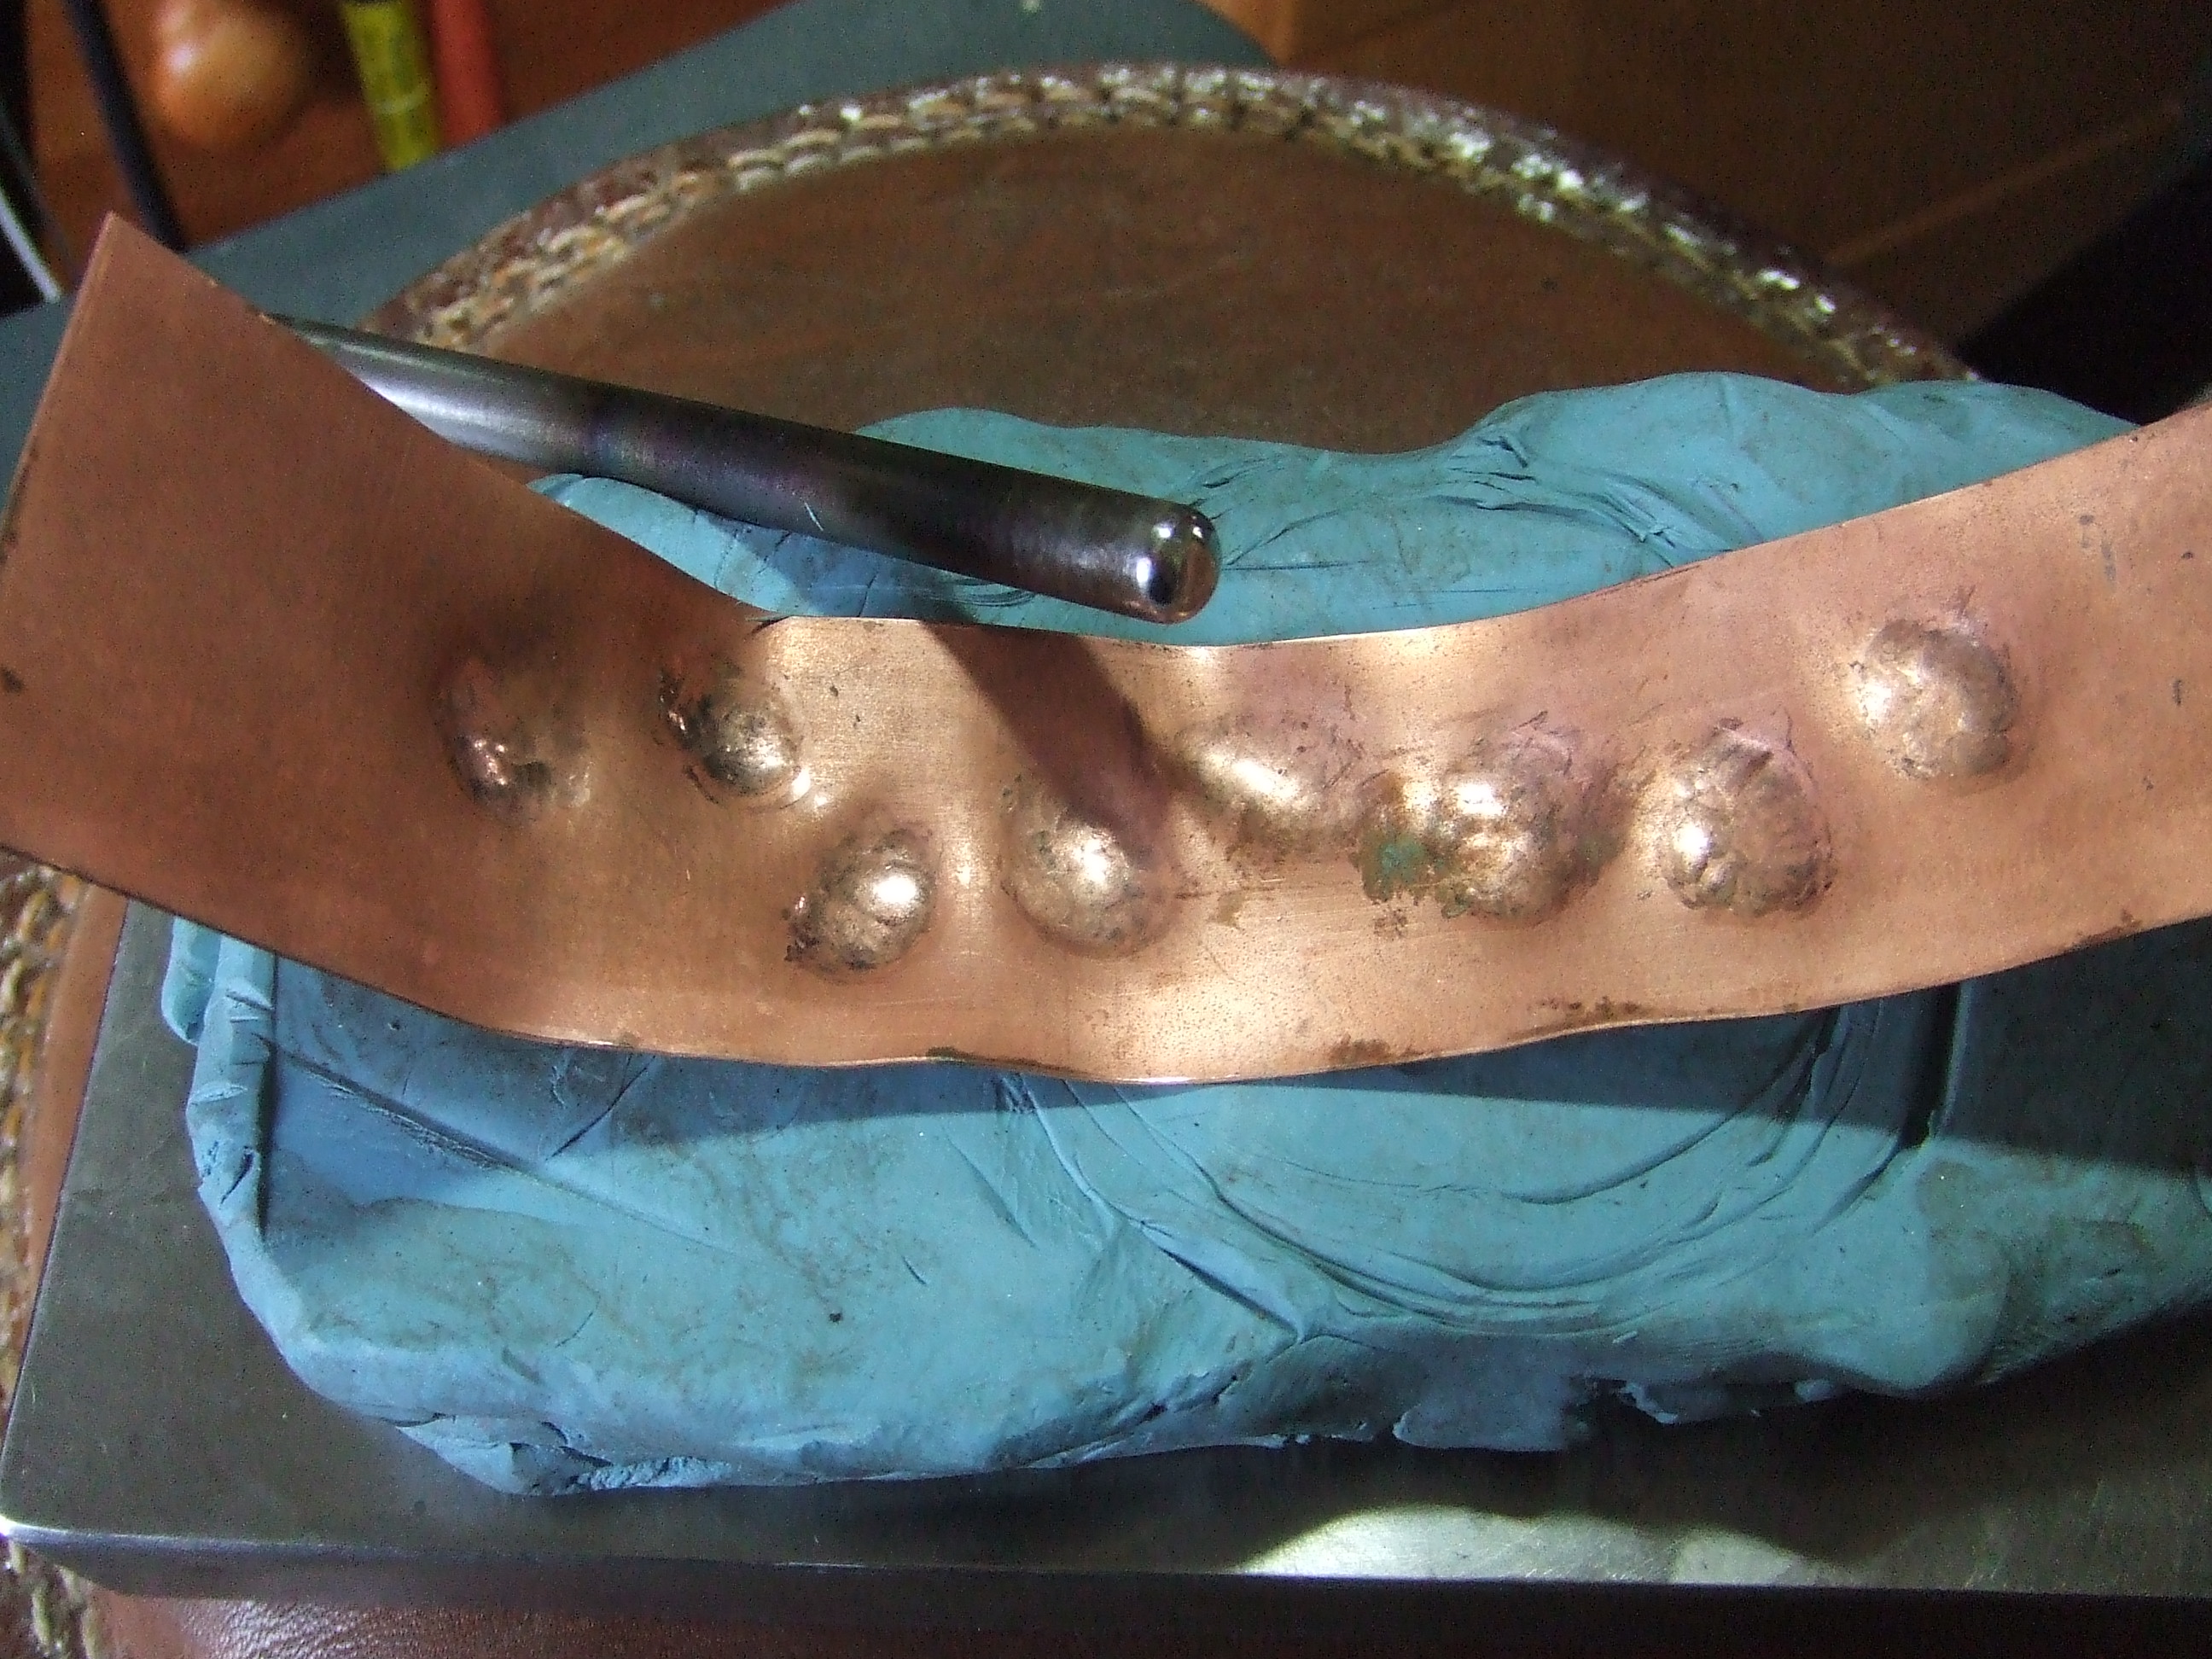
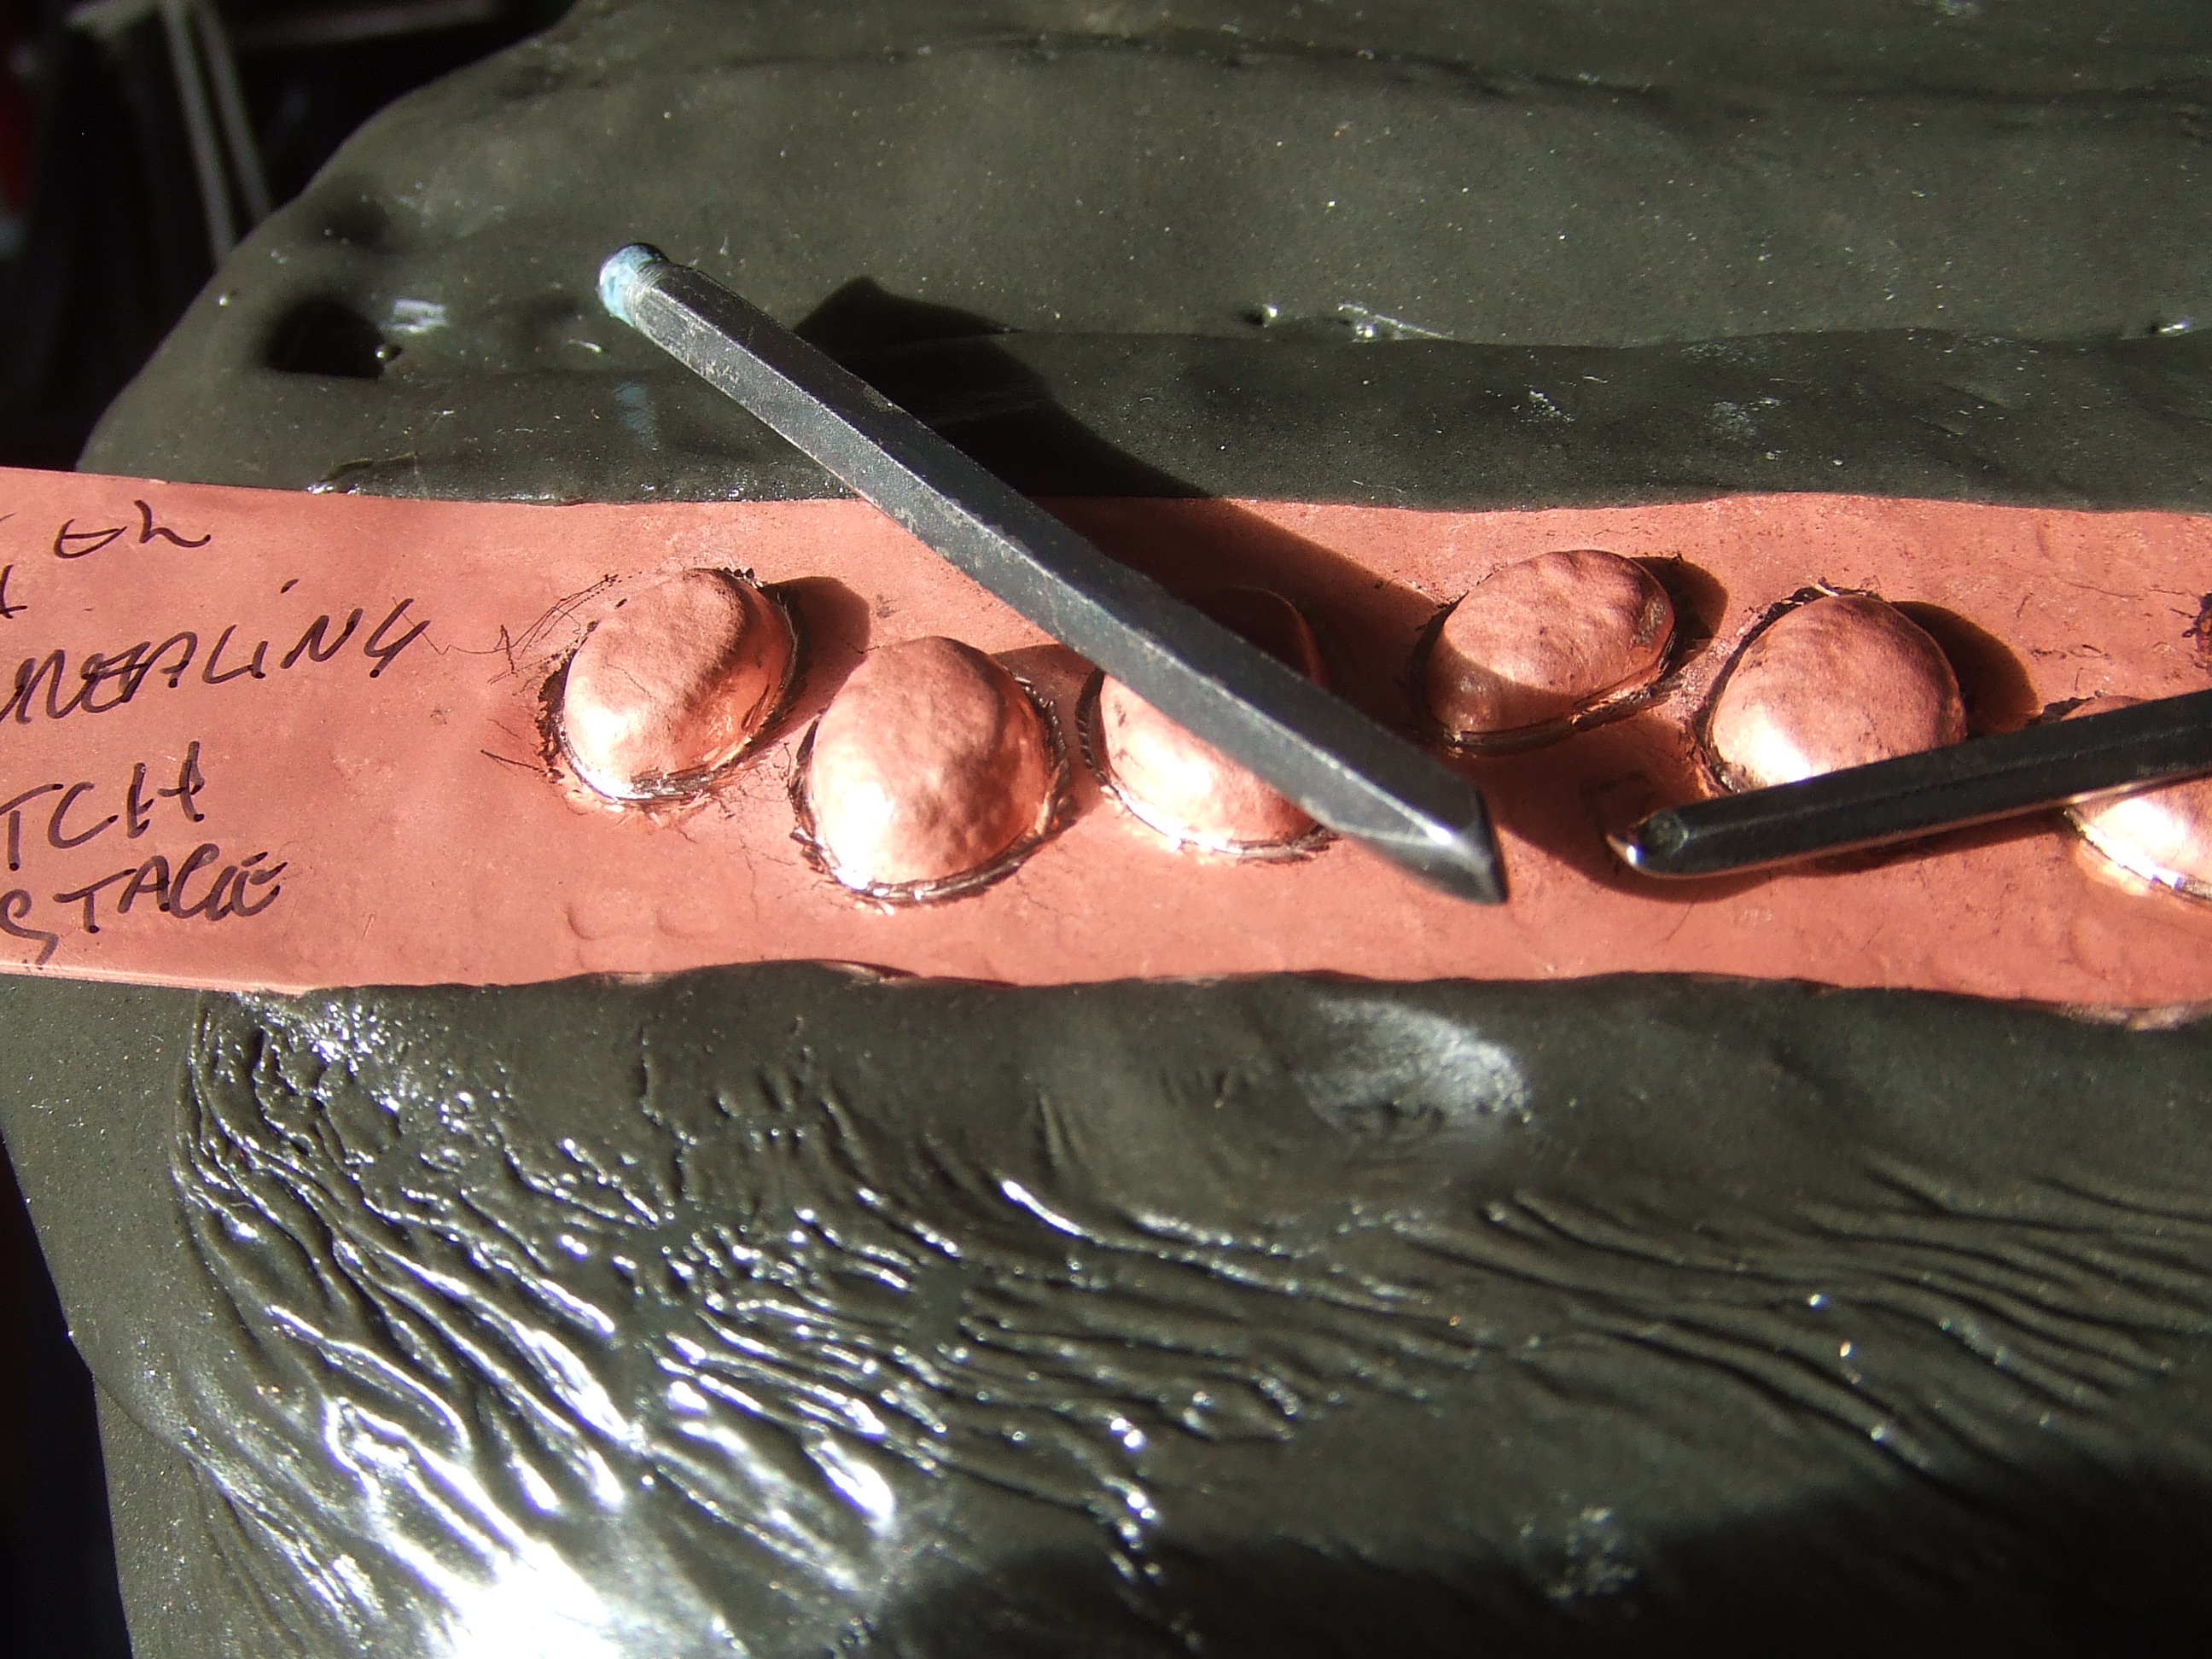
Without annealing, turn the lined piece over and use a rounded punch. Follow the outline, as made by the liner in previous stage, working towards the middle.

DSCF3271

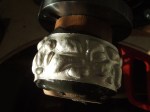
Turned over, on the plaster scene from previous stage, you can see the ‘runes’ taking shape. The surrounding material needs to be straightened out now.

DSCF3272

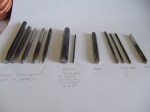
You can see this was an allen key, most of my tools start as allen keys, great cheep tool steel. The face, as most all of my chasing and repousse tools are, is mirror polished to prevent scarring of the material whilst working. The background is gently pushed down, again use the largest planishing punch as you can to minimise the overlapping tool marks that can lead to an unwanted planished effect. You are just ‘placing’ the material back, not forming it, just be gentle as you will need to repeat this again later.

DSCF3273

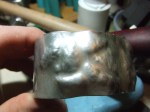
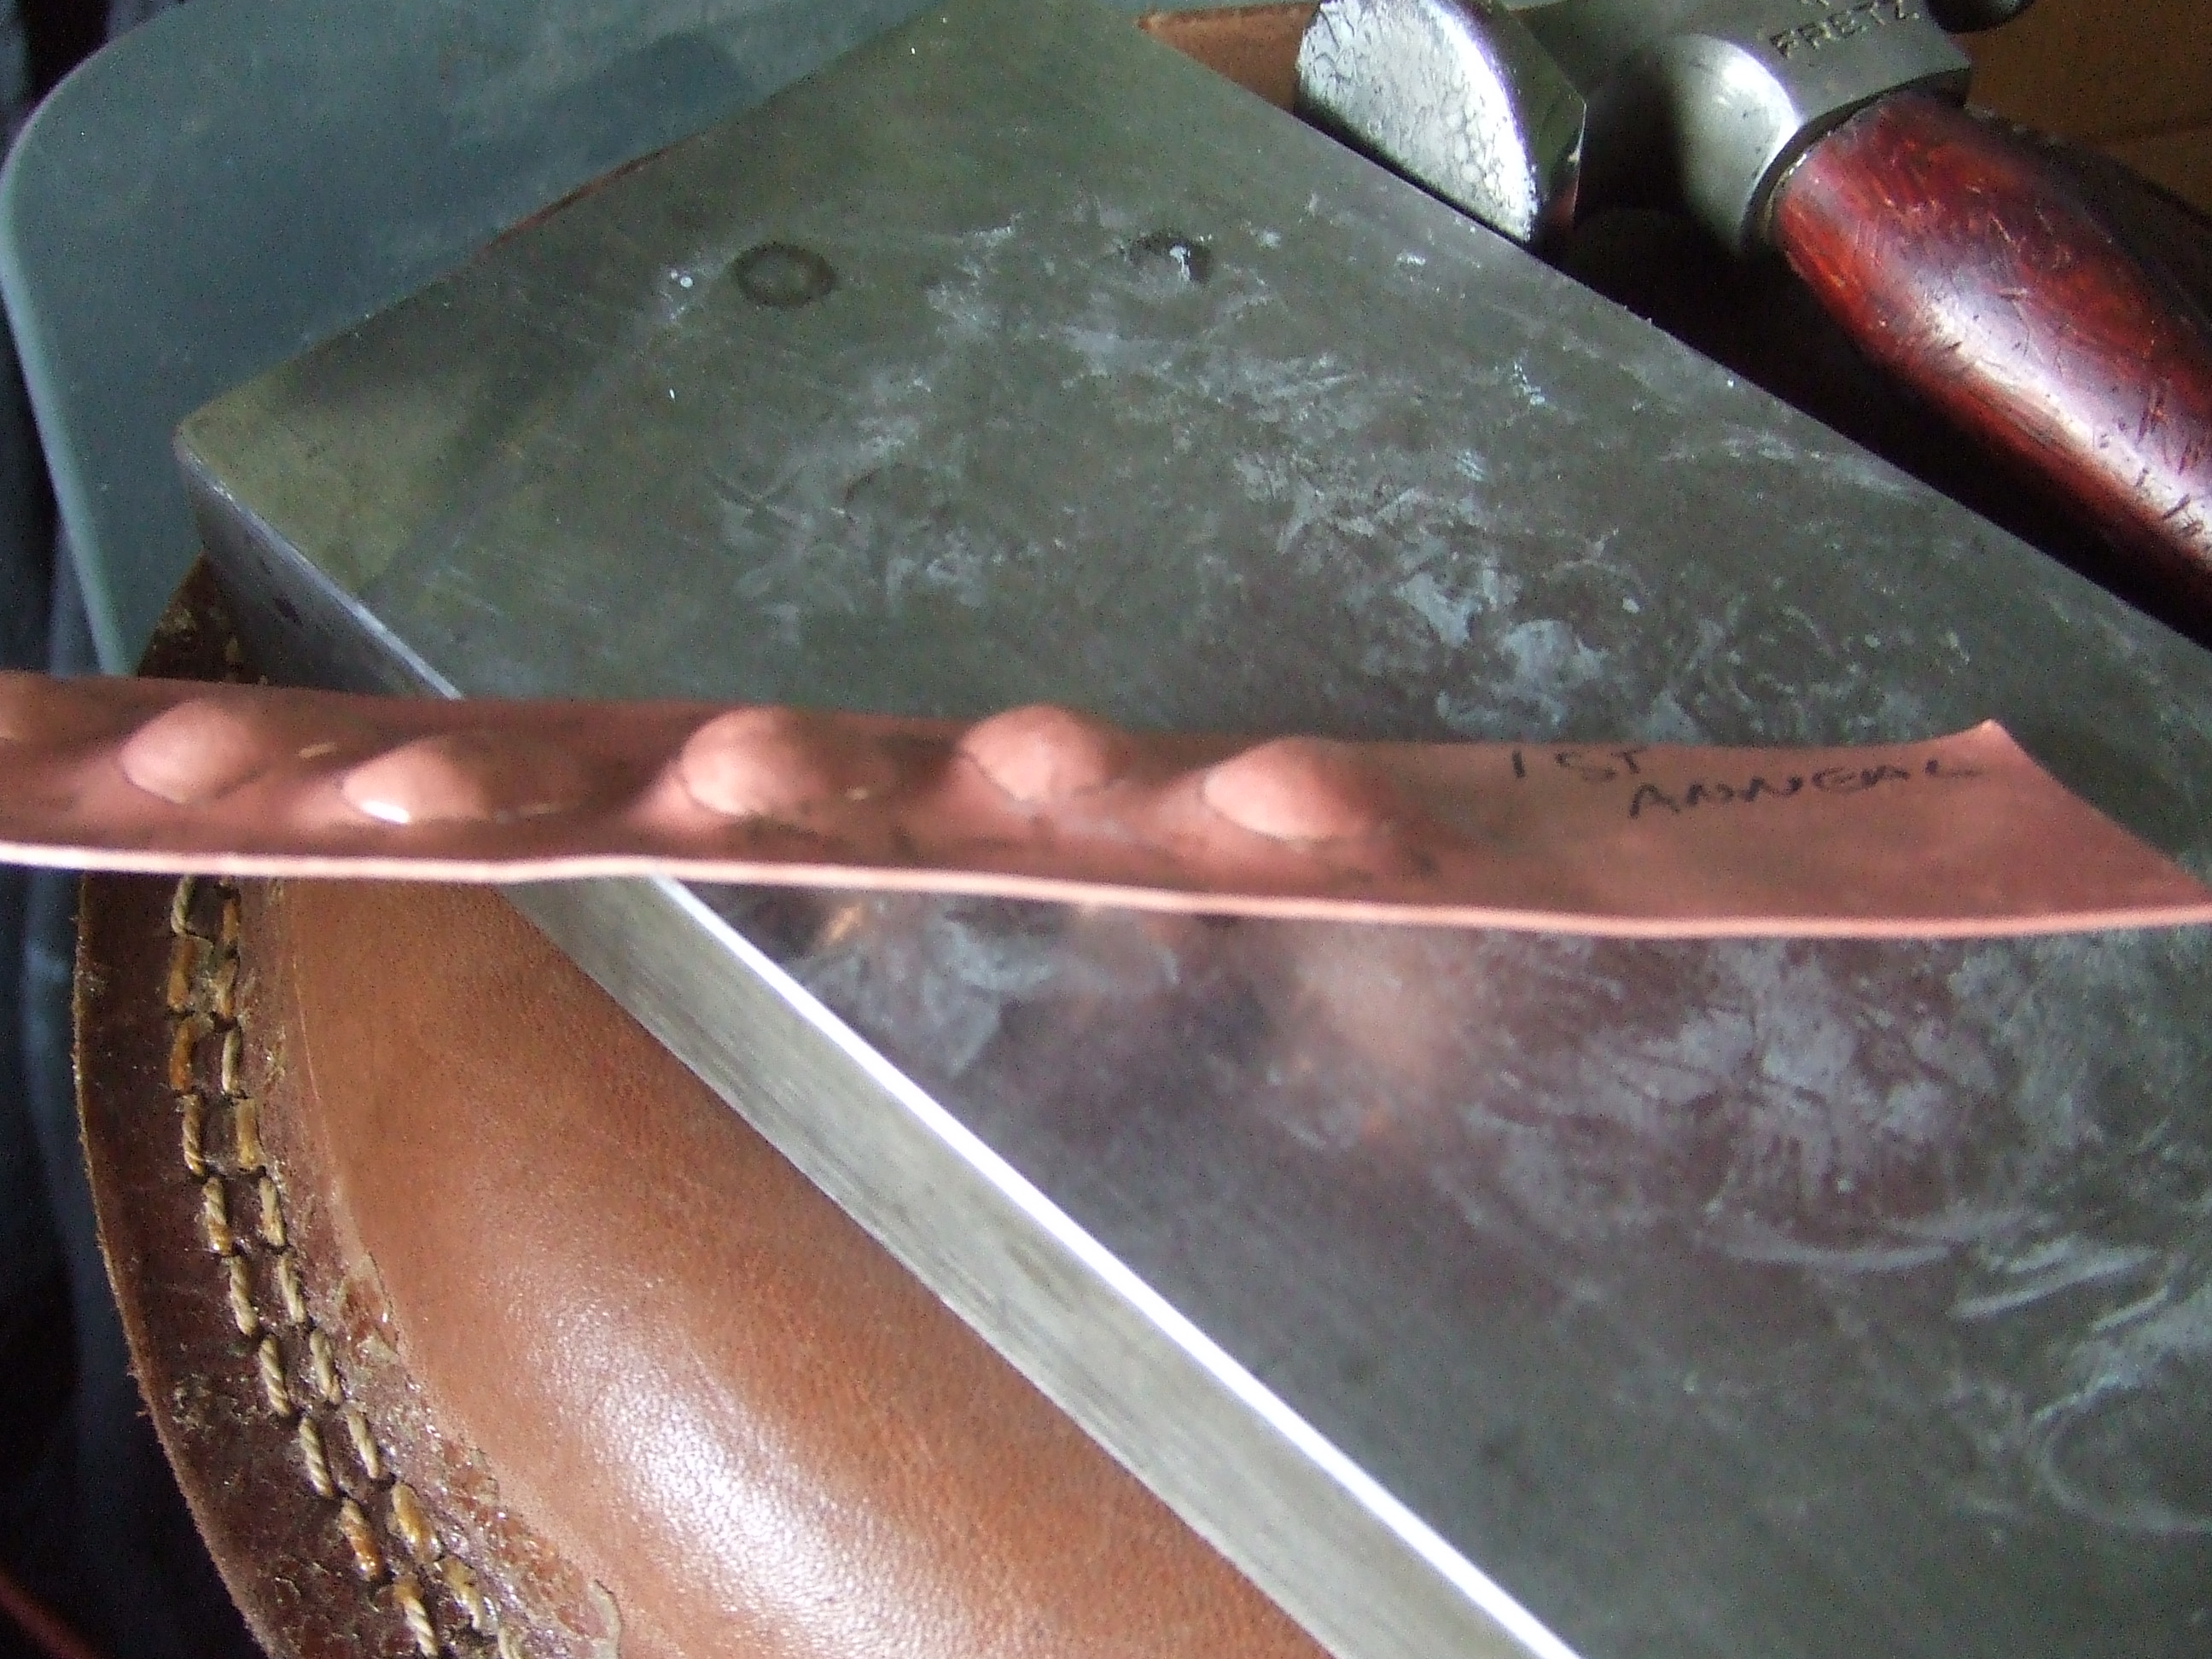
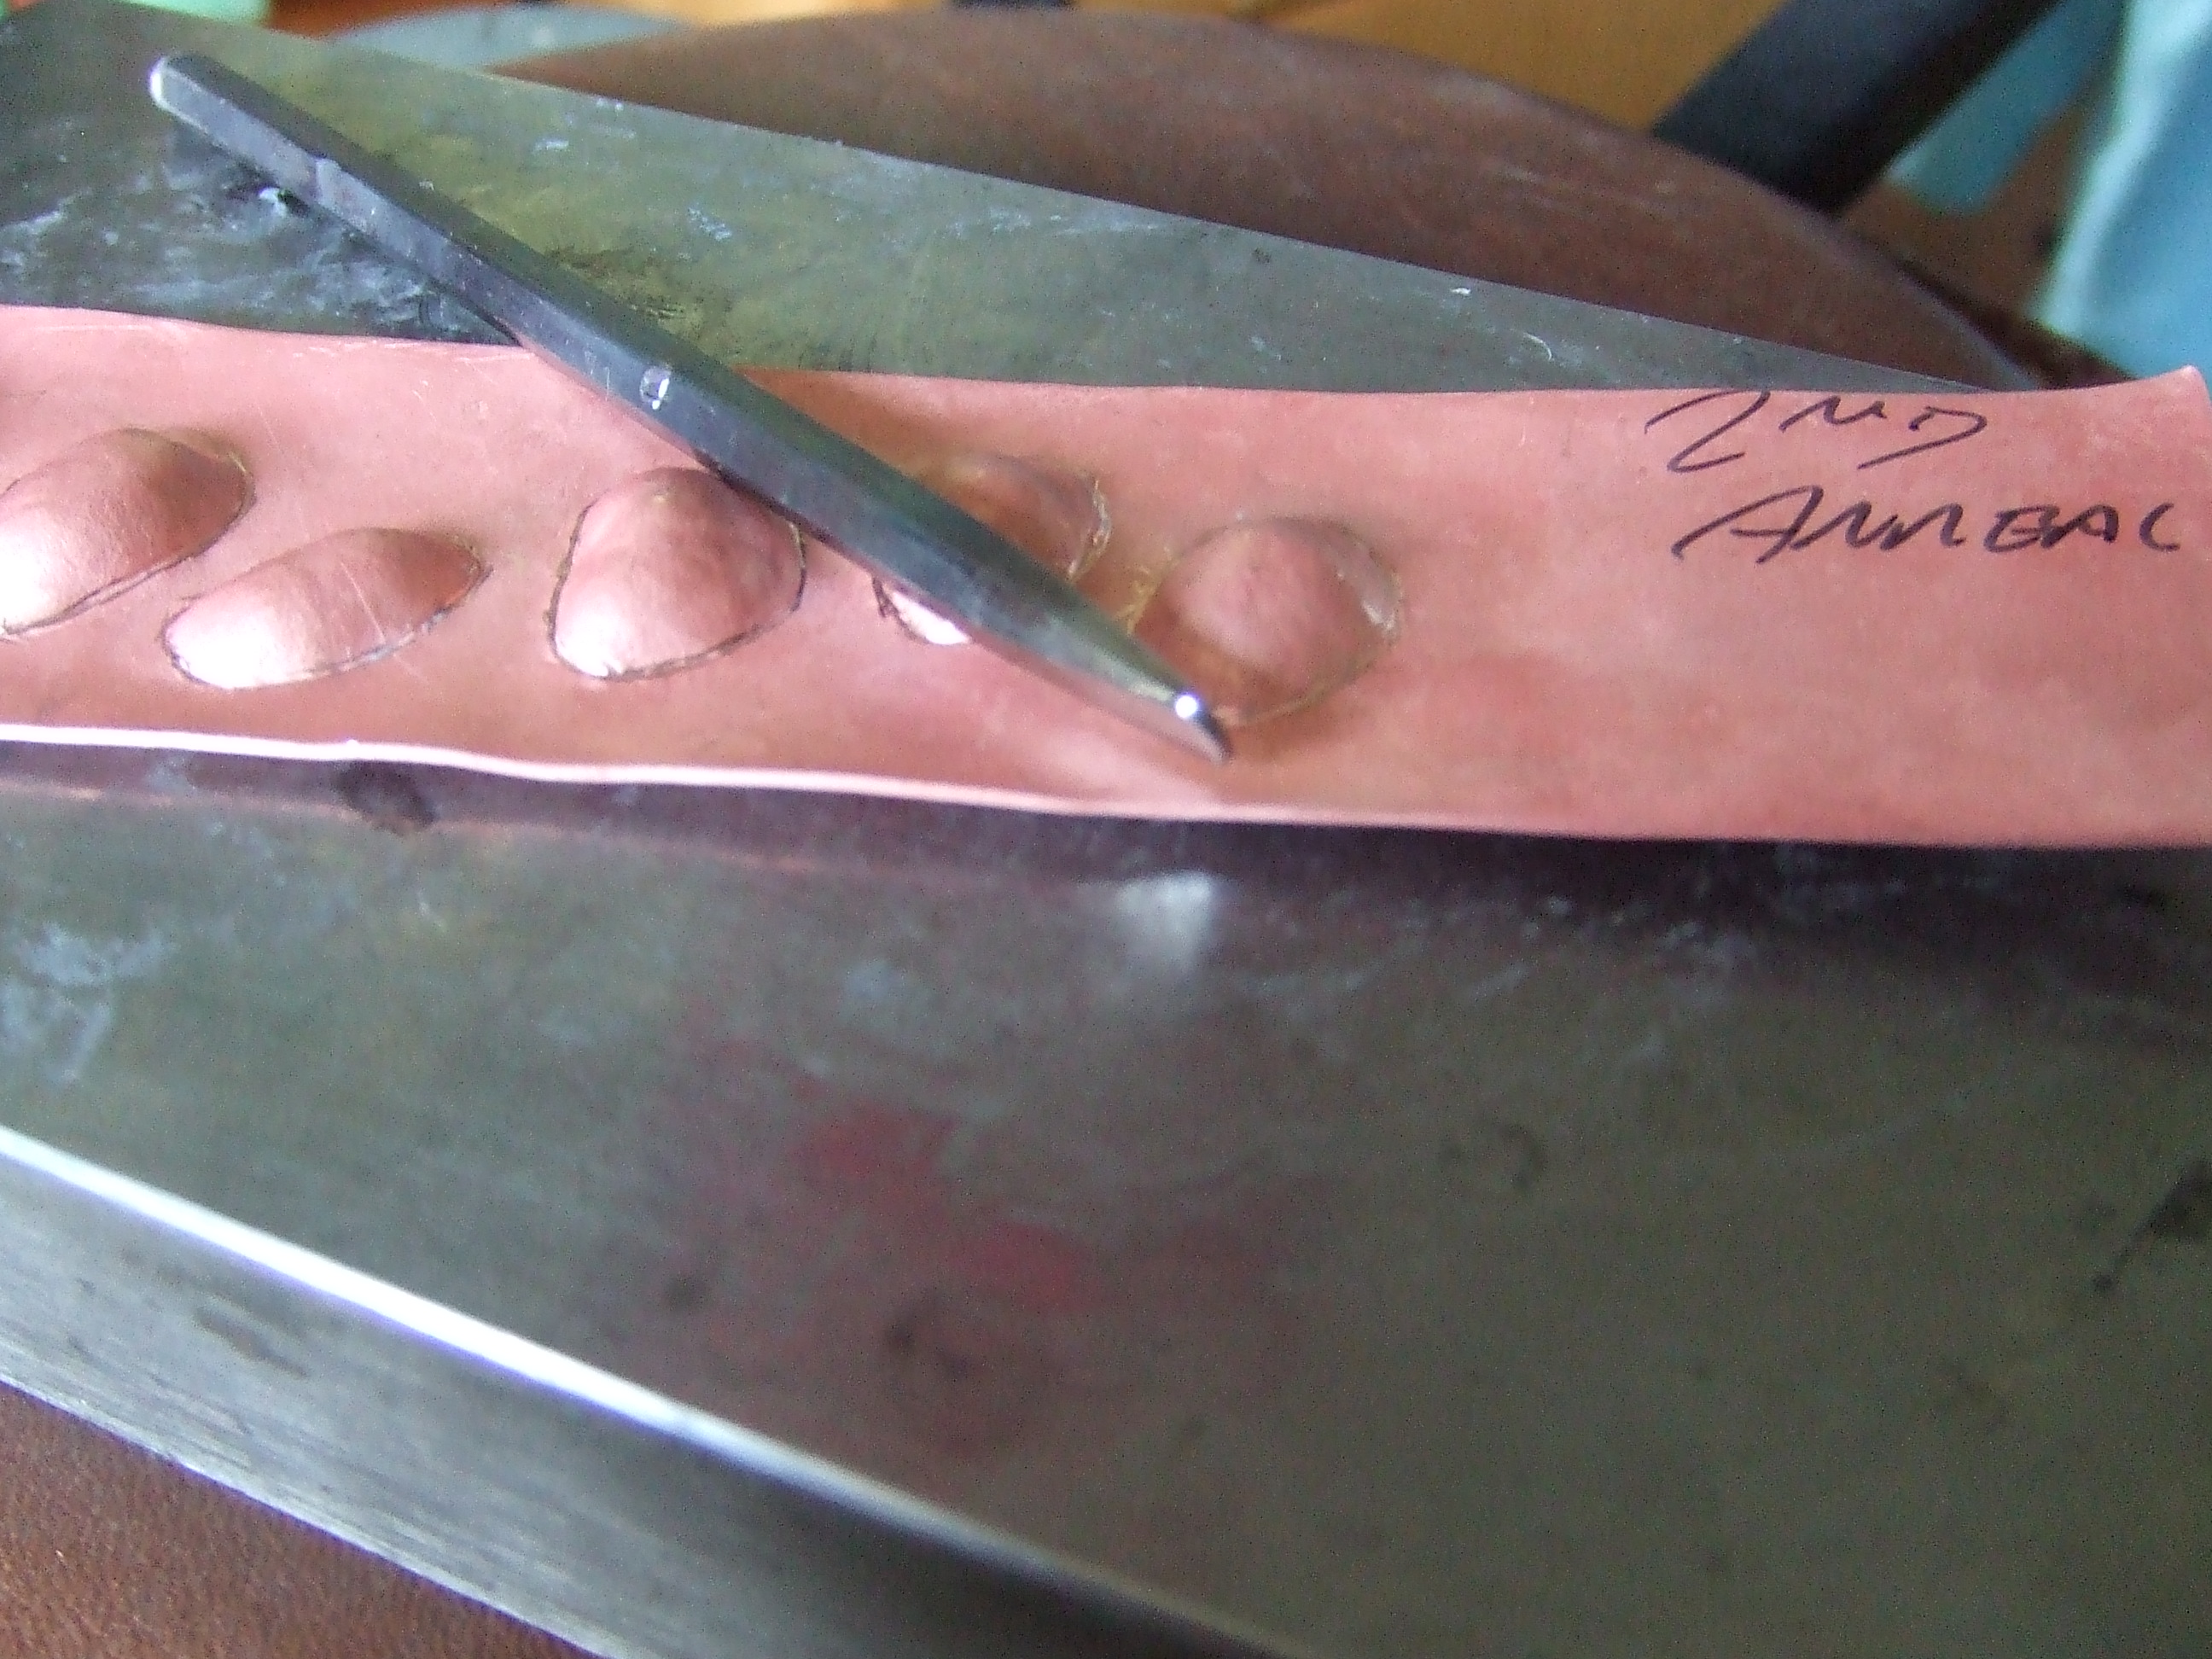
First annealing stage, pickled ready for more working.

DSCF3274

Because the material was work hardened in the previous stage this would likely not have been successful before this annealing. This takes the last stage to its conclusion, making the ‘runes’ return to the same level as the surrounding material. This allows you to separate the elements better later and allows you to see how high you have come, more importantly how much further you need to go.

DSCF3275

The underside after outlining the individual runes from the front, notice the clean edged as they have been encouraged back to the steel plate.

DSCF3276

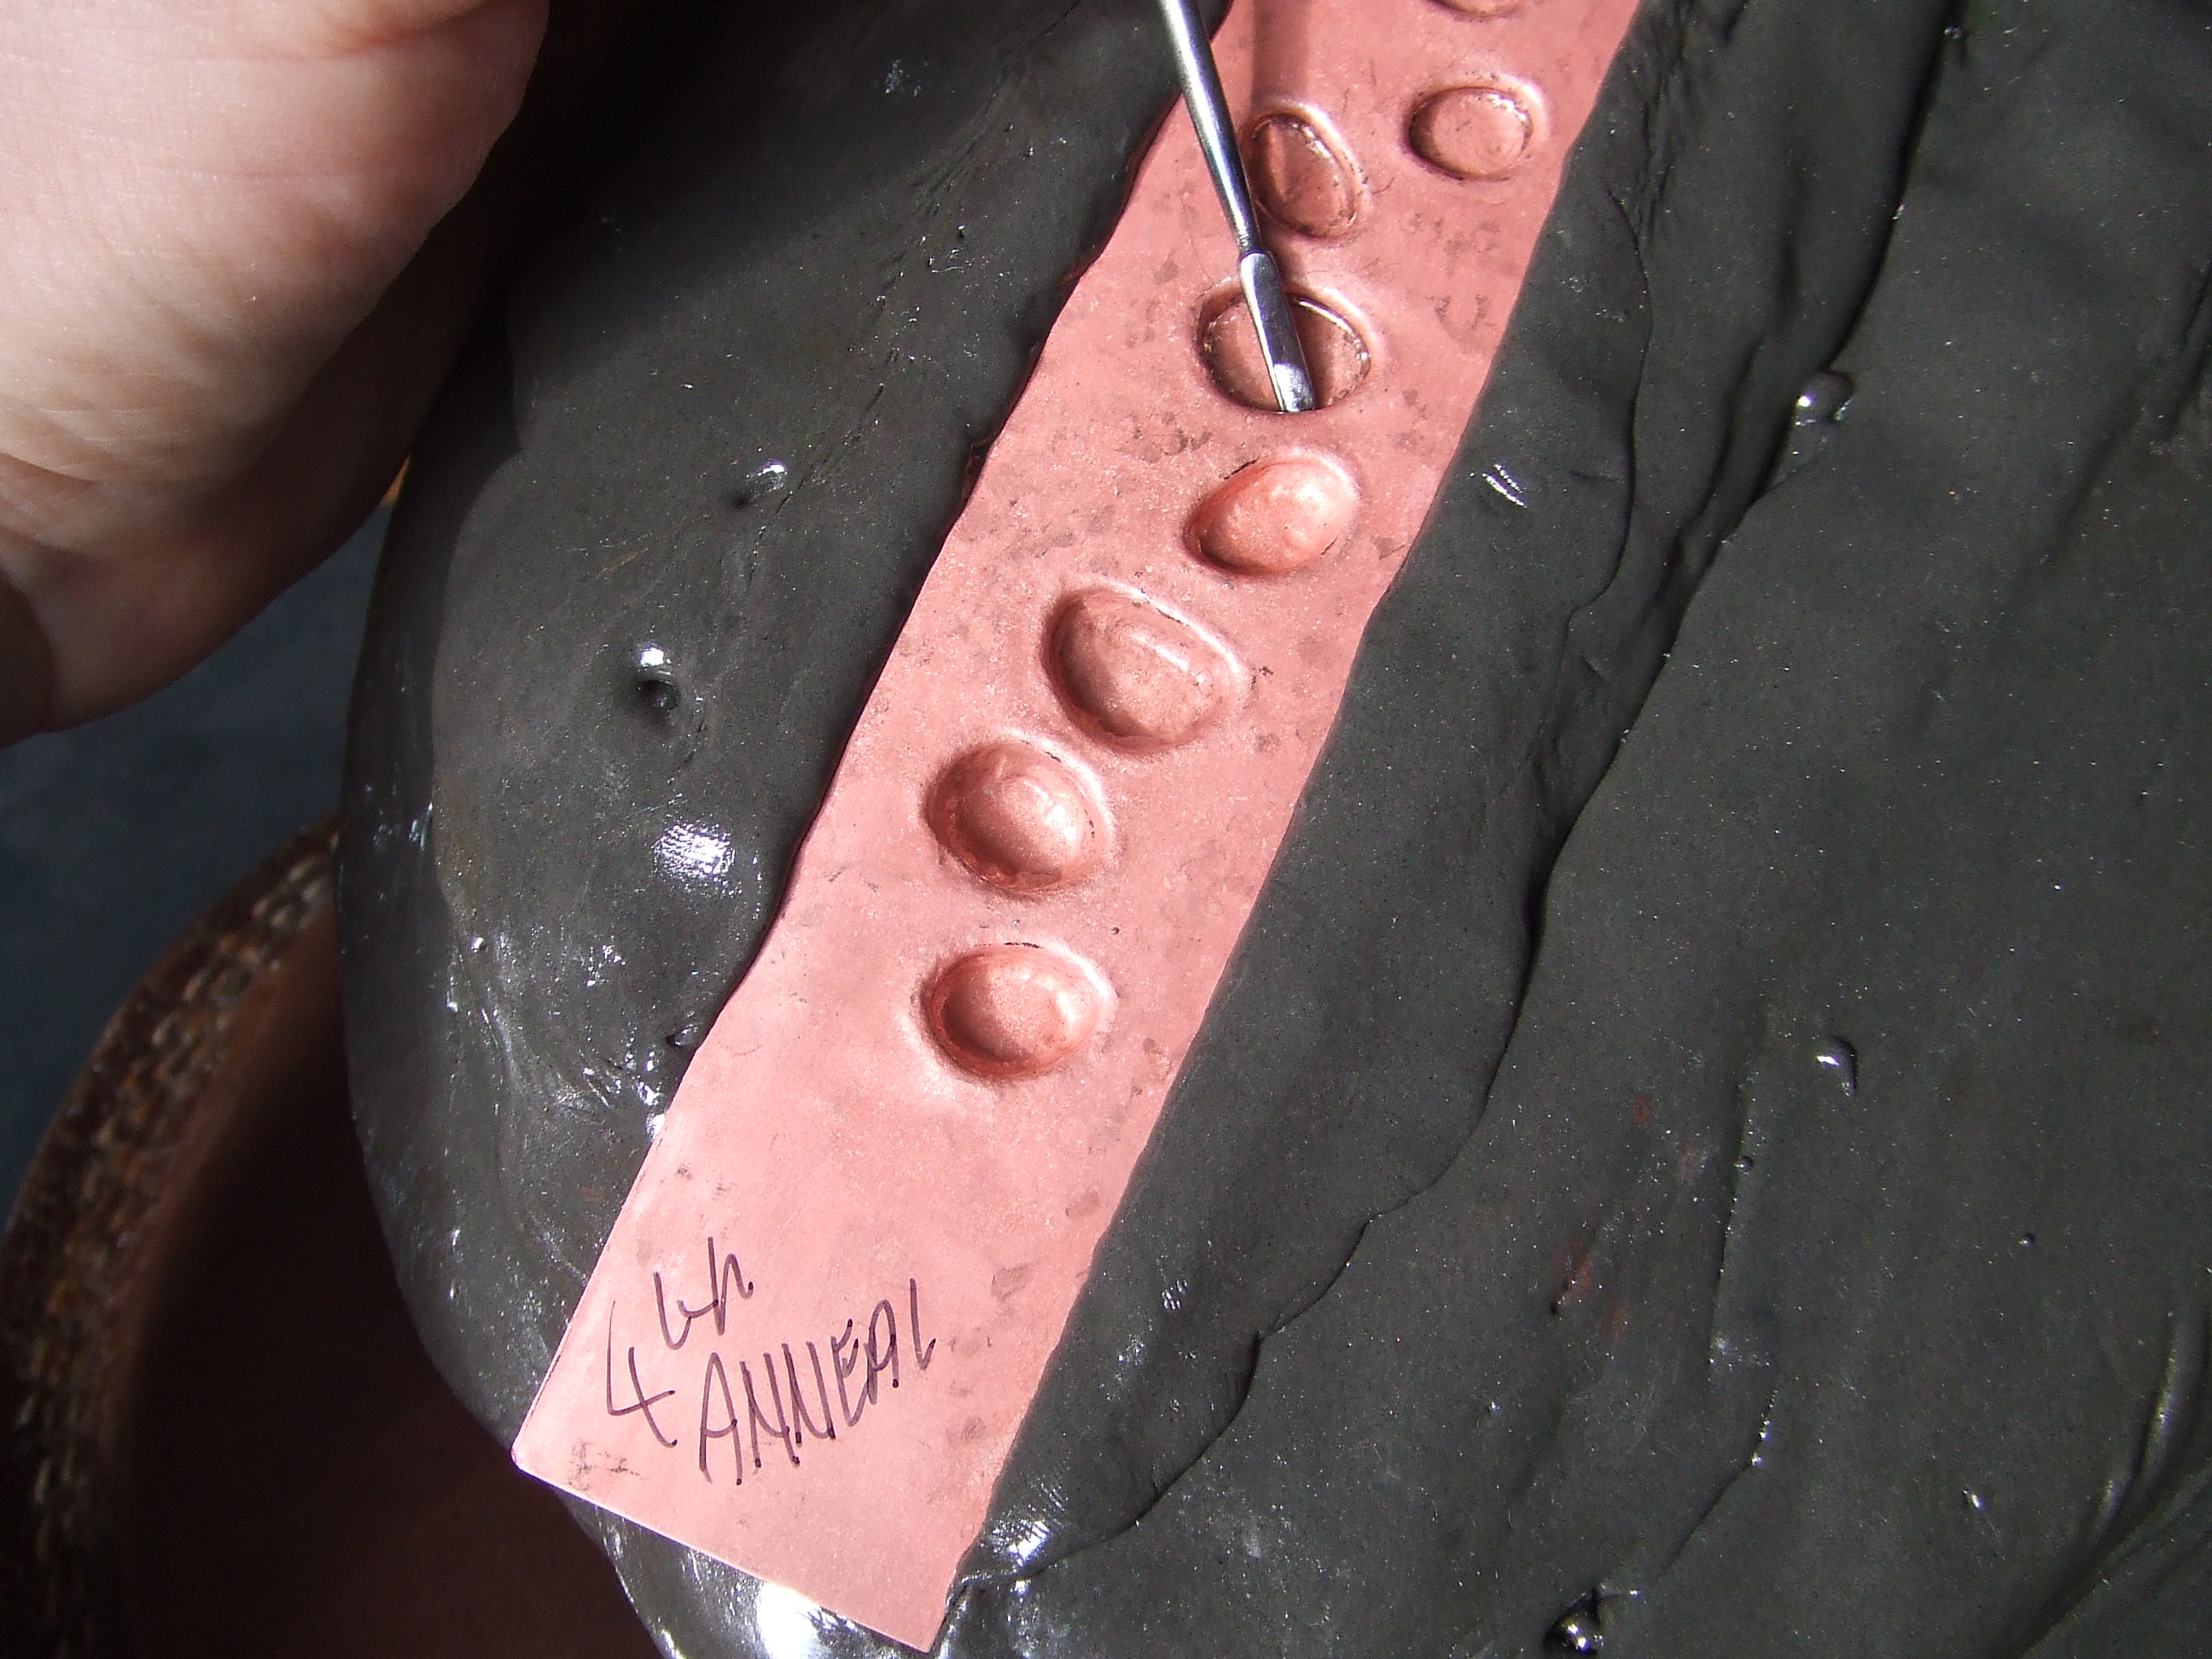
A more focussed push tool is used for the second puffing out round. Same again, start from the outline and work towards the middle of each separate element.

DSCF3277

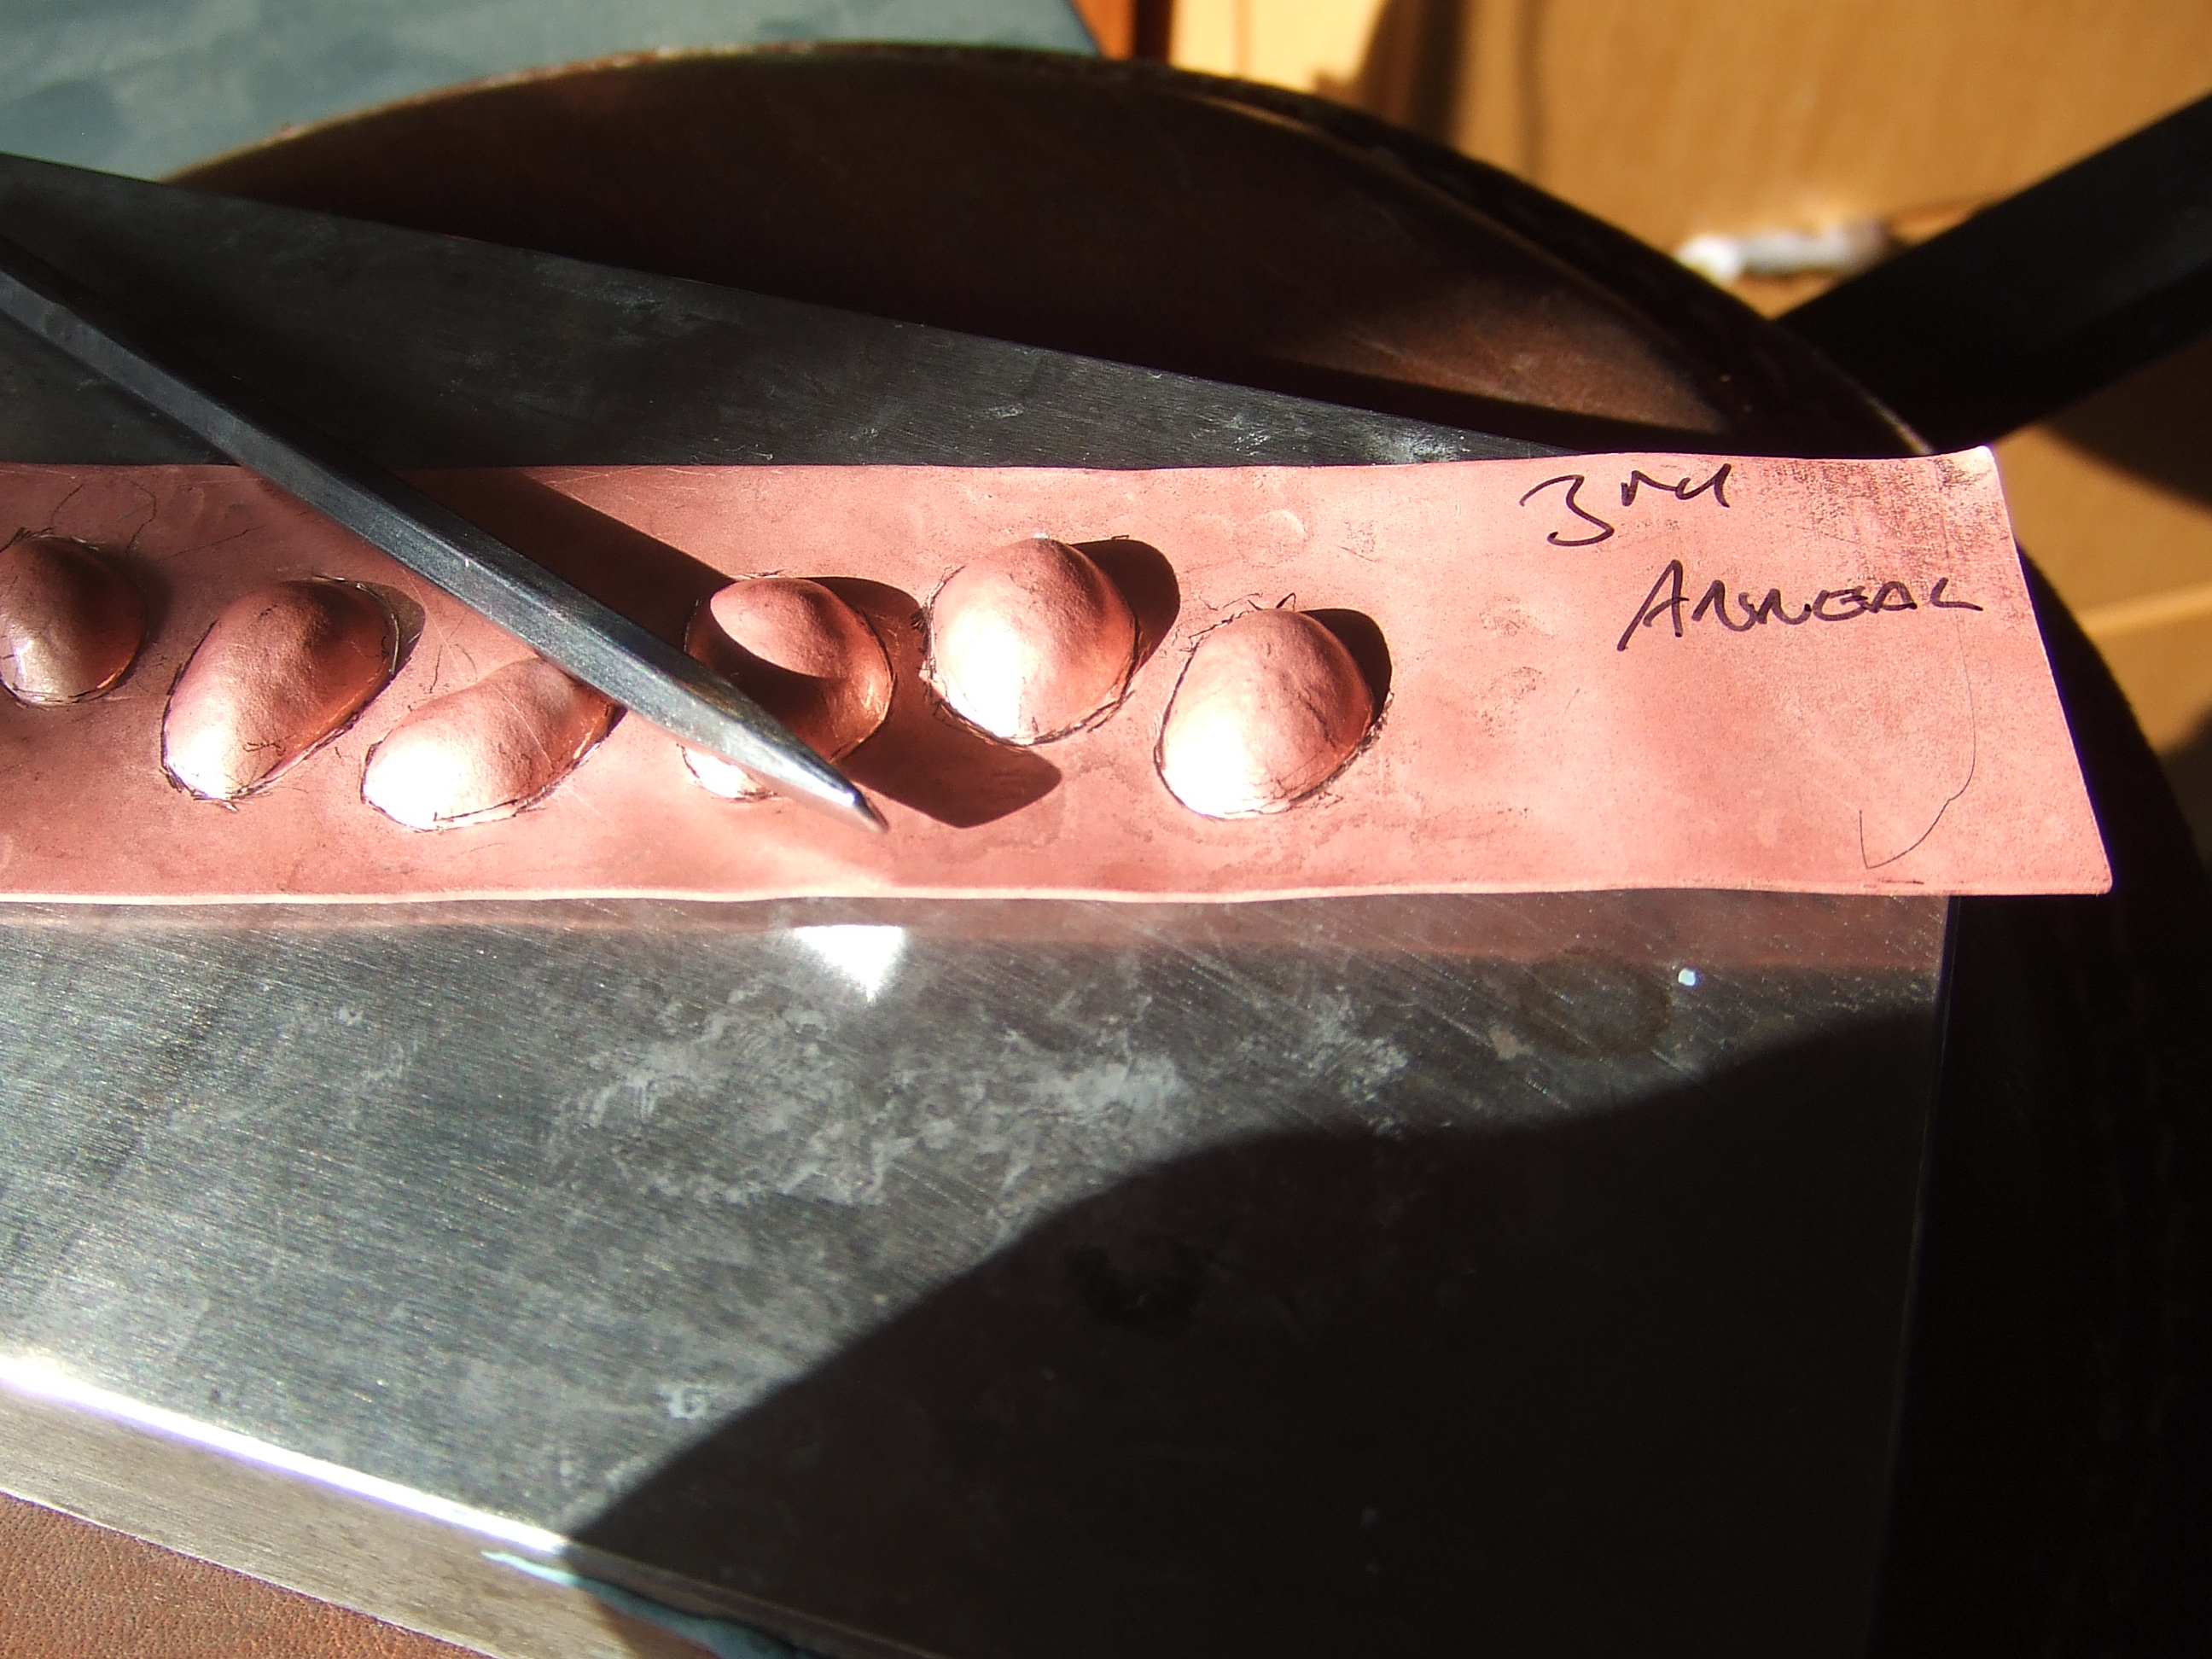
Compair this with the previous annealing, I need to start to think about making the runes look like separate elements rather than the balloon like appearance they have now.

DSCF3278

I will repeat this later. You will no way get this amount of height this early on working in any type of silver. You need to think about that as you may end up becoming despondent not being able when you try. Ask how I know 🙂

DSCF3279

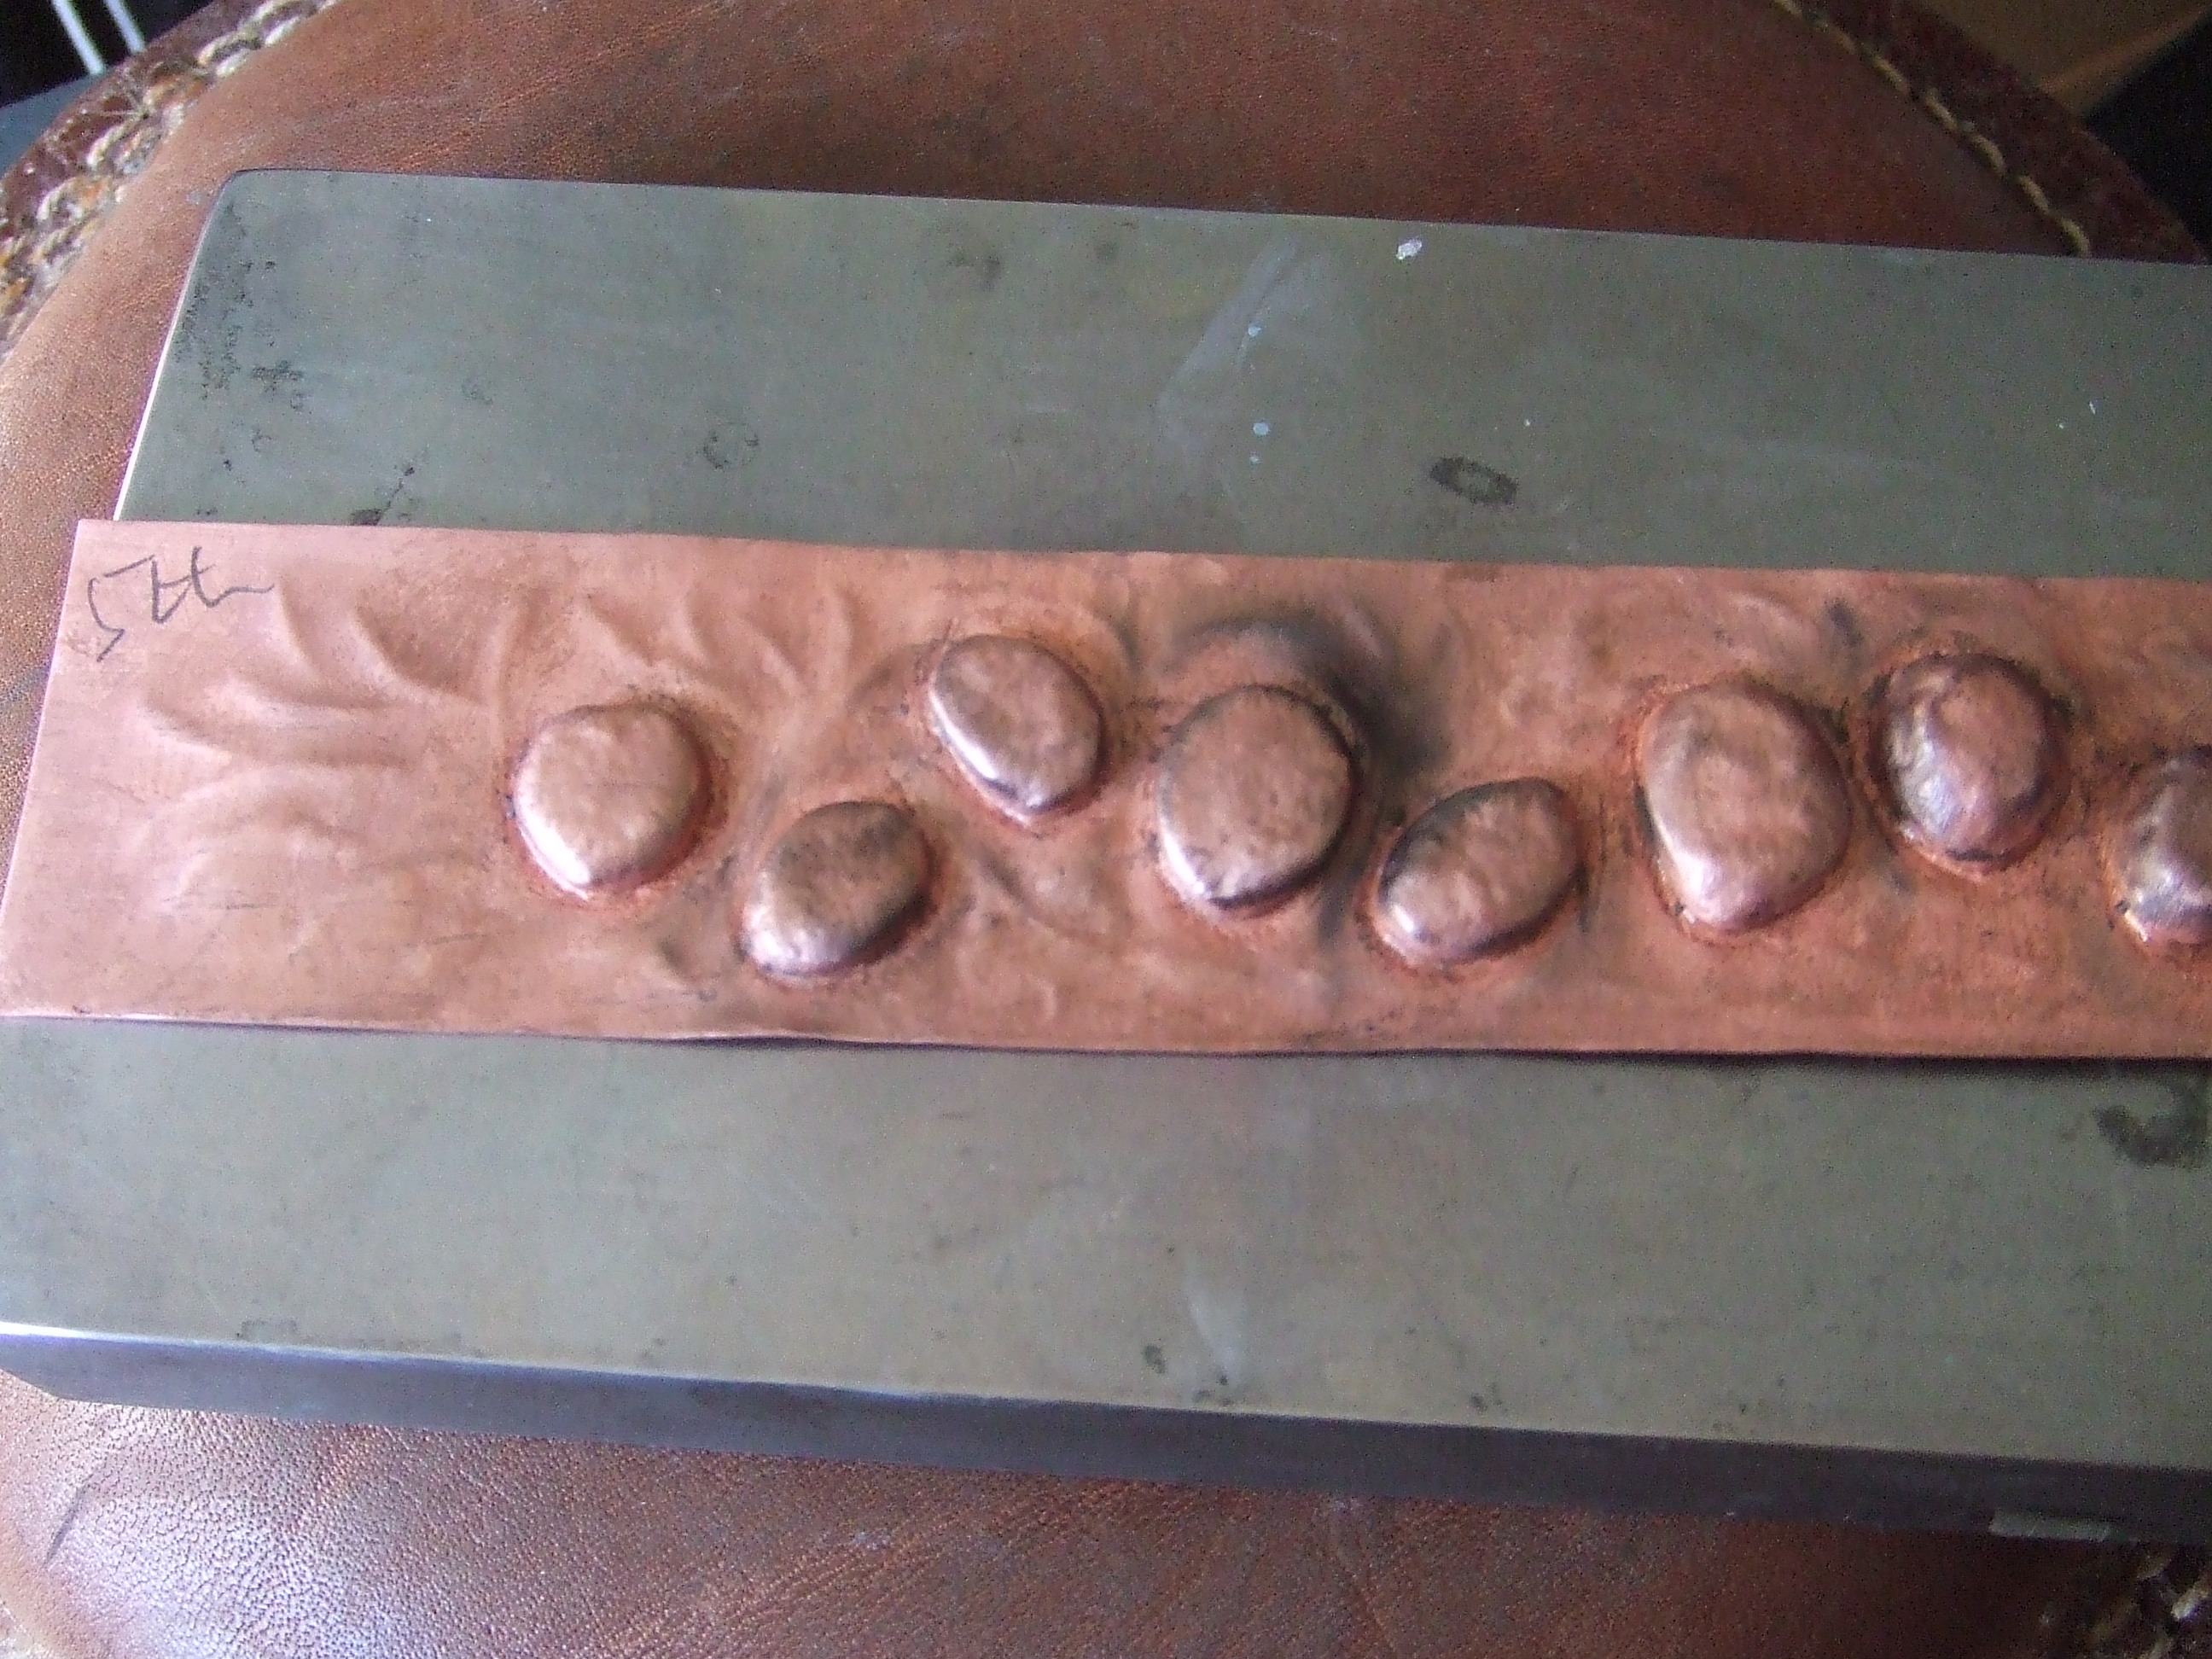
Ready for undercutting now to make the runes look separate from the surrounding sheet.

DSCF3280

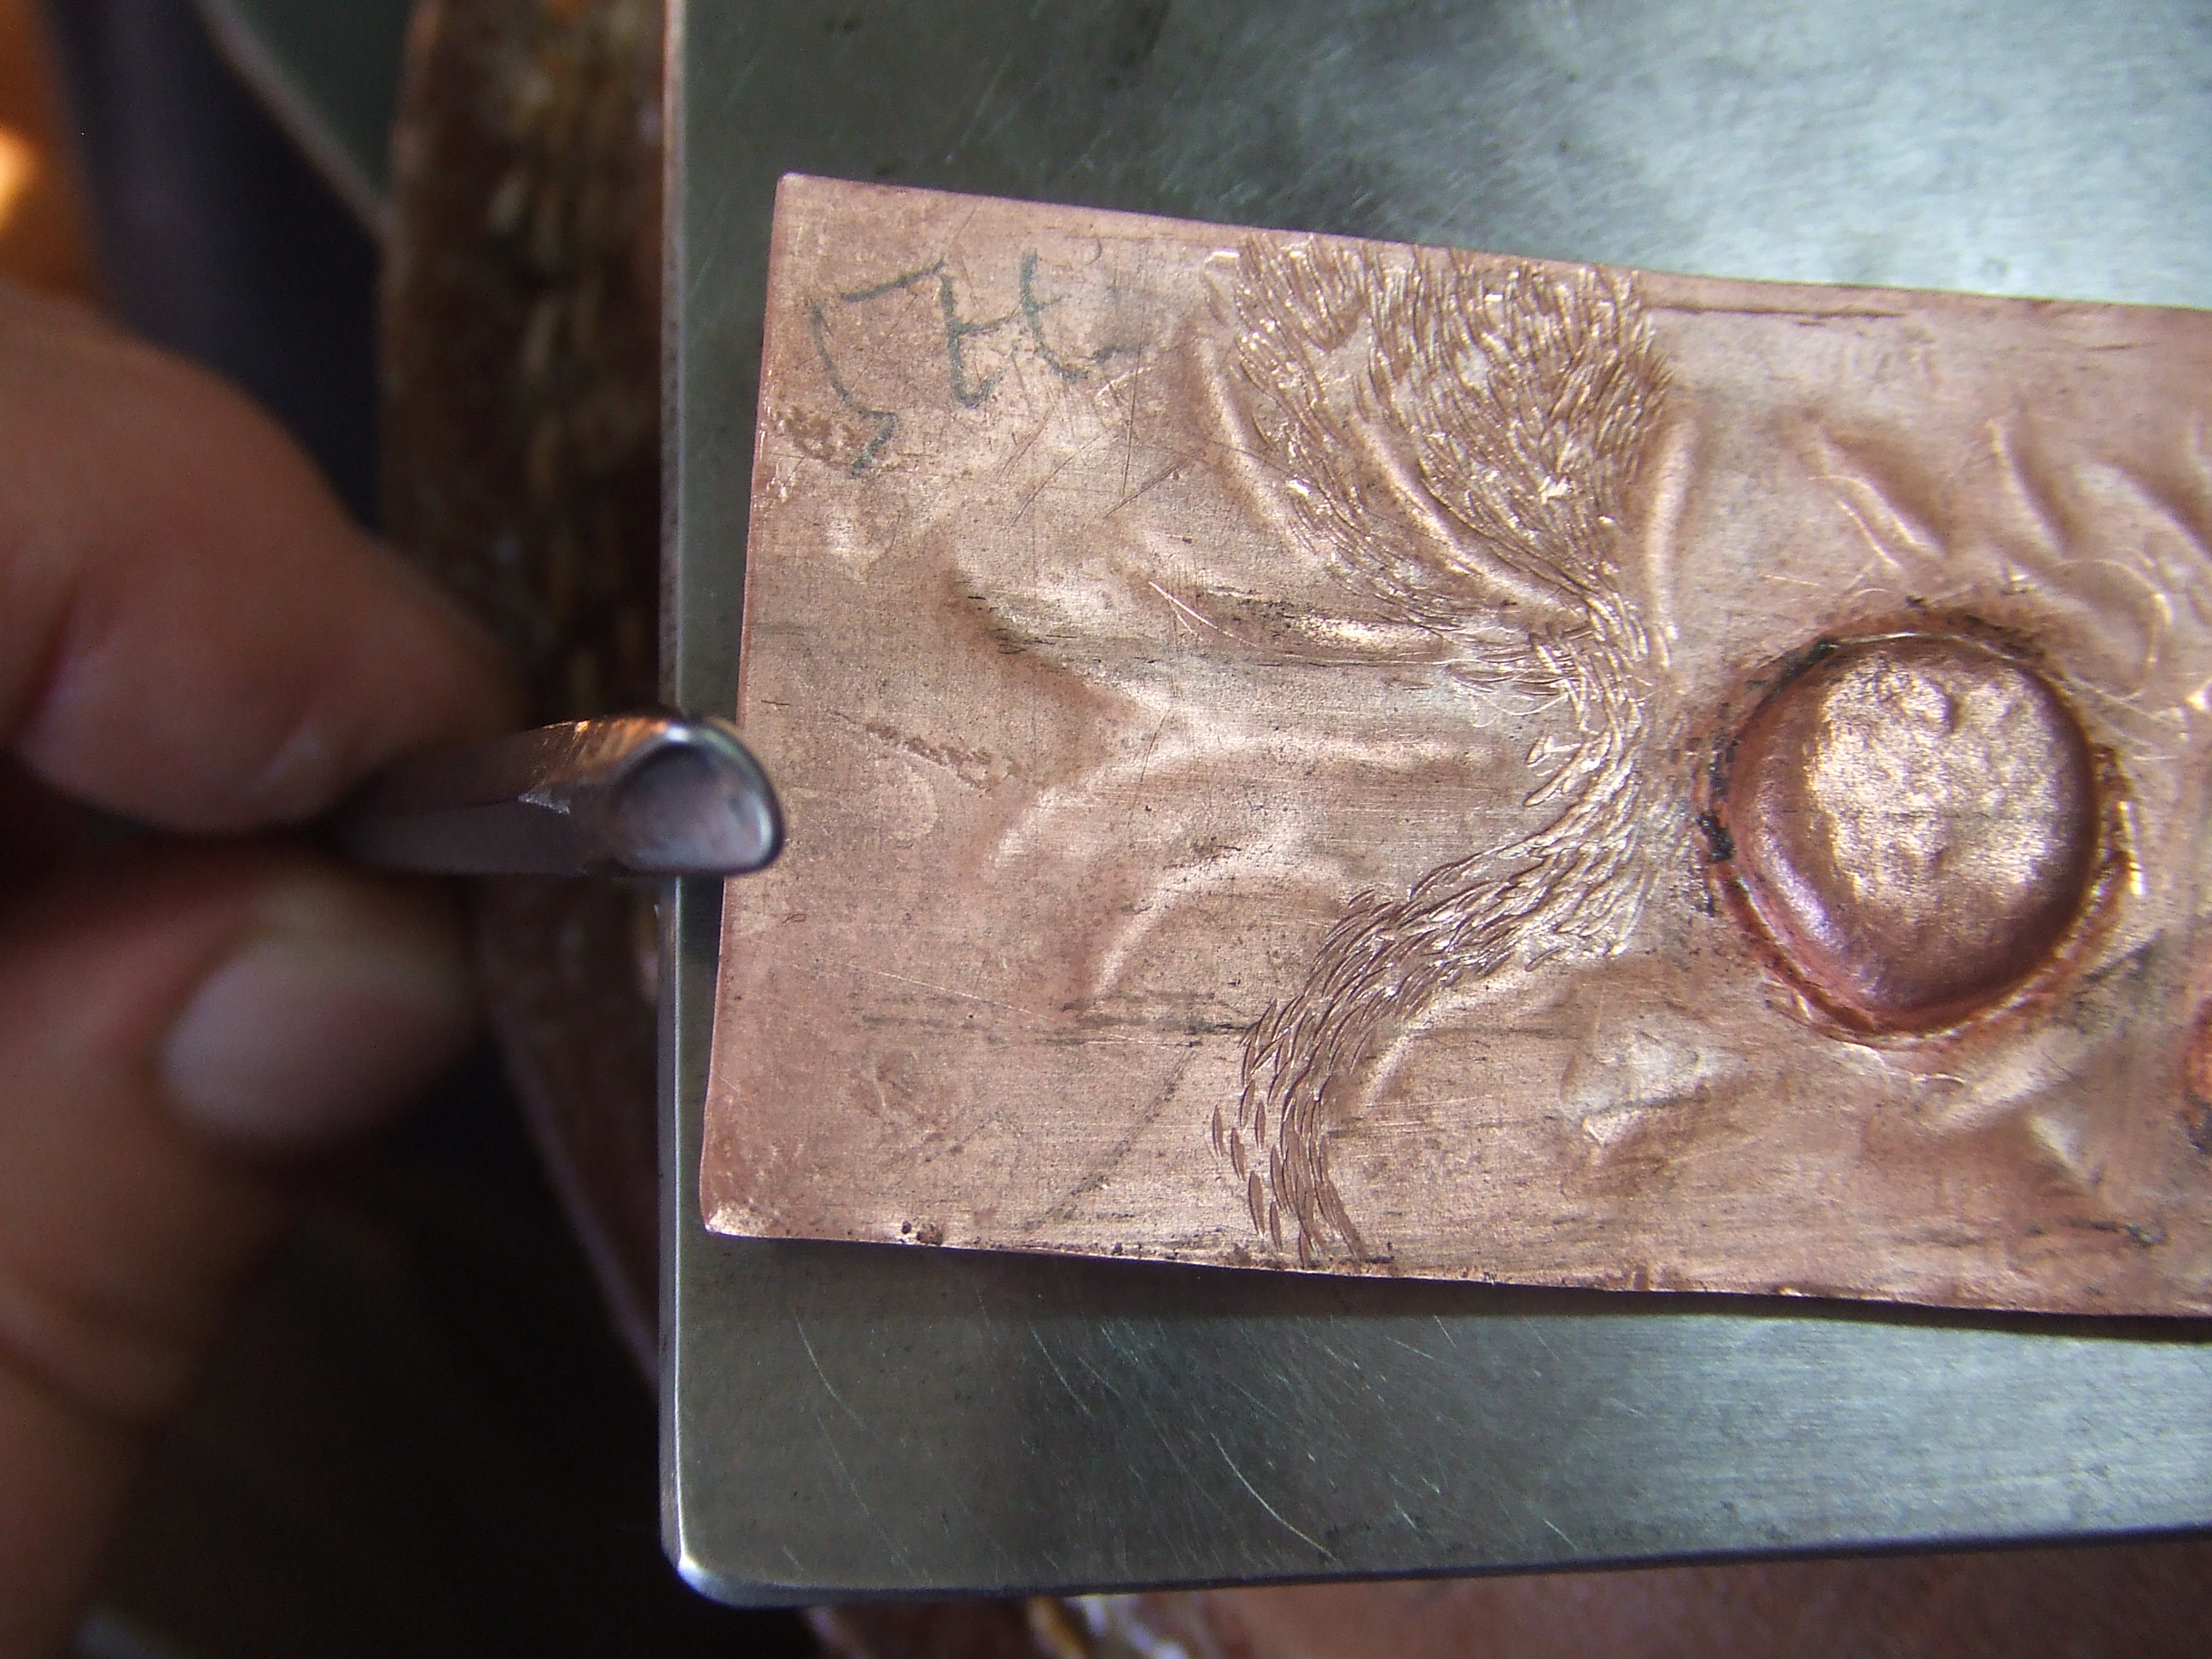
This is the sort of angle to use to give some material for undercutting when the piece is the right way up.

DSCF3281

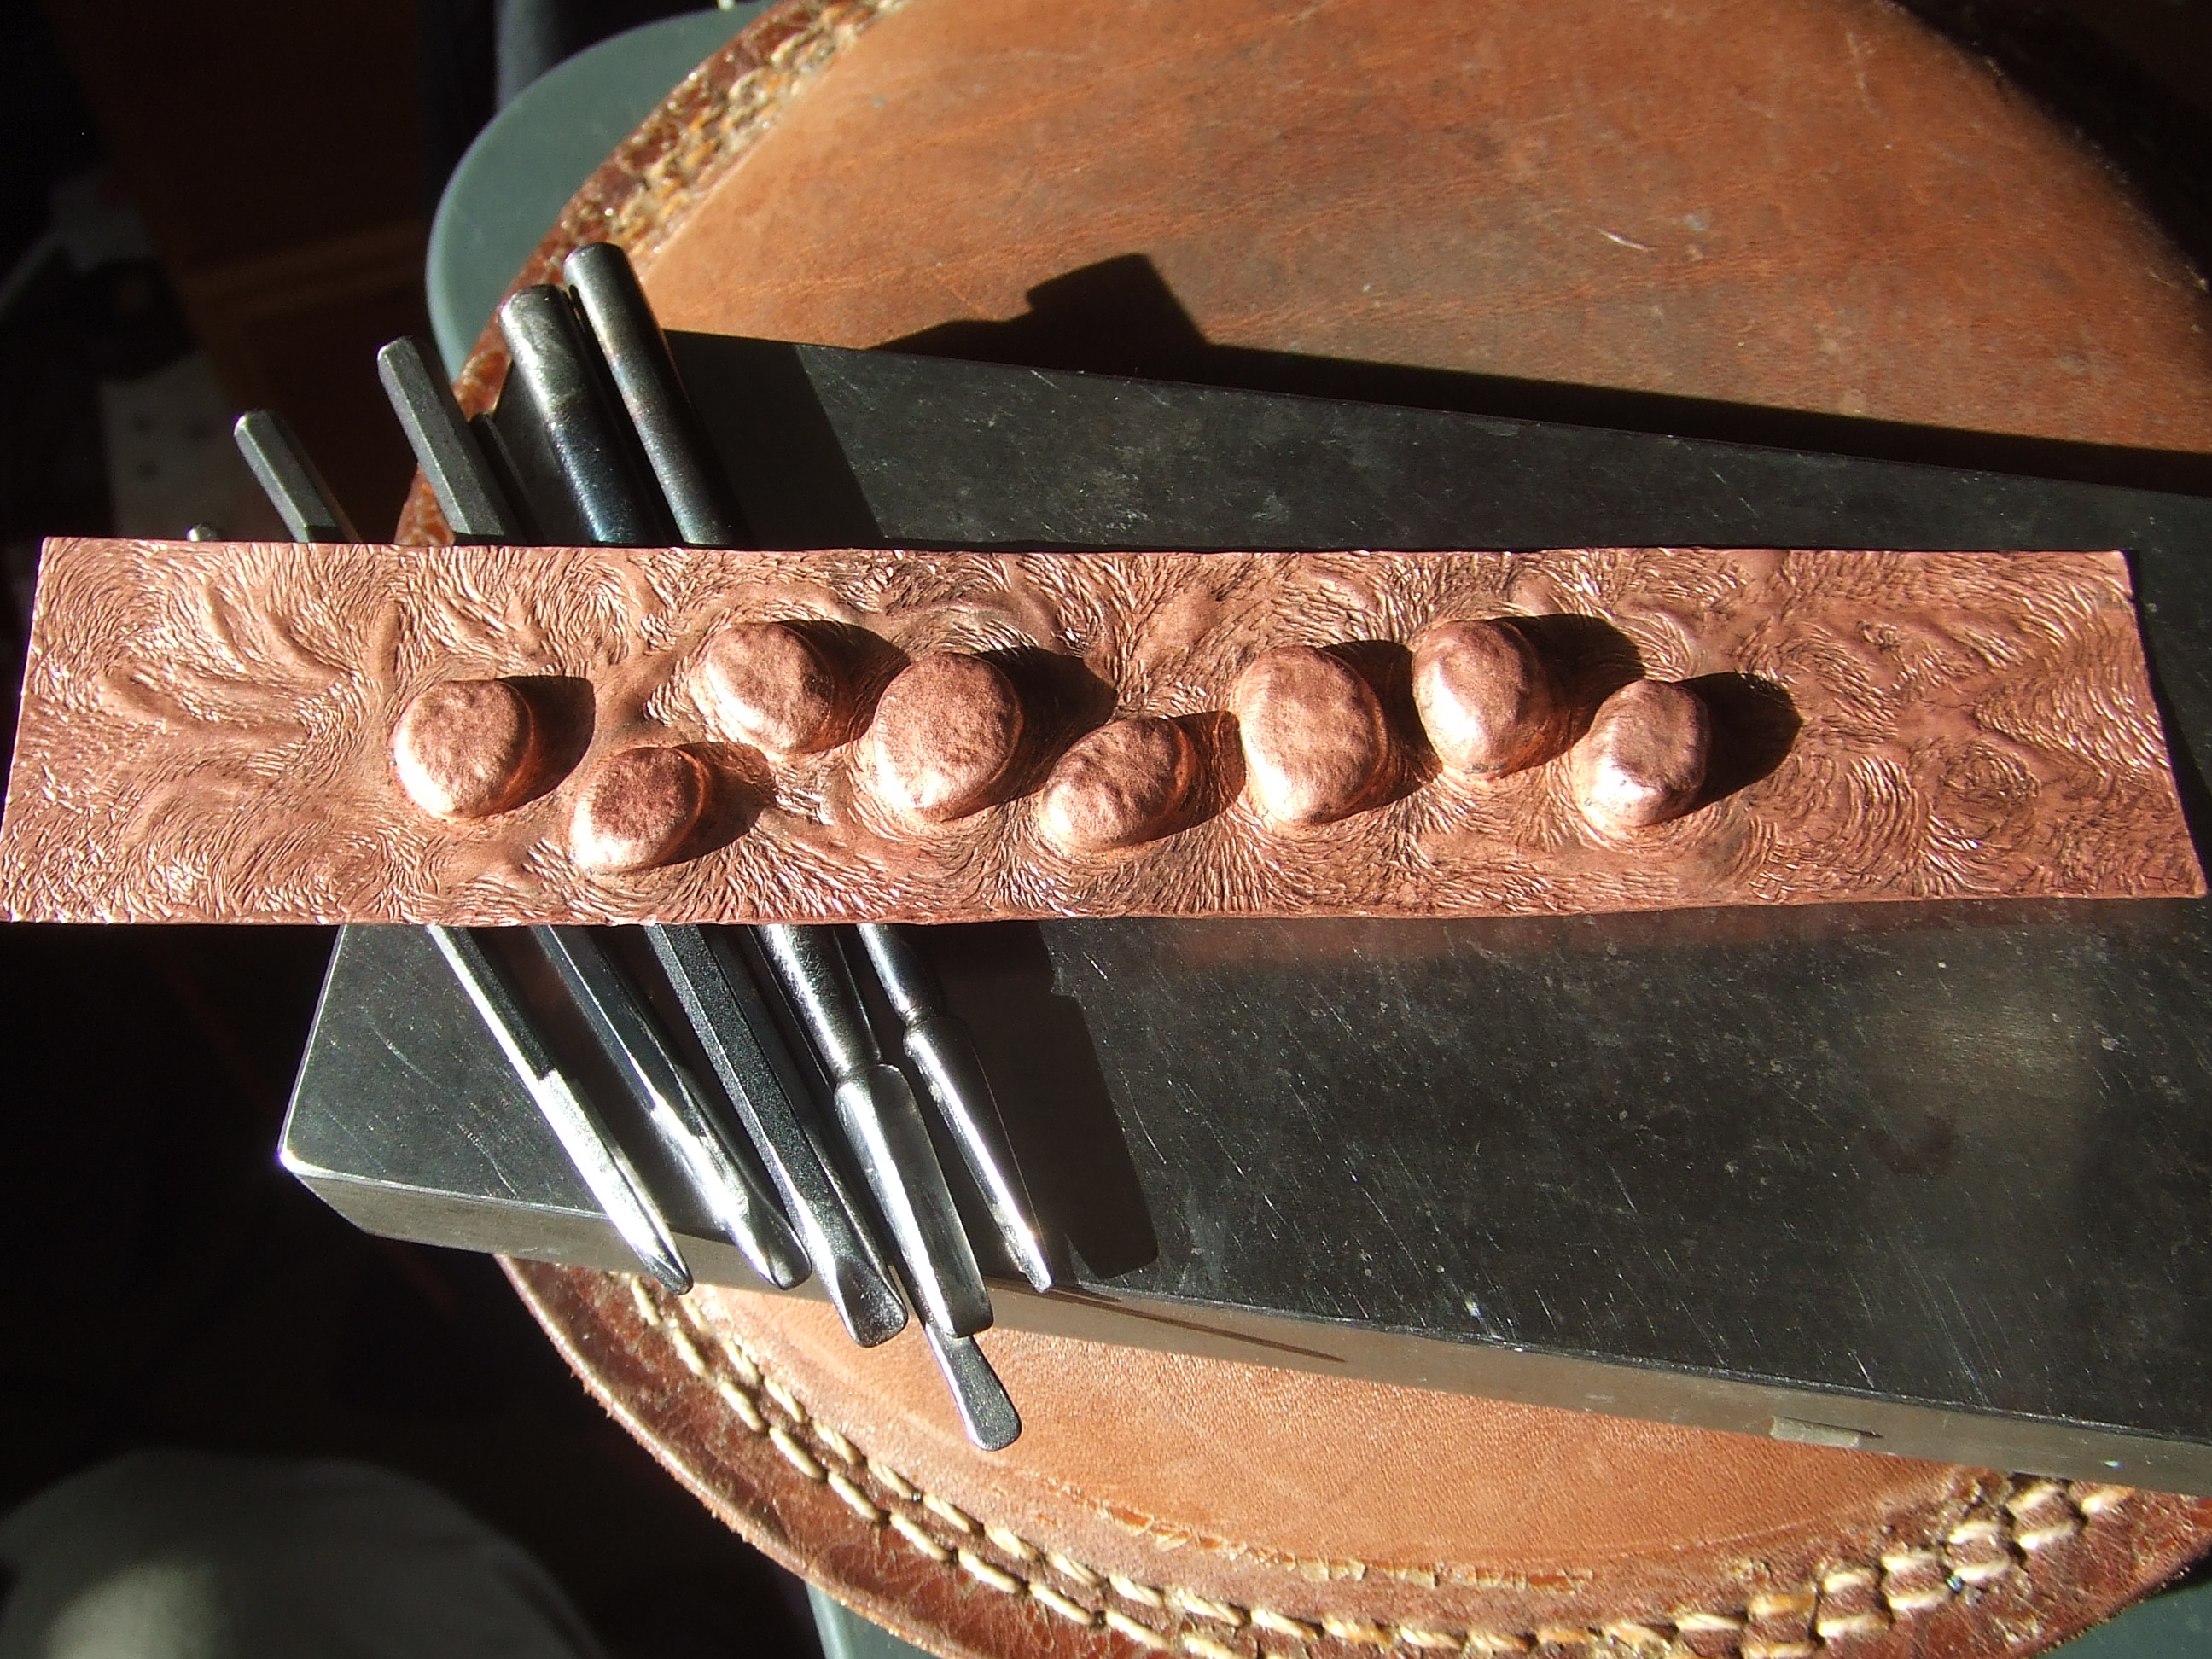
Two sizes of planishing punch, smallest one for the tighter gaps between the elements.

DSCF3282

Annealed and pickled, round three.

DSCF3284

Lined onto the metal plate again. Please be careful, too heavy hammering on this repeated process thins the material and a real risk of breaking through exists if you are a little exuberant at this stage. Guess how I found out : \

DSCF3285

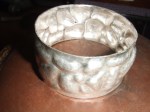
Straighter sides ready for undercutting, helping to further shape the illusion of separate pieces.

DSCF3286

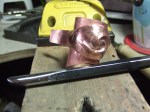
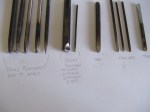
This type of tool with a rounded blunt profile is used at this kind of angle.

DSCF3287

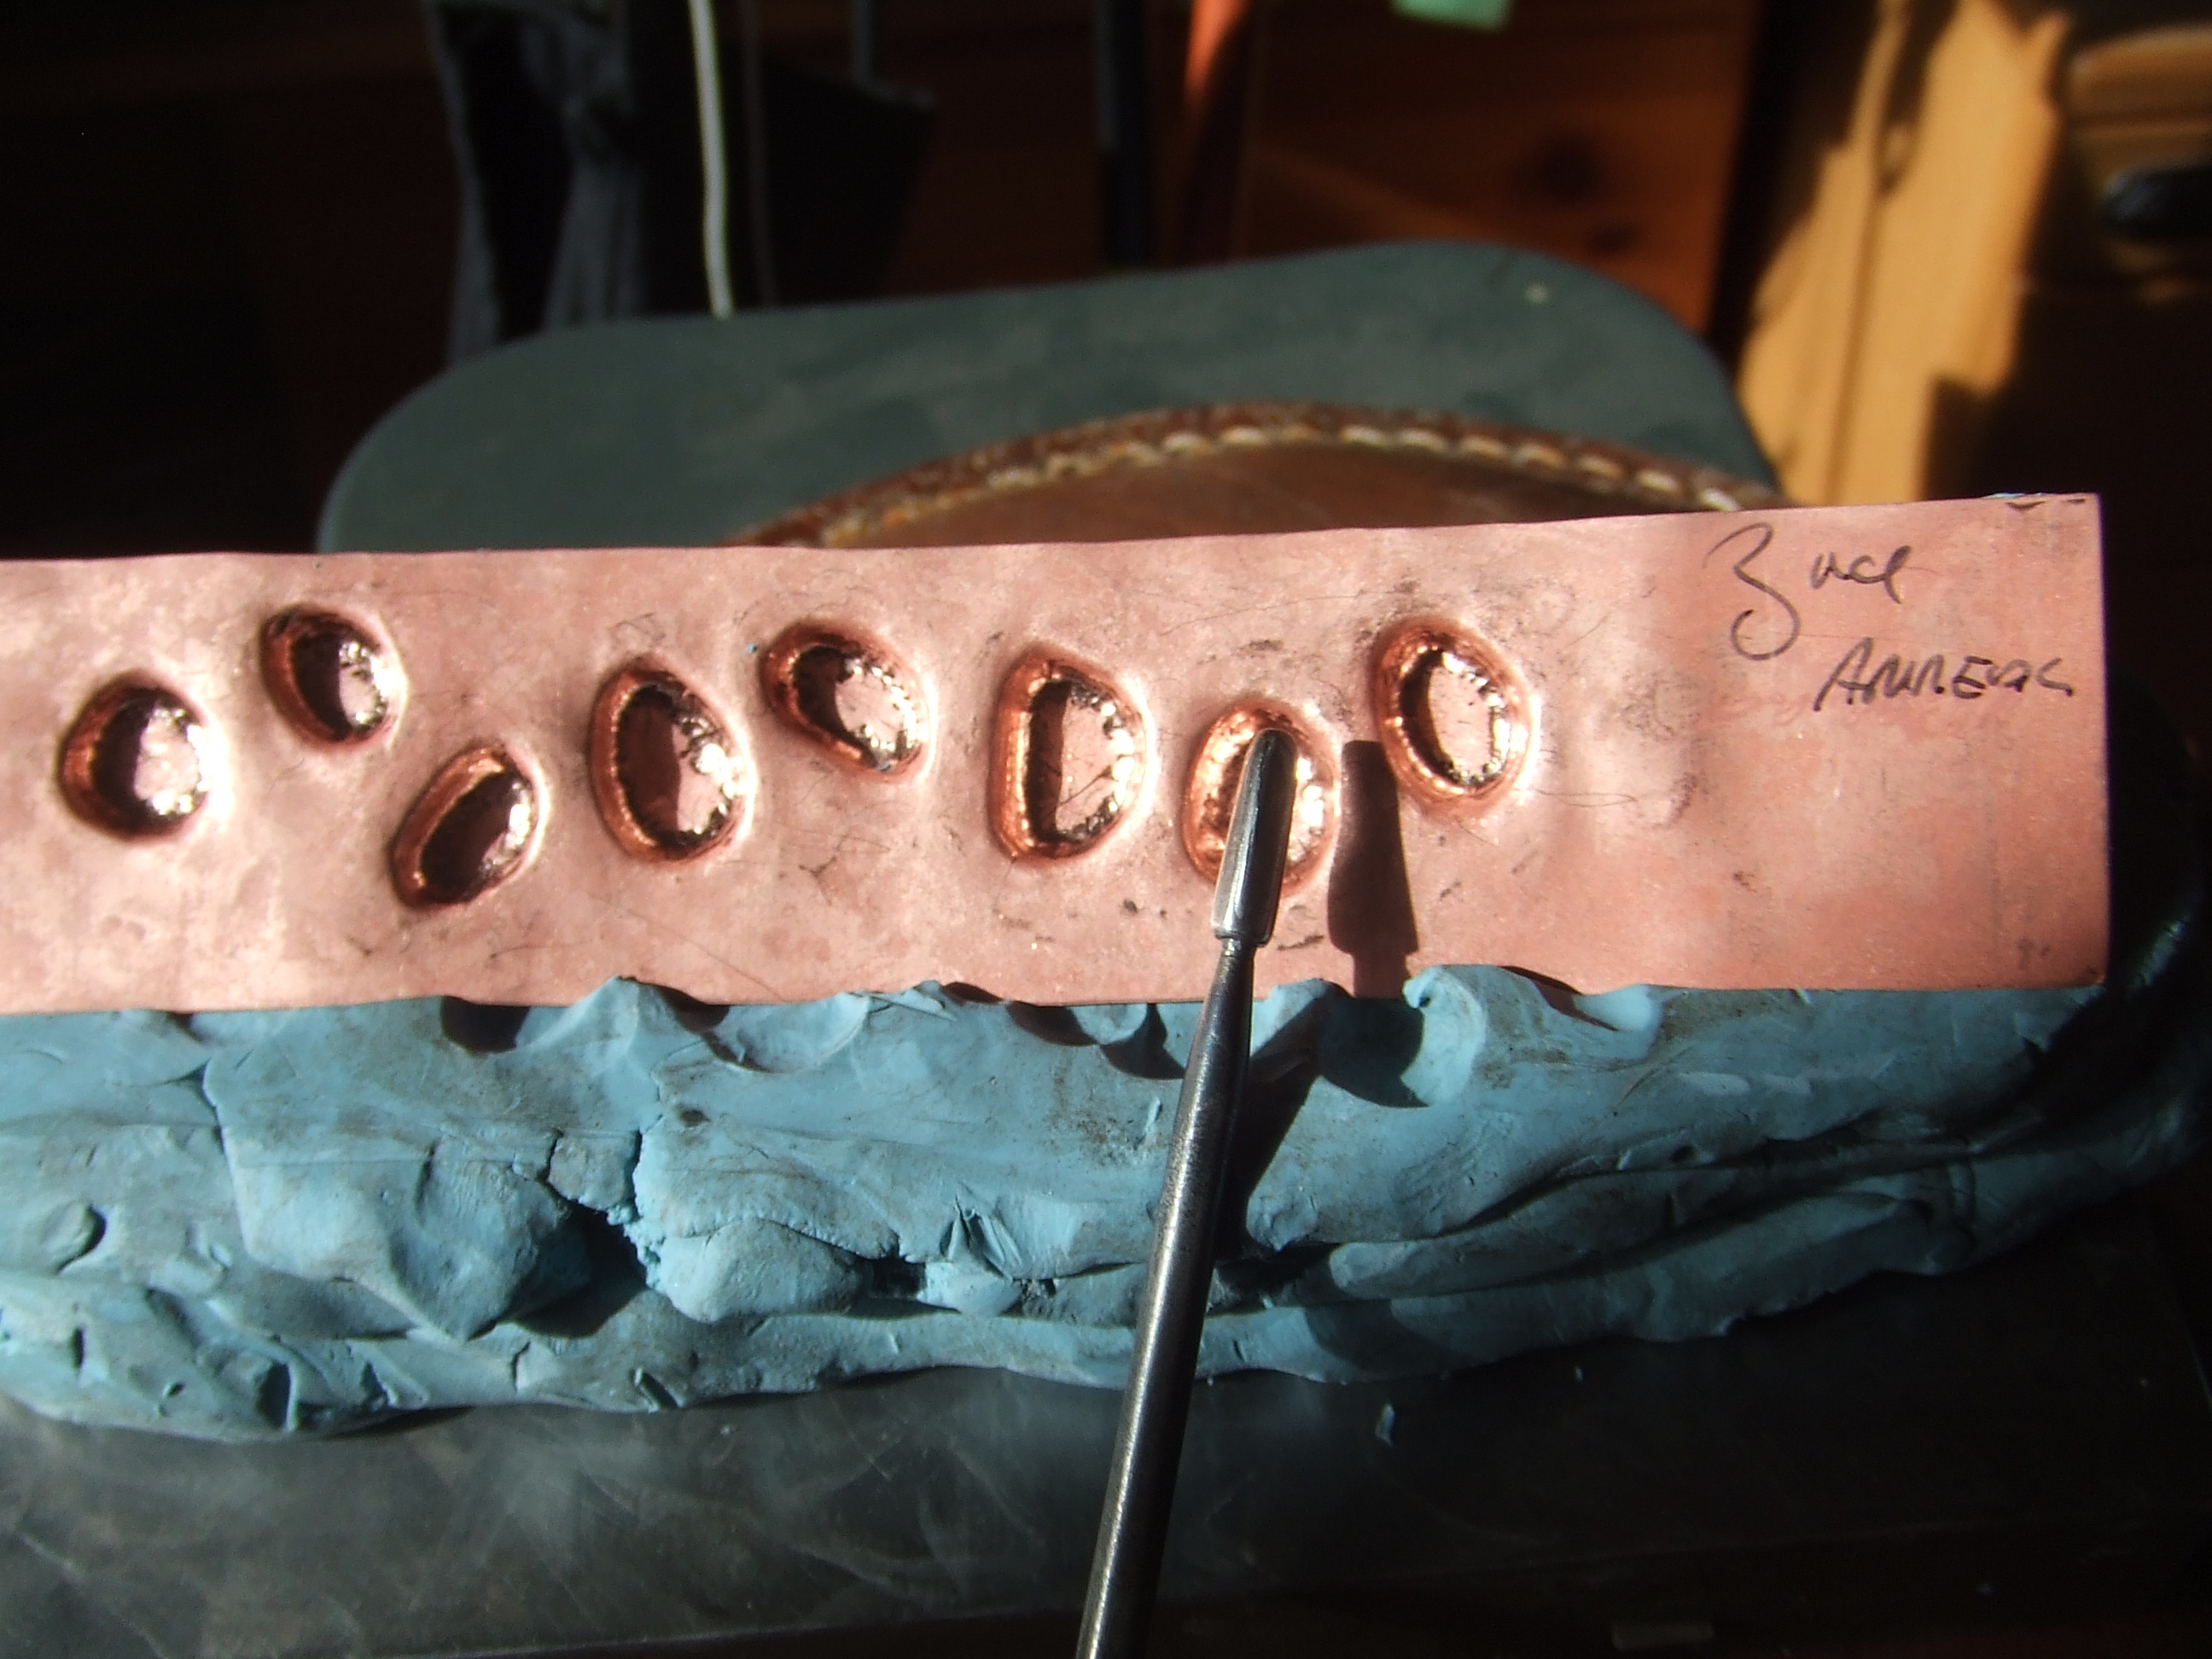
The shiny parts show where the tool has contacted. A little imagination is needed to envisage how you wish the elements to look from the front. This will dictate the profile, as well as the angle you choose to employ

DSCF3288

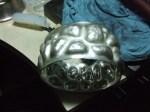
Much more defined and starting to look more like separate elements. Its over to the pitch now as the final shaping requires more support than the plaster scene can provide.

DSCF3289

A Victoria Lansford tip here, cooking oil applied to the side you are adhering to the pitch will aid its removal when completed.

DSCF3290

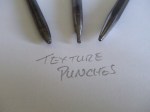
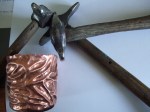
Sorry to say, imagination will have to guide you better than my words here. Study the two tool profiles, the blunt one is driven into the side to undercut each element. The other tool I made up from previous attempts to ‘lift’ elements. I made this type of tool for ‘wear your heart on your sleeve’ cuff when I was having trouble making the veins stand proud of the surrounding material. I find it effective, good luck if you wish to try your own. Better still, do you have any profiles you may wish to share?

DSCF3291

Another view of the two tools. The ‘lift’ tool shows the ‘belly’ I shape into it. Picture the effect this has when struck. The belly forces the tool to follow the rocker profile, the scoop profile then shapes and tucks in the element as it is described around each one.

DSCF3292

Just like the plaster scene stage, this is for making crisper definition that the more supportive pitch allows.

DSCF3293

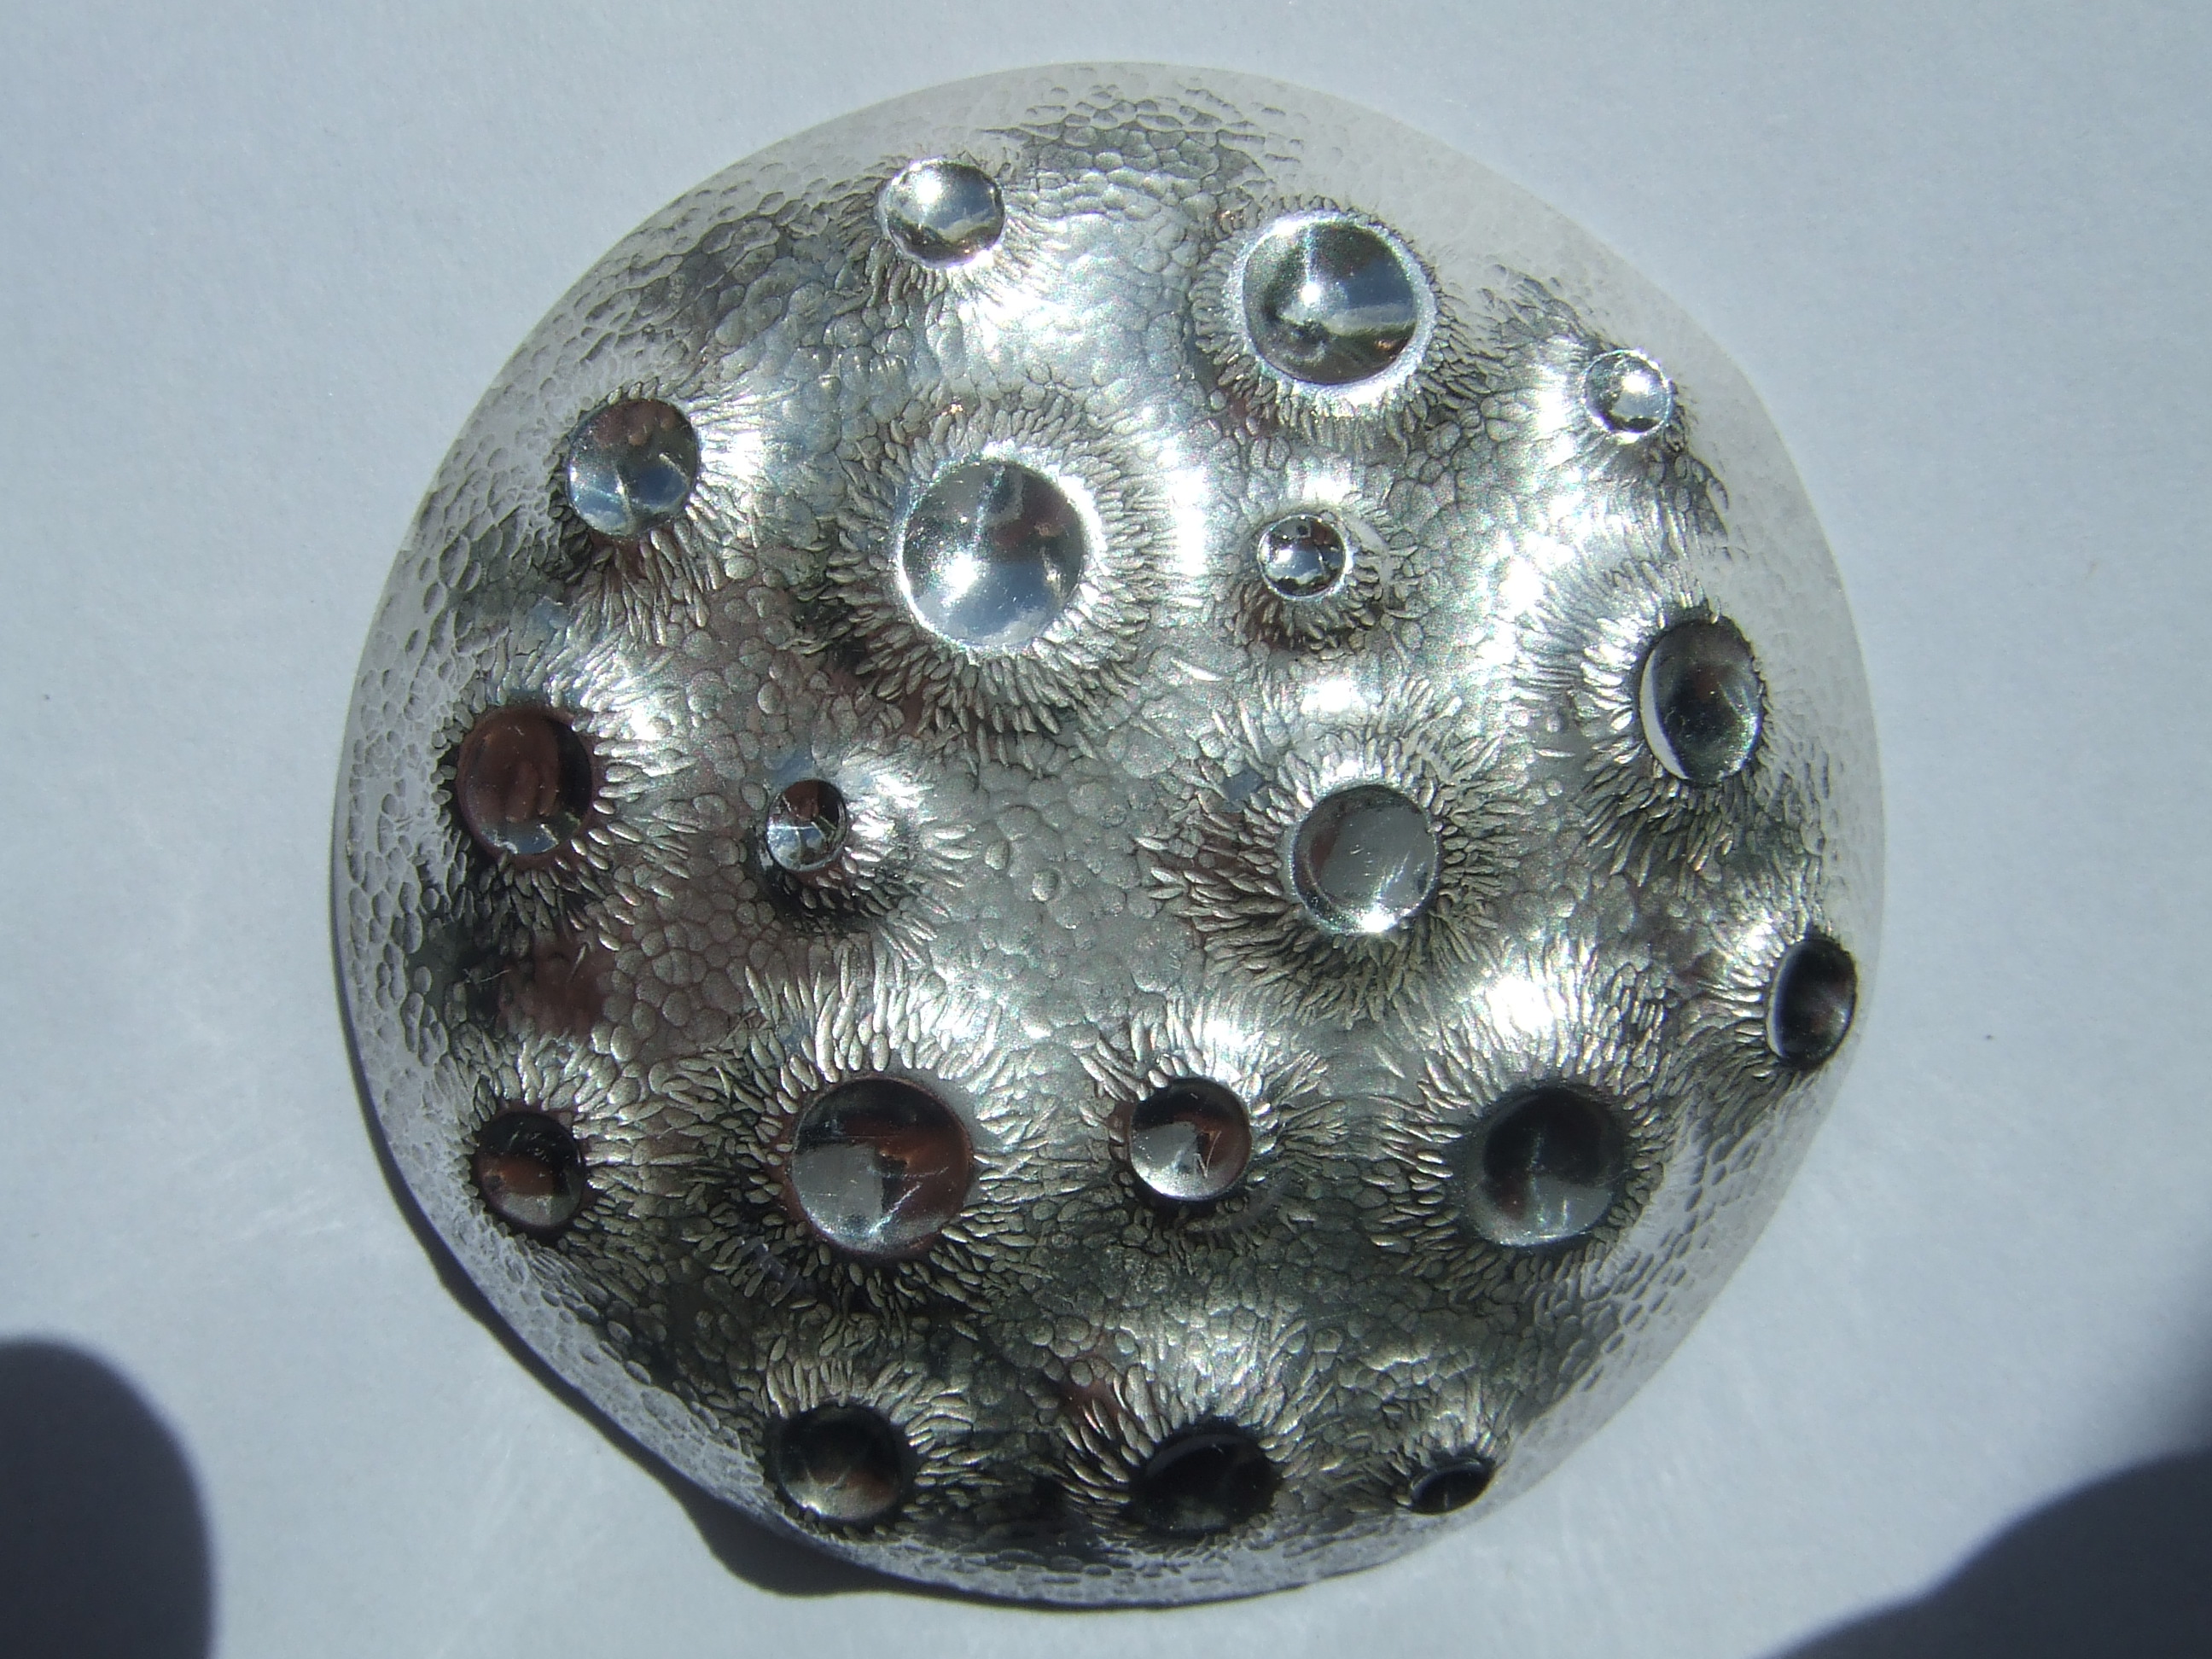
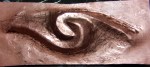
Playing with the runes theme, elements and the like, I thought water flowing around would give a greater visual impact. Back in the pitch, face down, this blunt rounded tool is used to create raised ripple like effects as seen from the front.

DSCF3294

Off the pitch, from the front on a steel plate.

DSCF3295

Chasing the flowing patterns, this is one of the curved liners I used, more in following pictures.

DSCF3296

All the ‘flowing’ chased detail applied, shown are all the liners I used to attain this pattern.

DSCF3297

A blunt tool was used to mark out the rune letters that were requested. This is an example of spoiling the effect trying to rush. If you do this, remember to fill each element with pitch BEFORE you attach the whole piece. As you see some of the runes are sunken. This is due to be omitting this stage and having to contend with air pockets that do not support, leading to a collapse, shown here.

DSCF3298

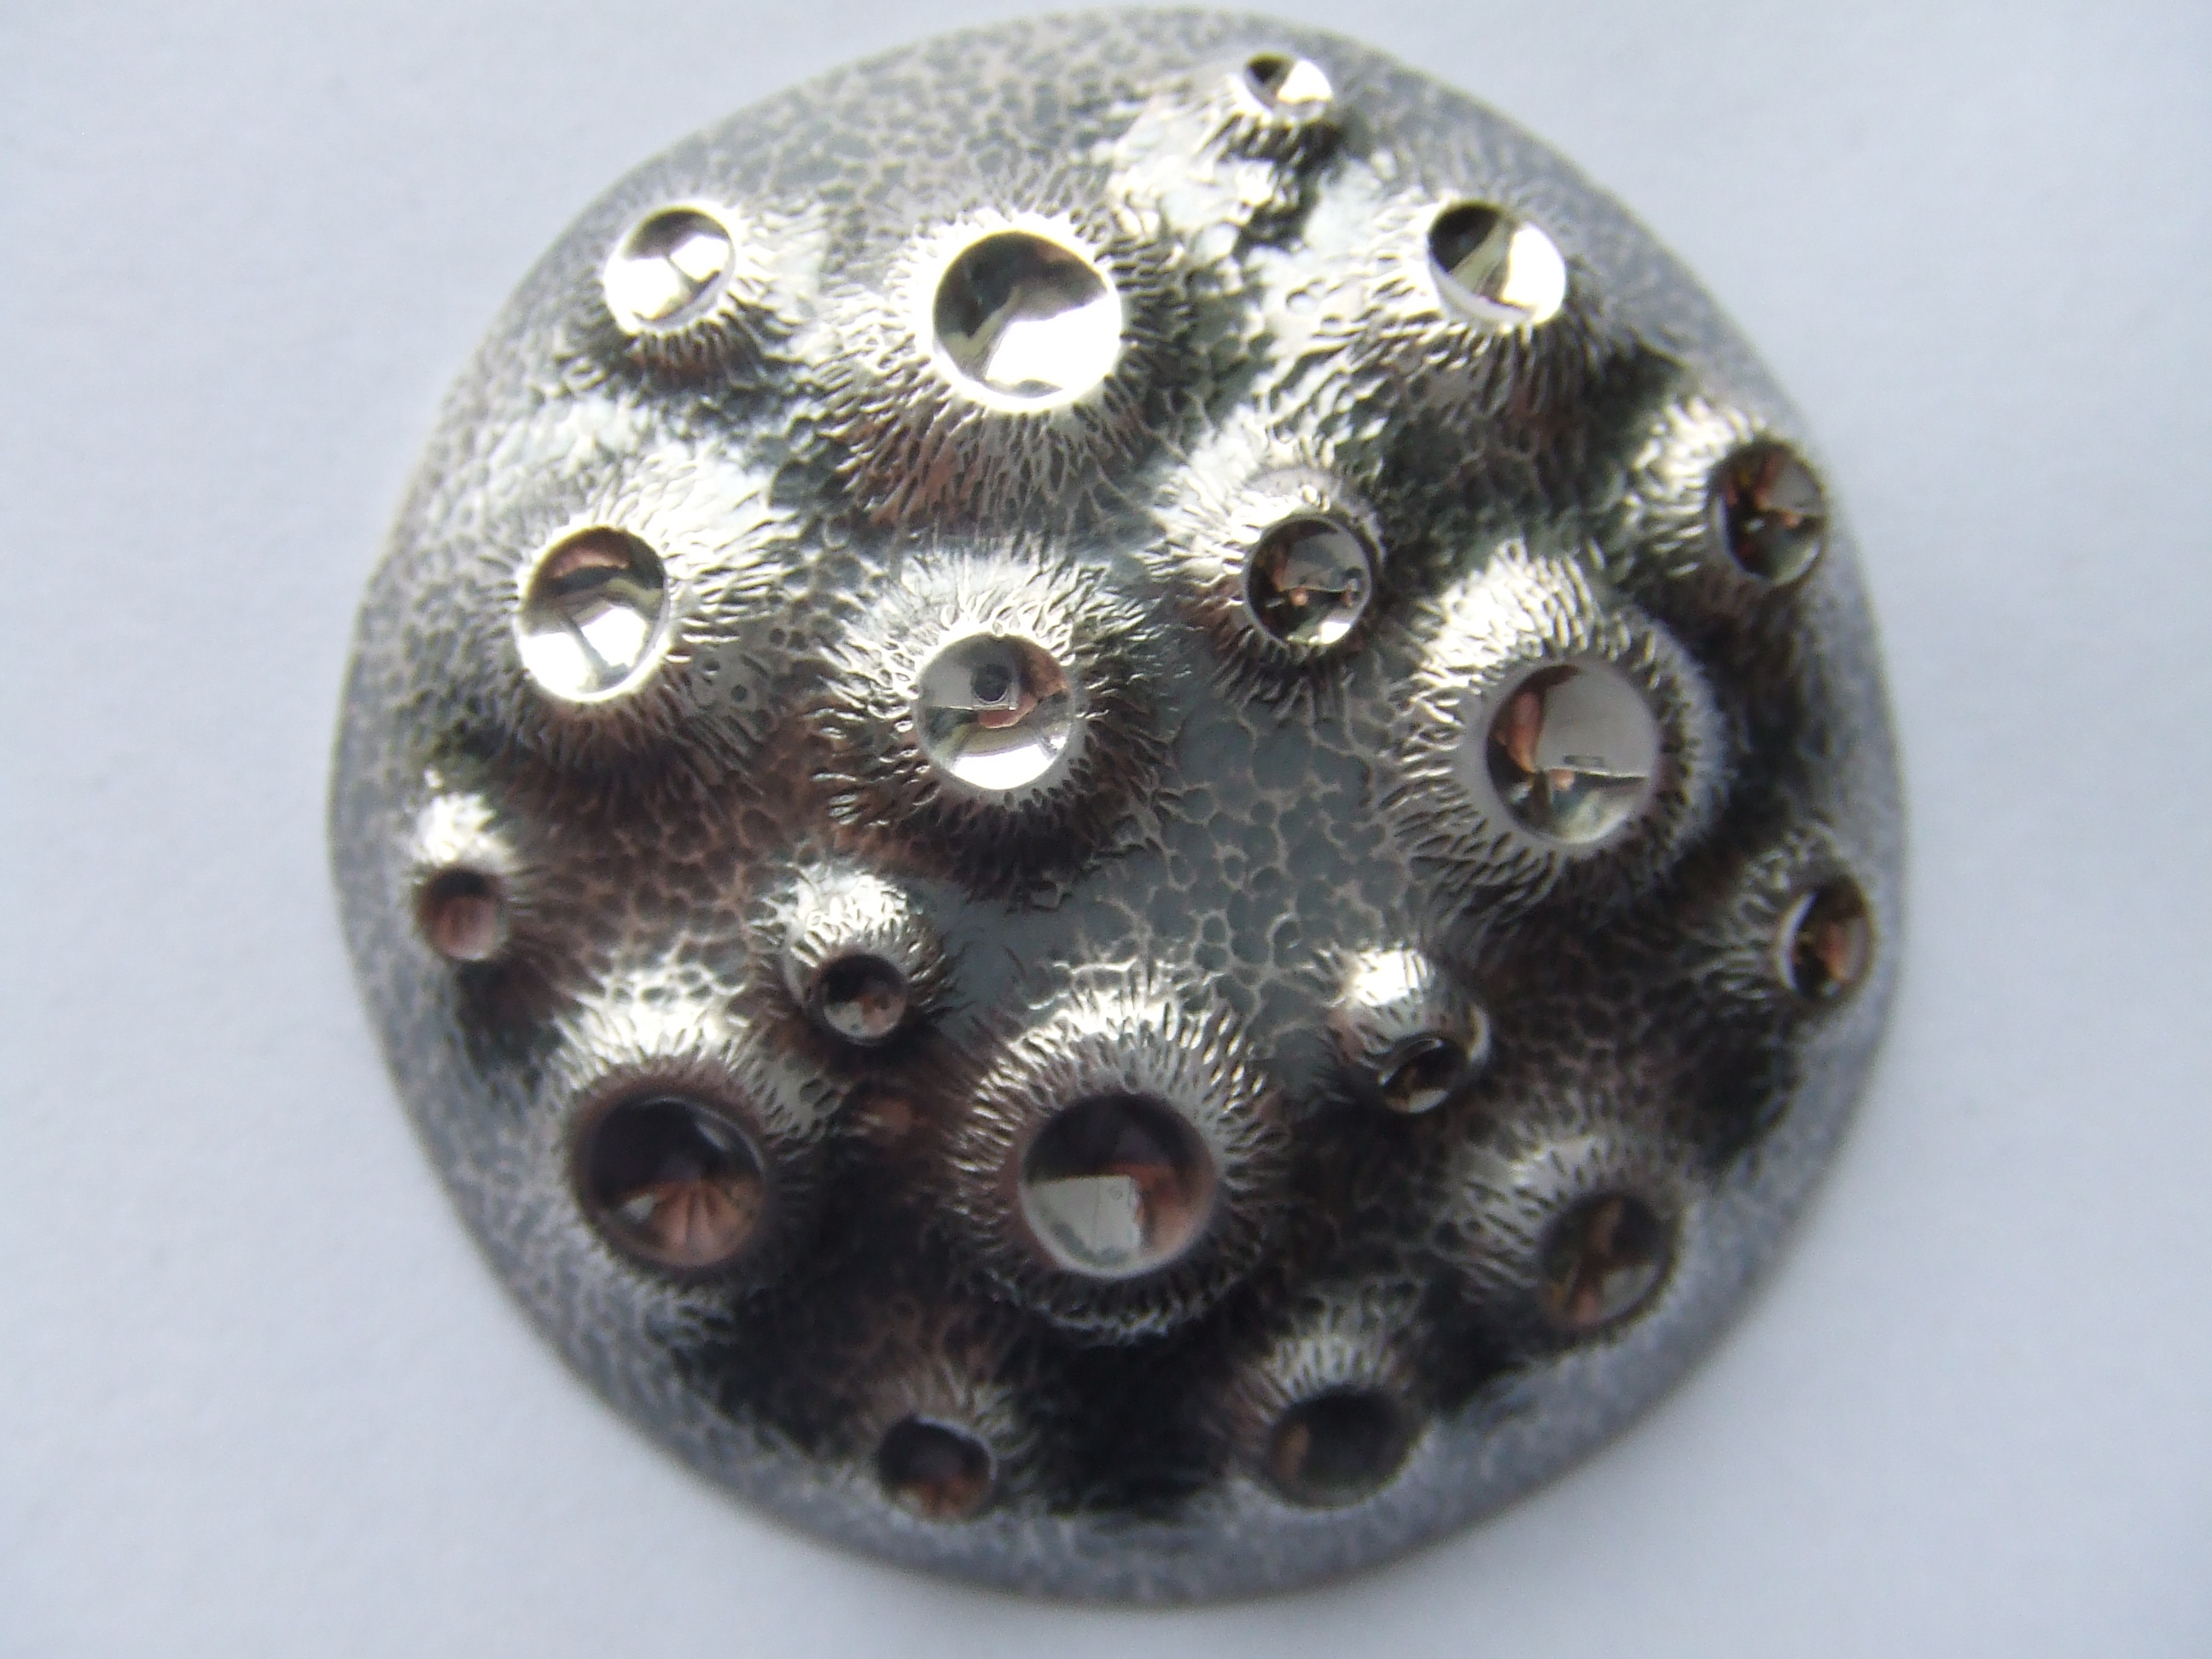
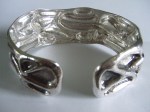
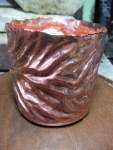
Cleaned up and fresh from the barrel polishing machine.

DSCF3301

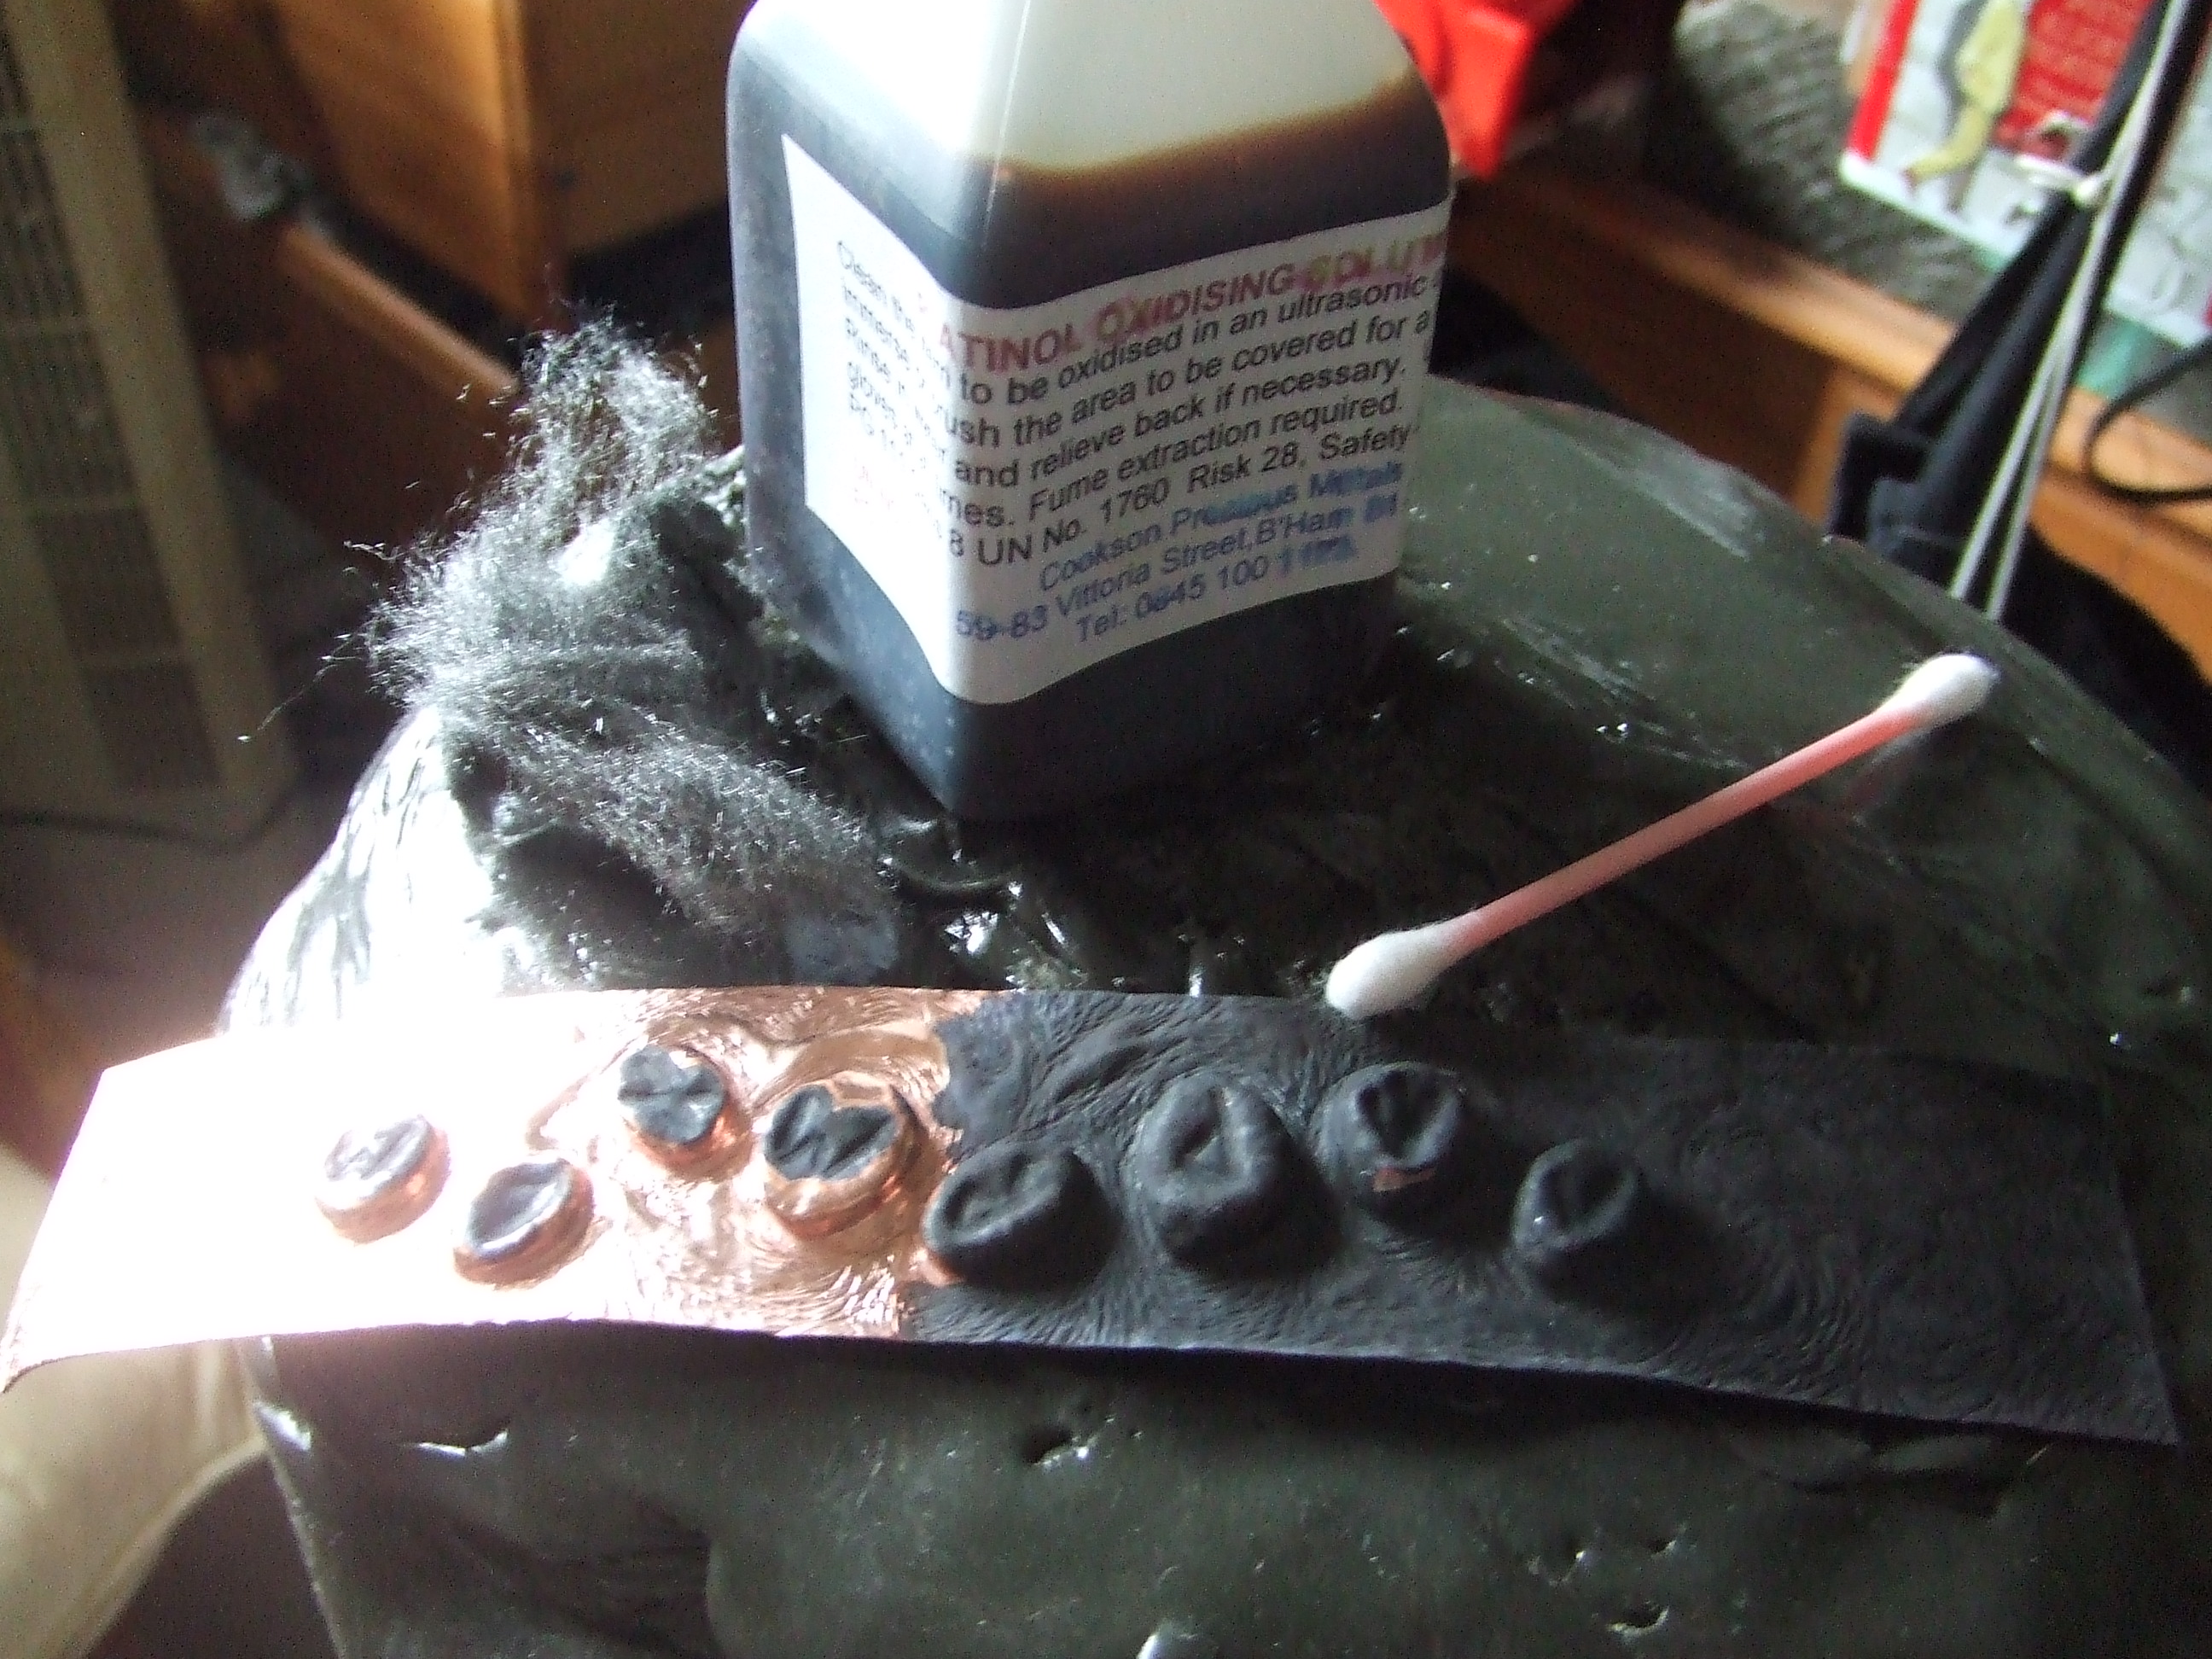
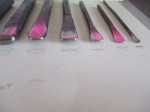
For illustrating options I chose to present this model half patinated to allow the chap to express a choice. I use a cotton bud as I find the solution wrecks brushes. The fine steel wool is used to take the black off the higher elements.

DSCF3302

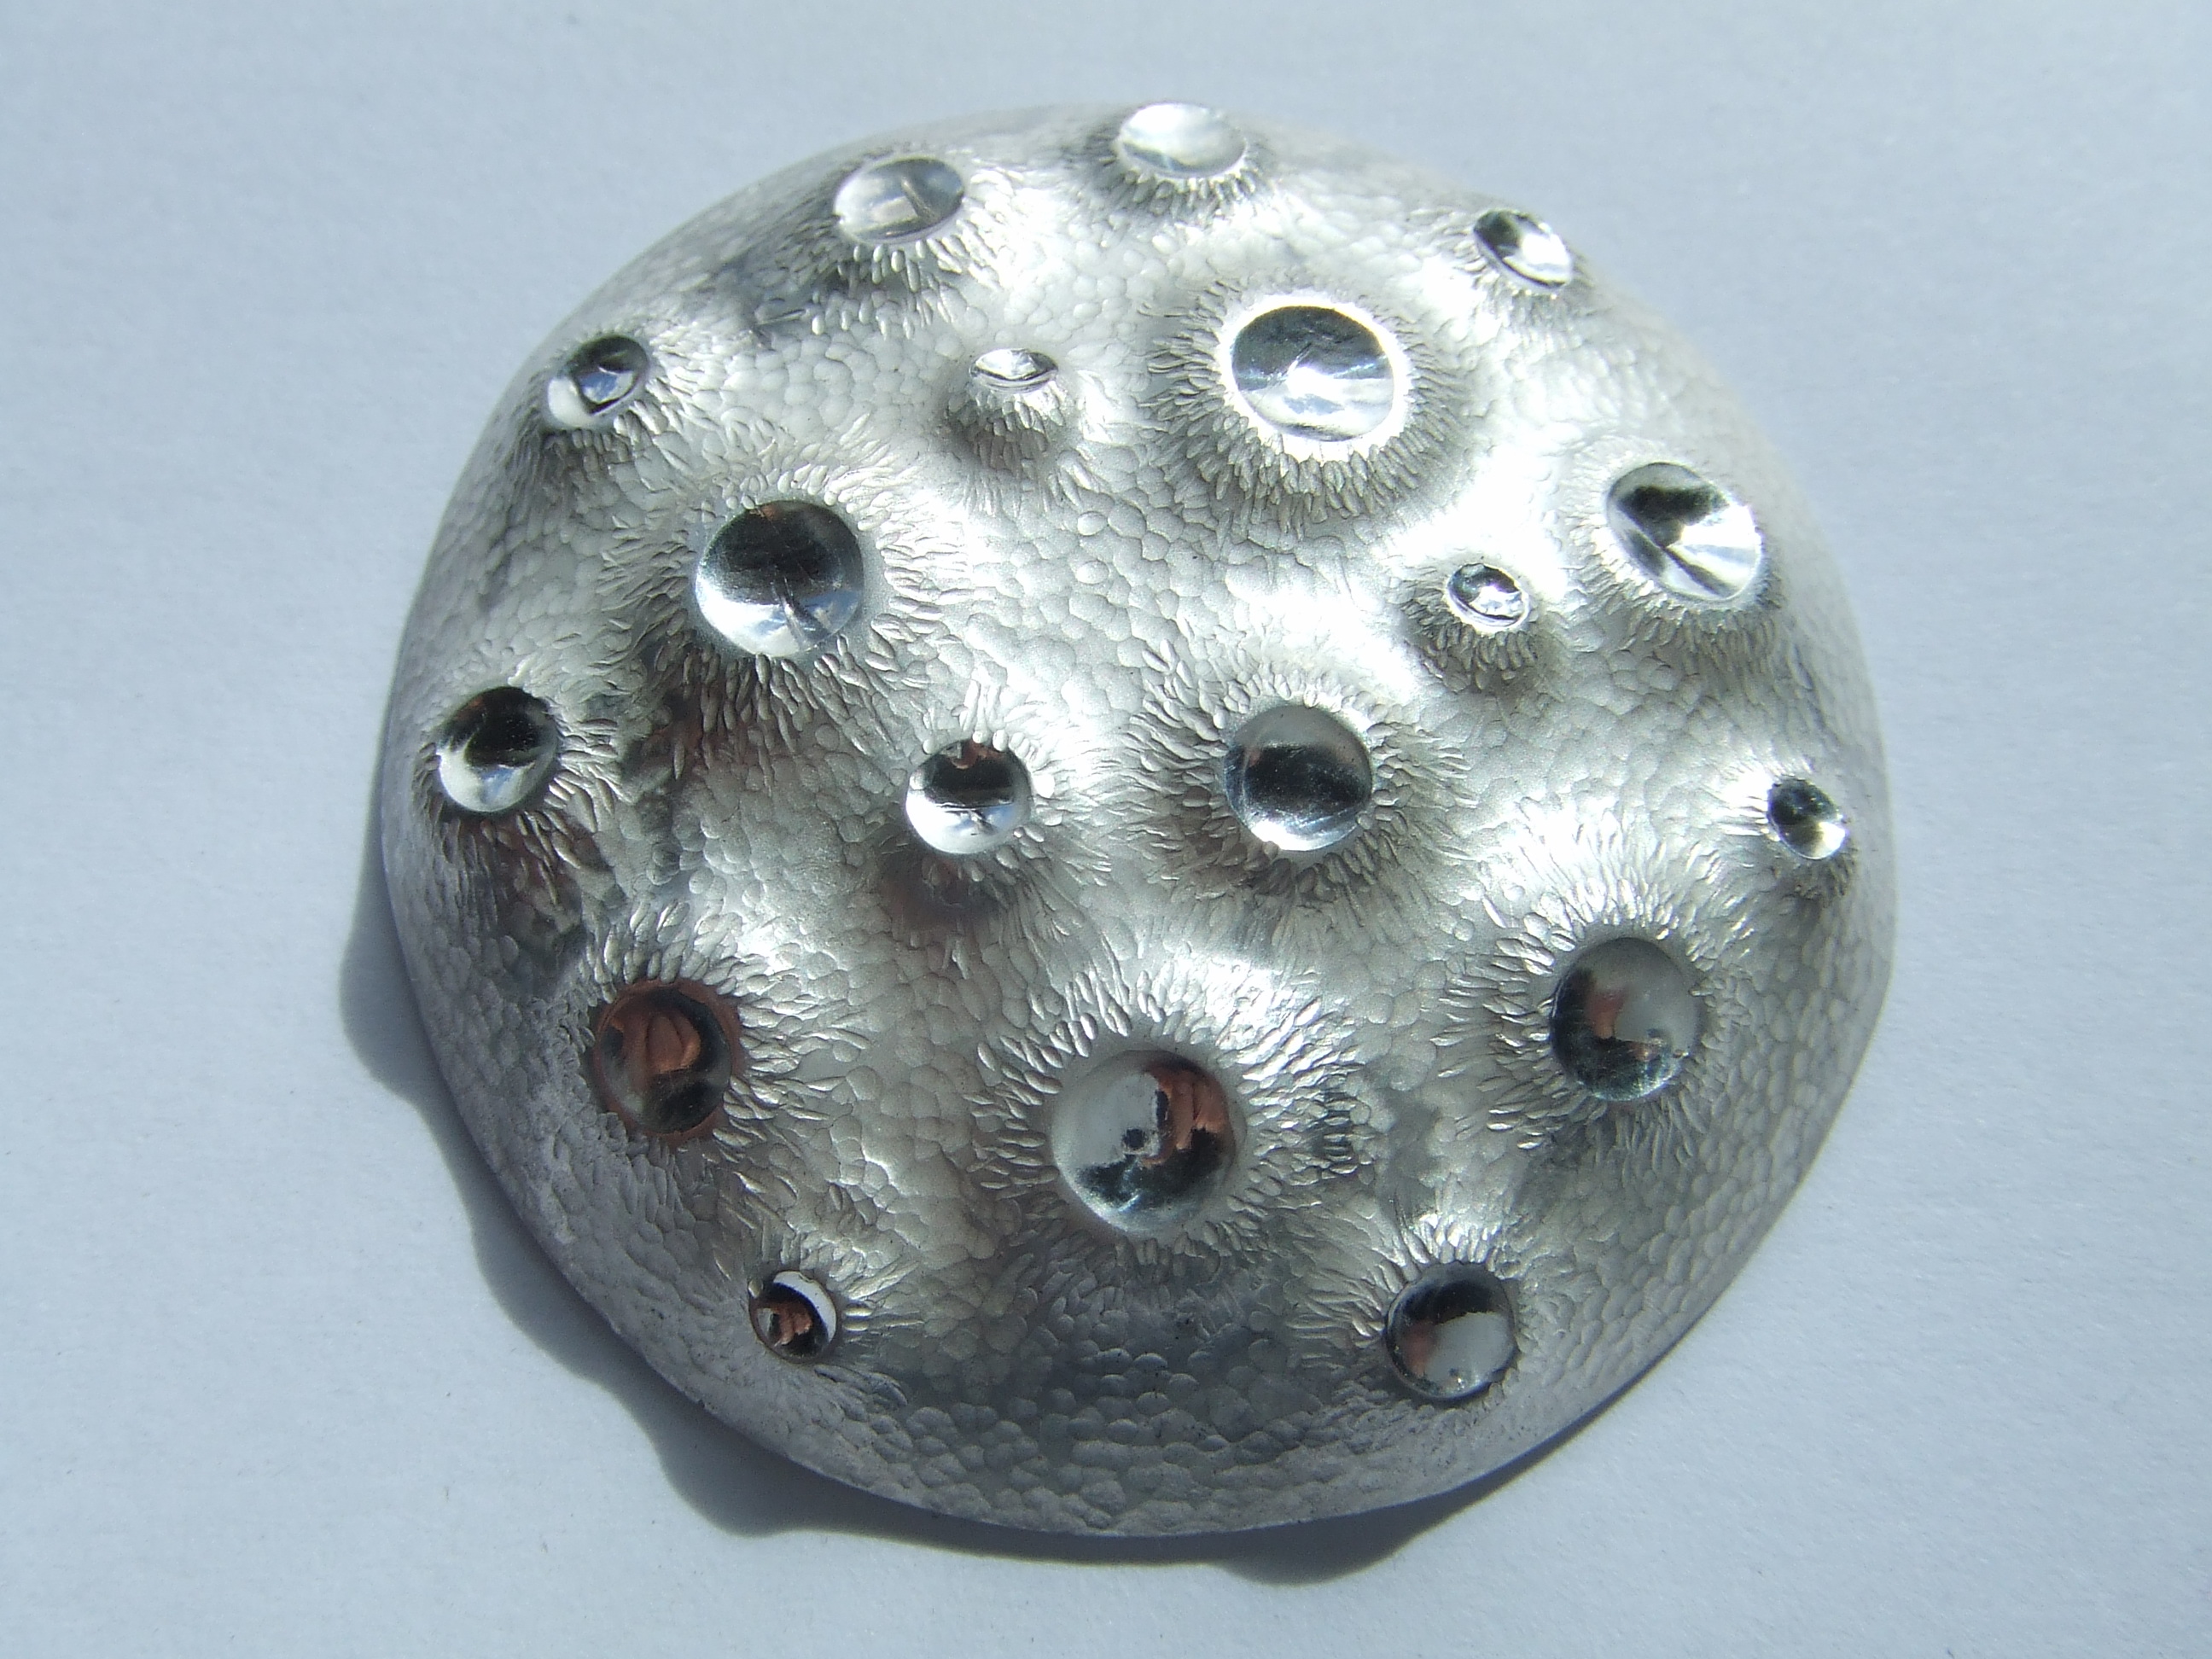
One half patinated, the rest shiny, decisions decisions.

DSCF3303

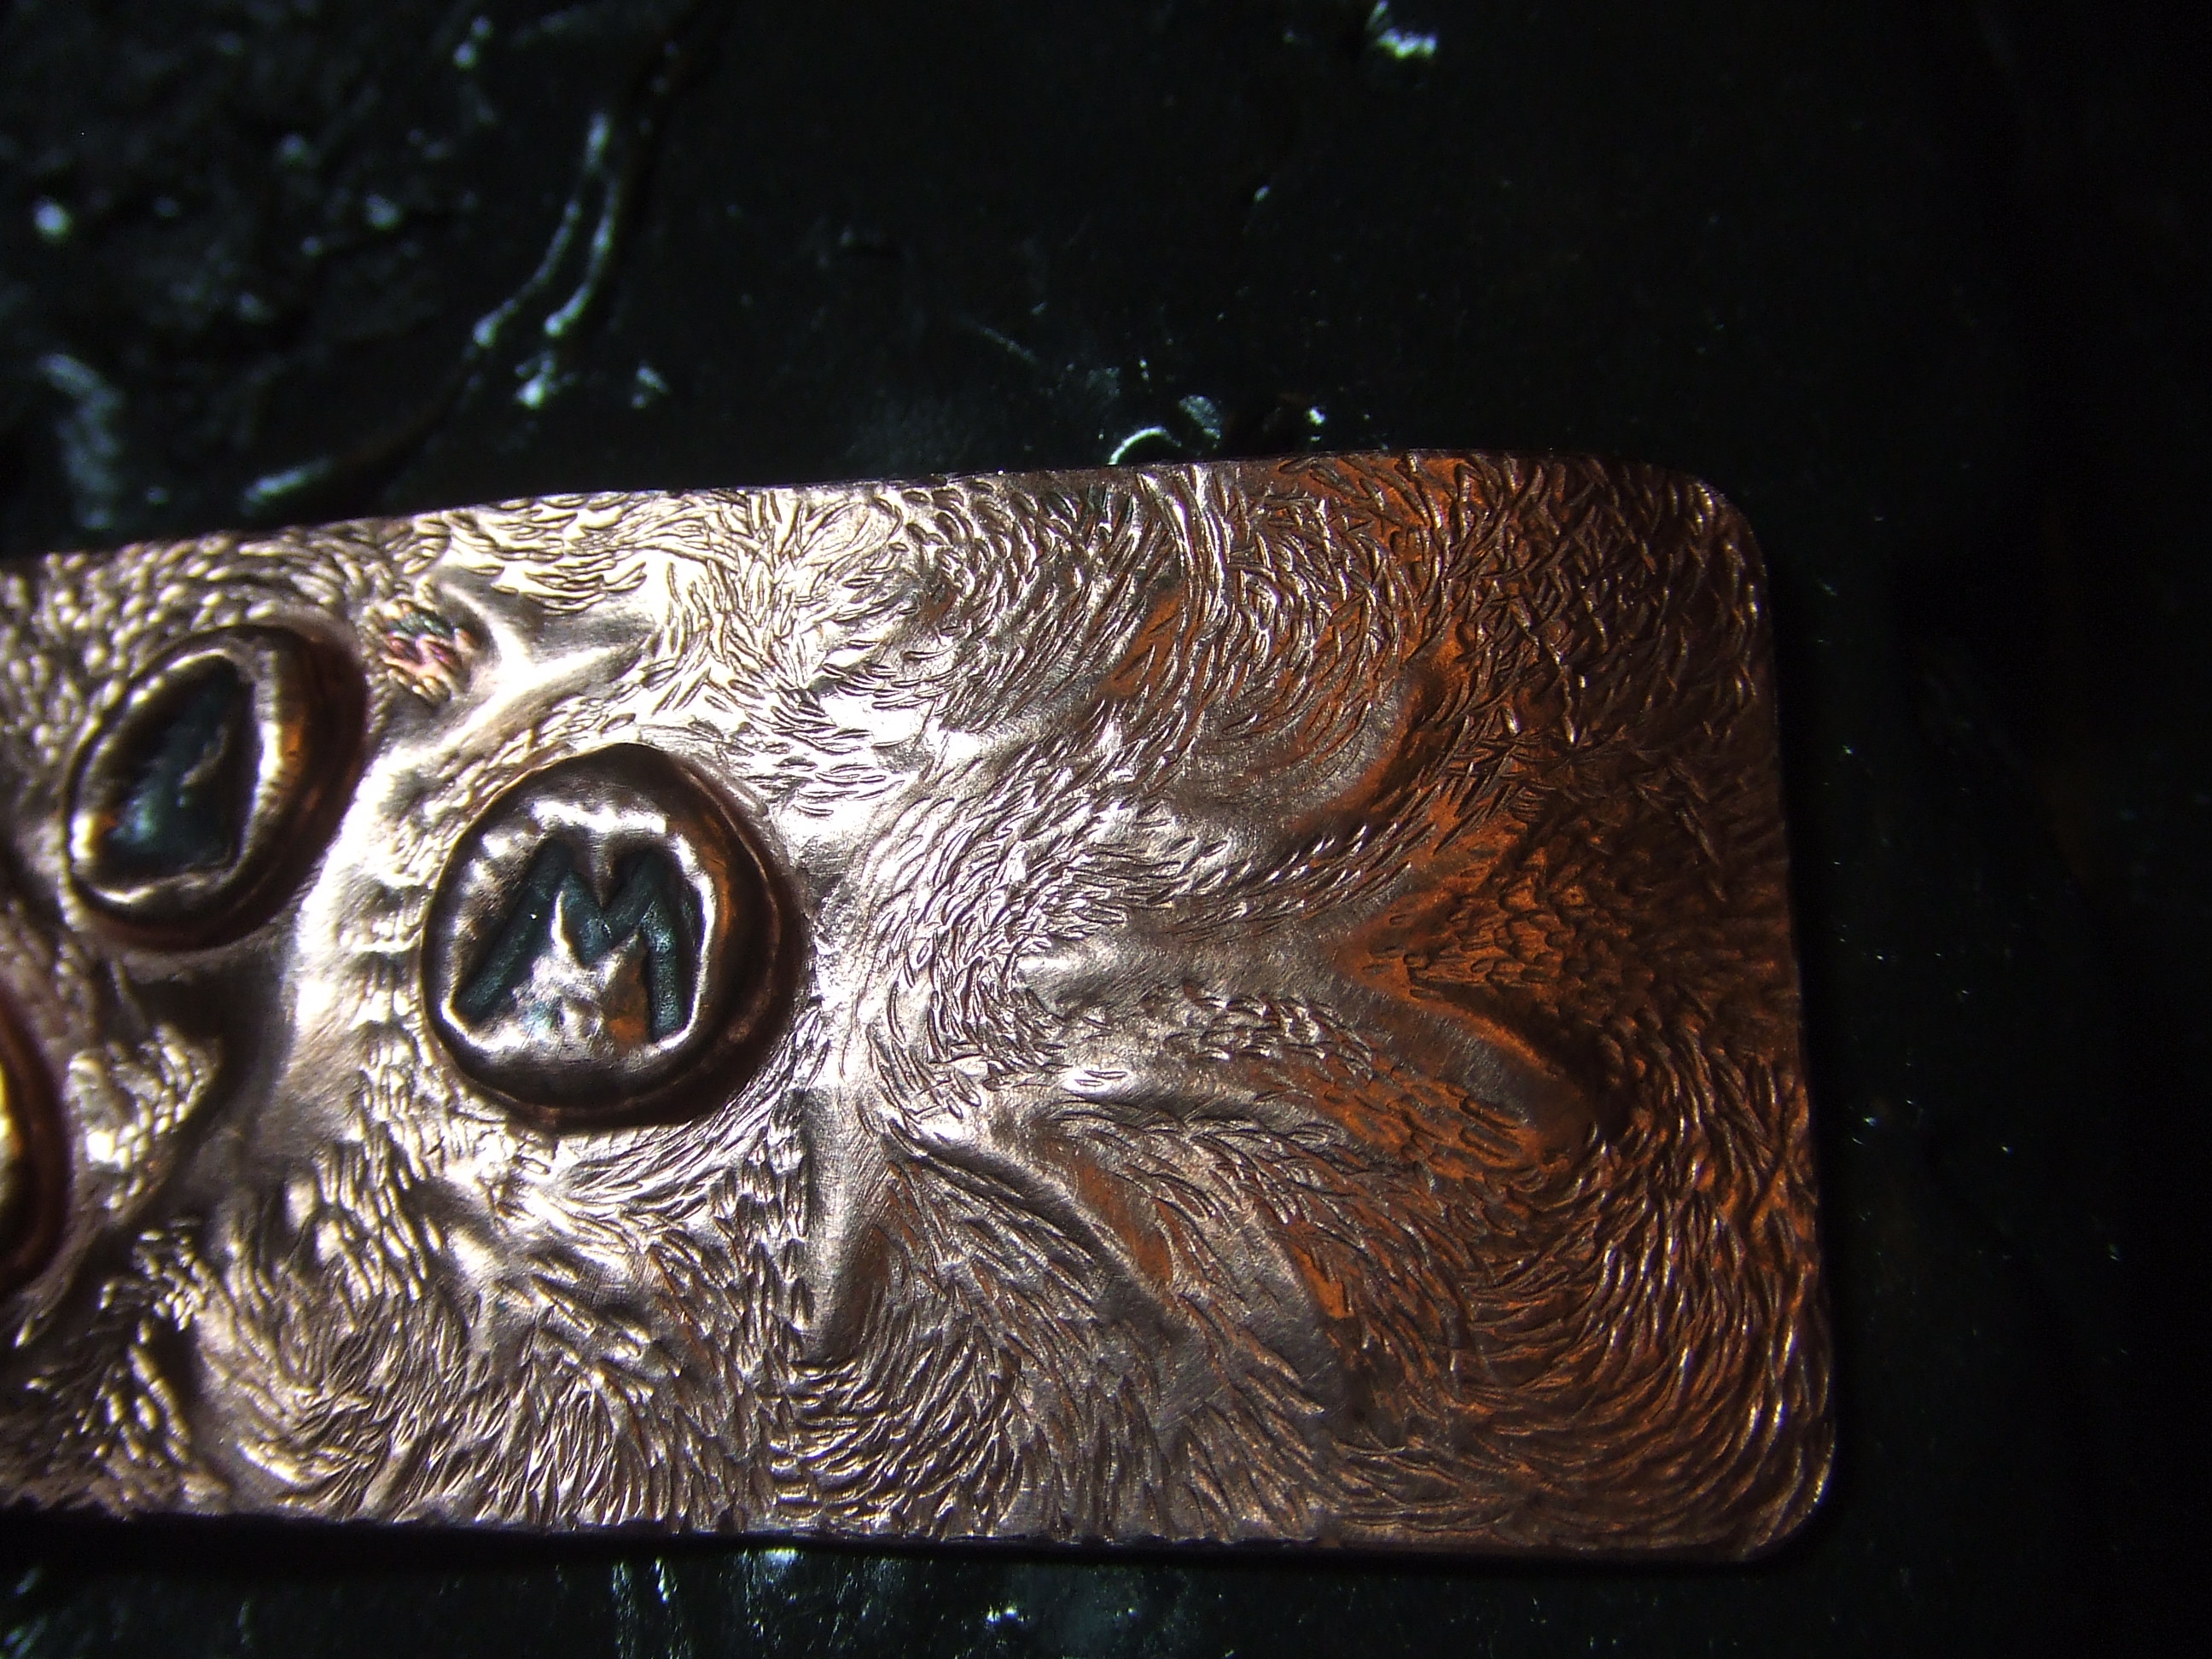
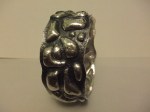
Close up of shiny, clearly showing the ‘reward’ for lack of patience, the rune squashed, what a twit eh.

DSCF3304

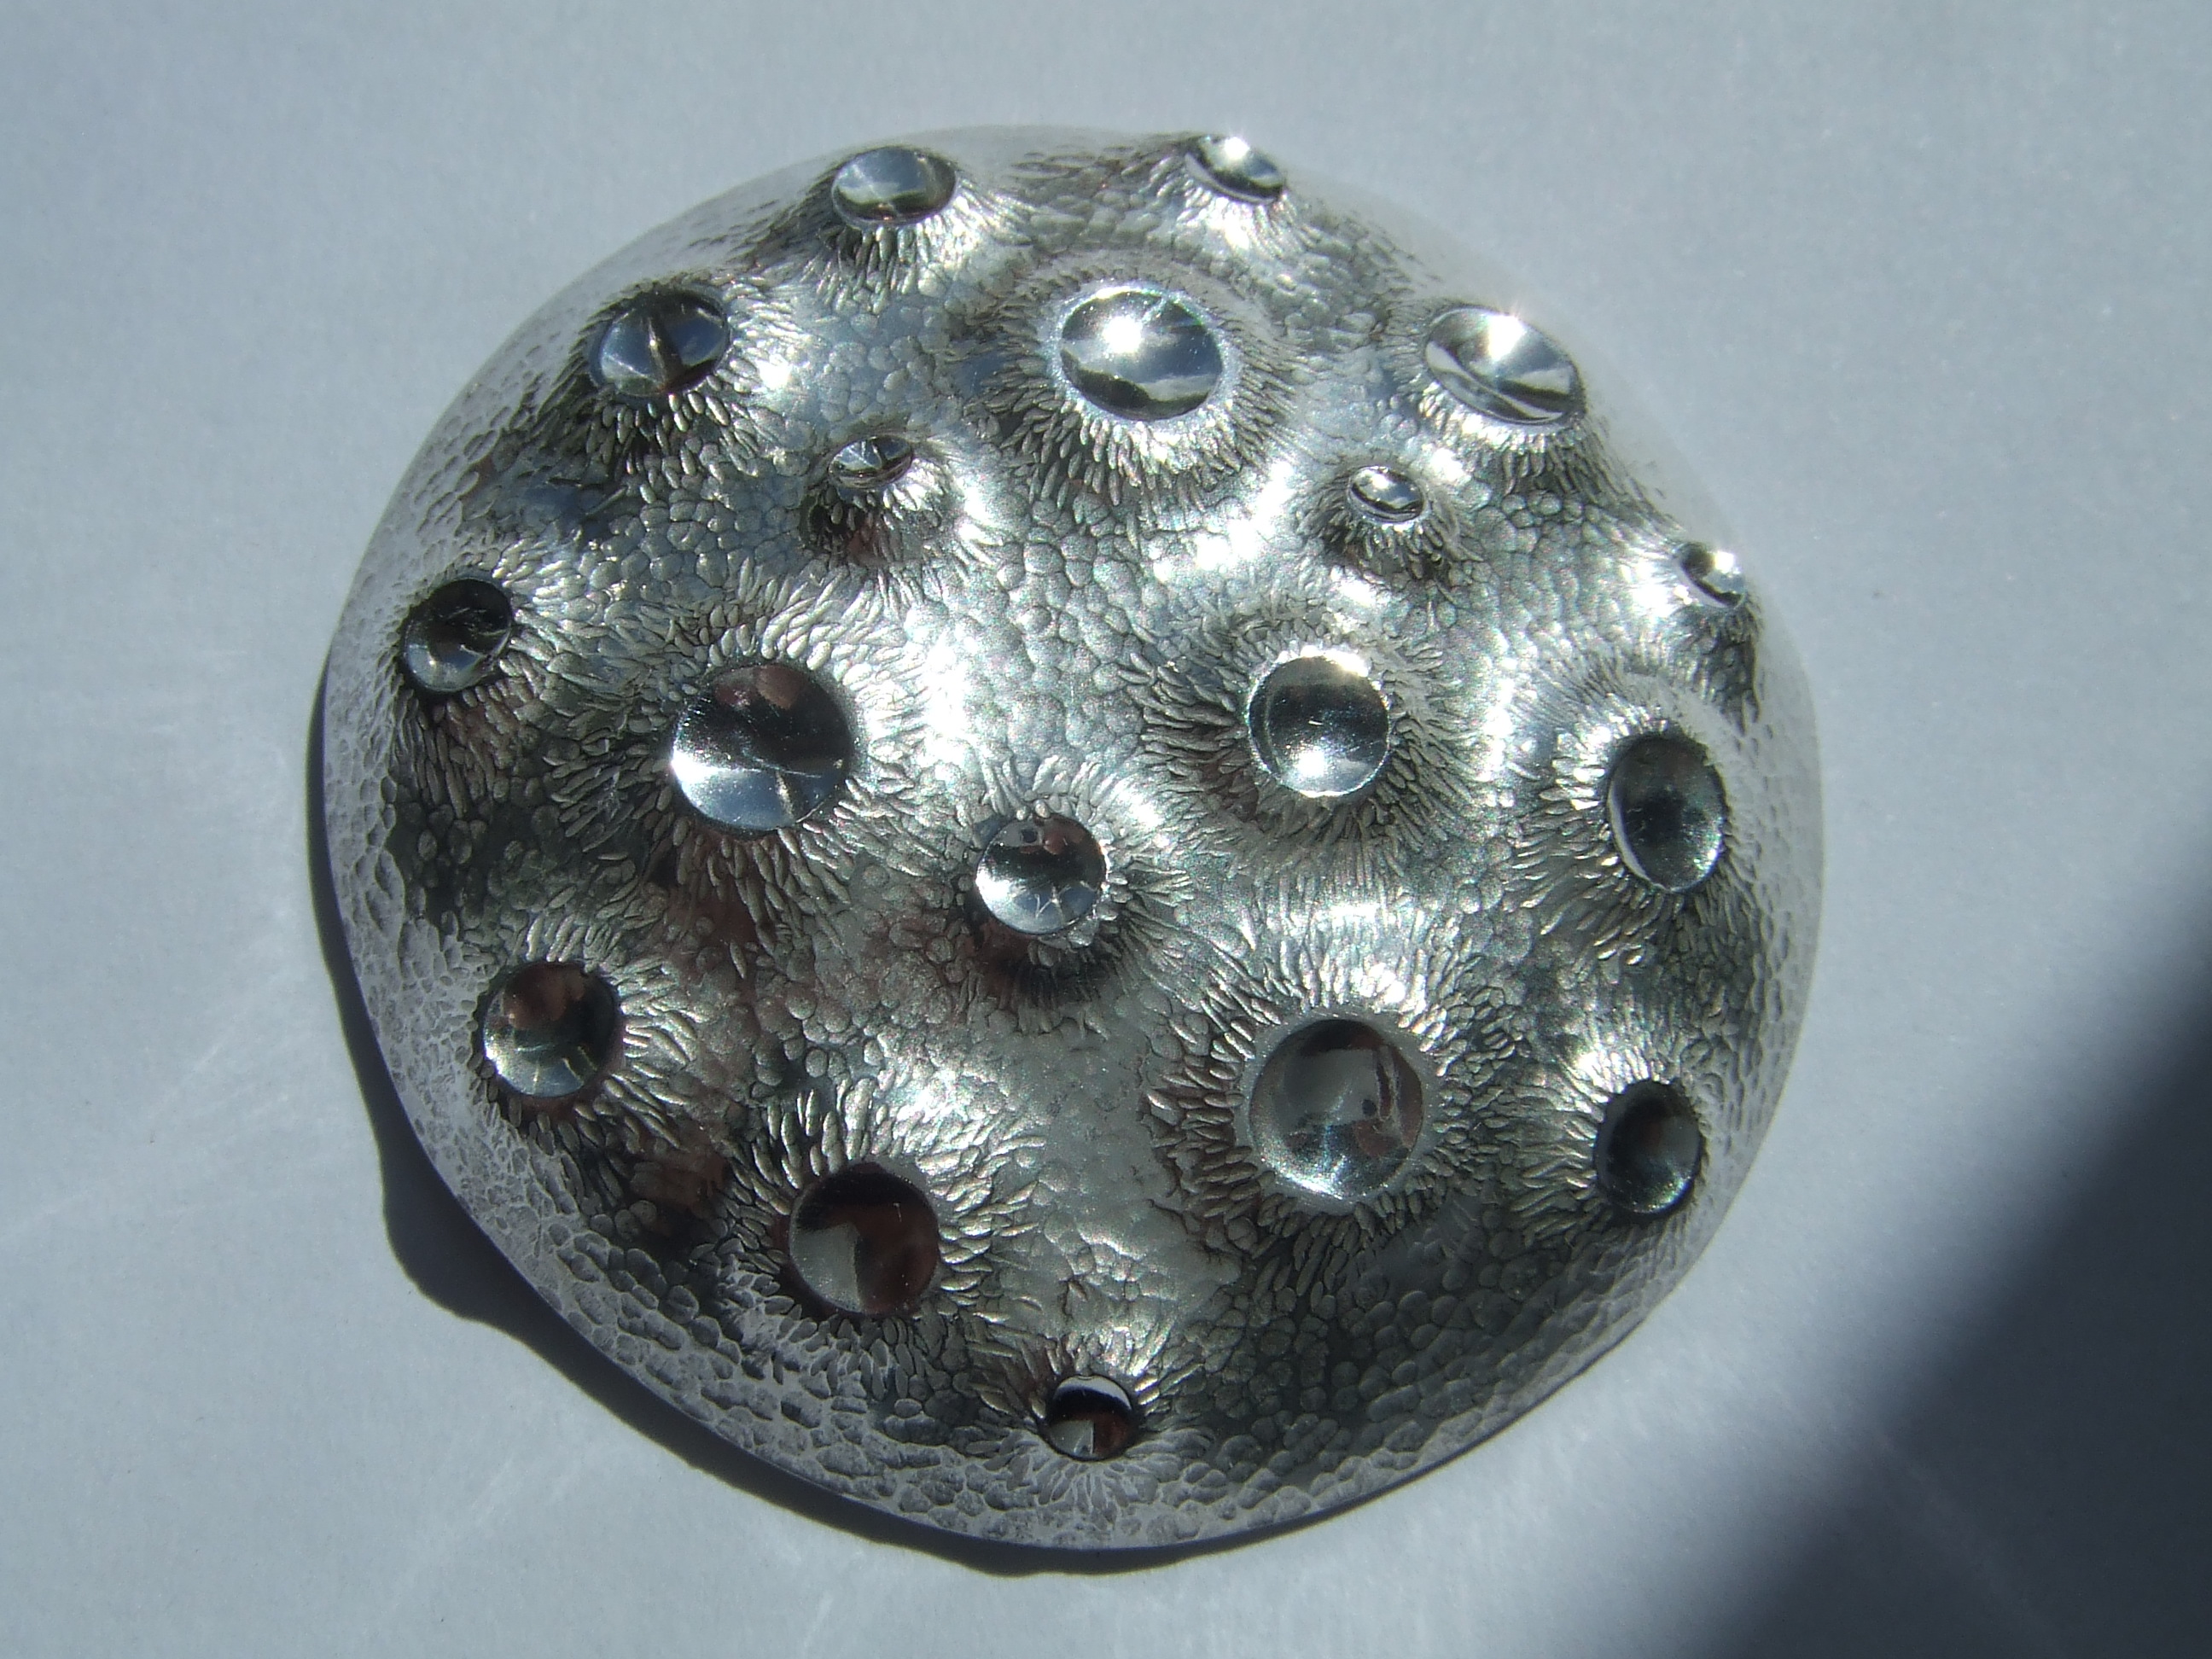
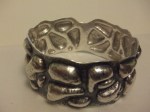
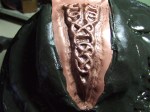
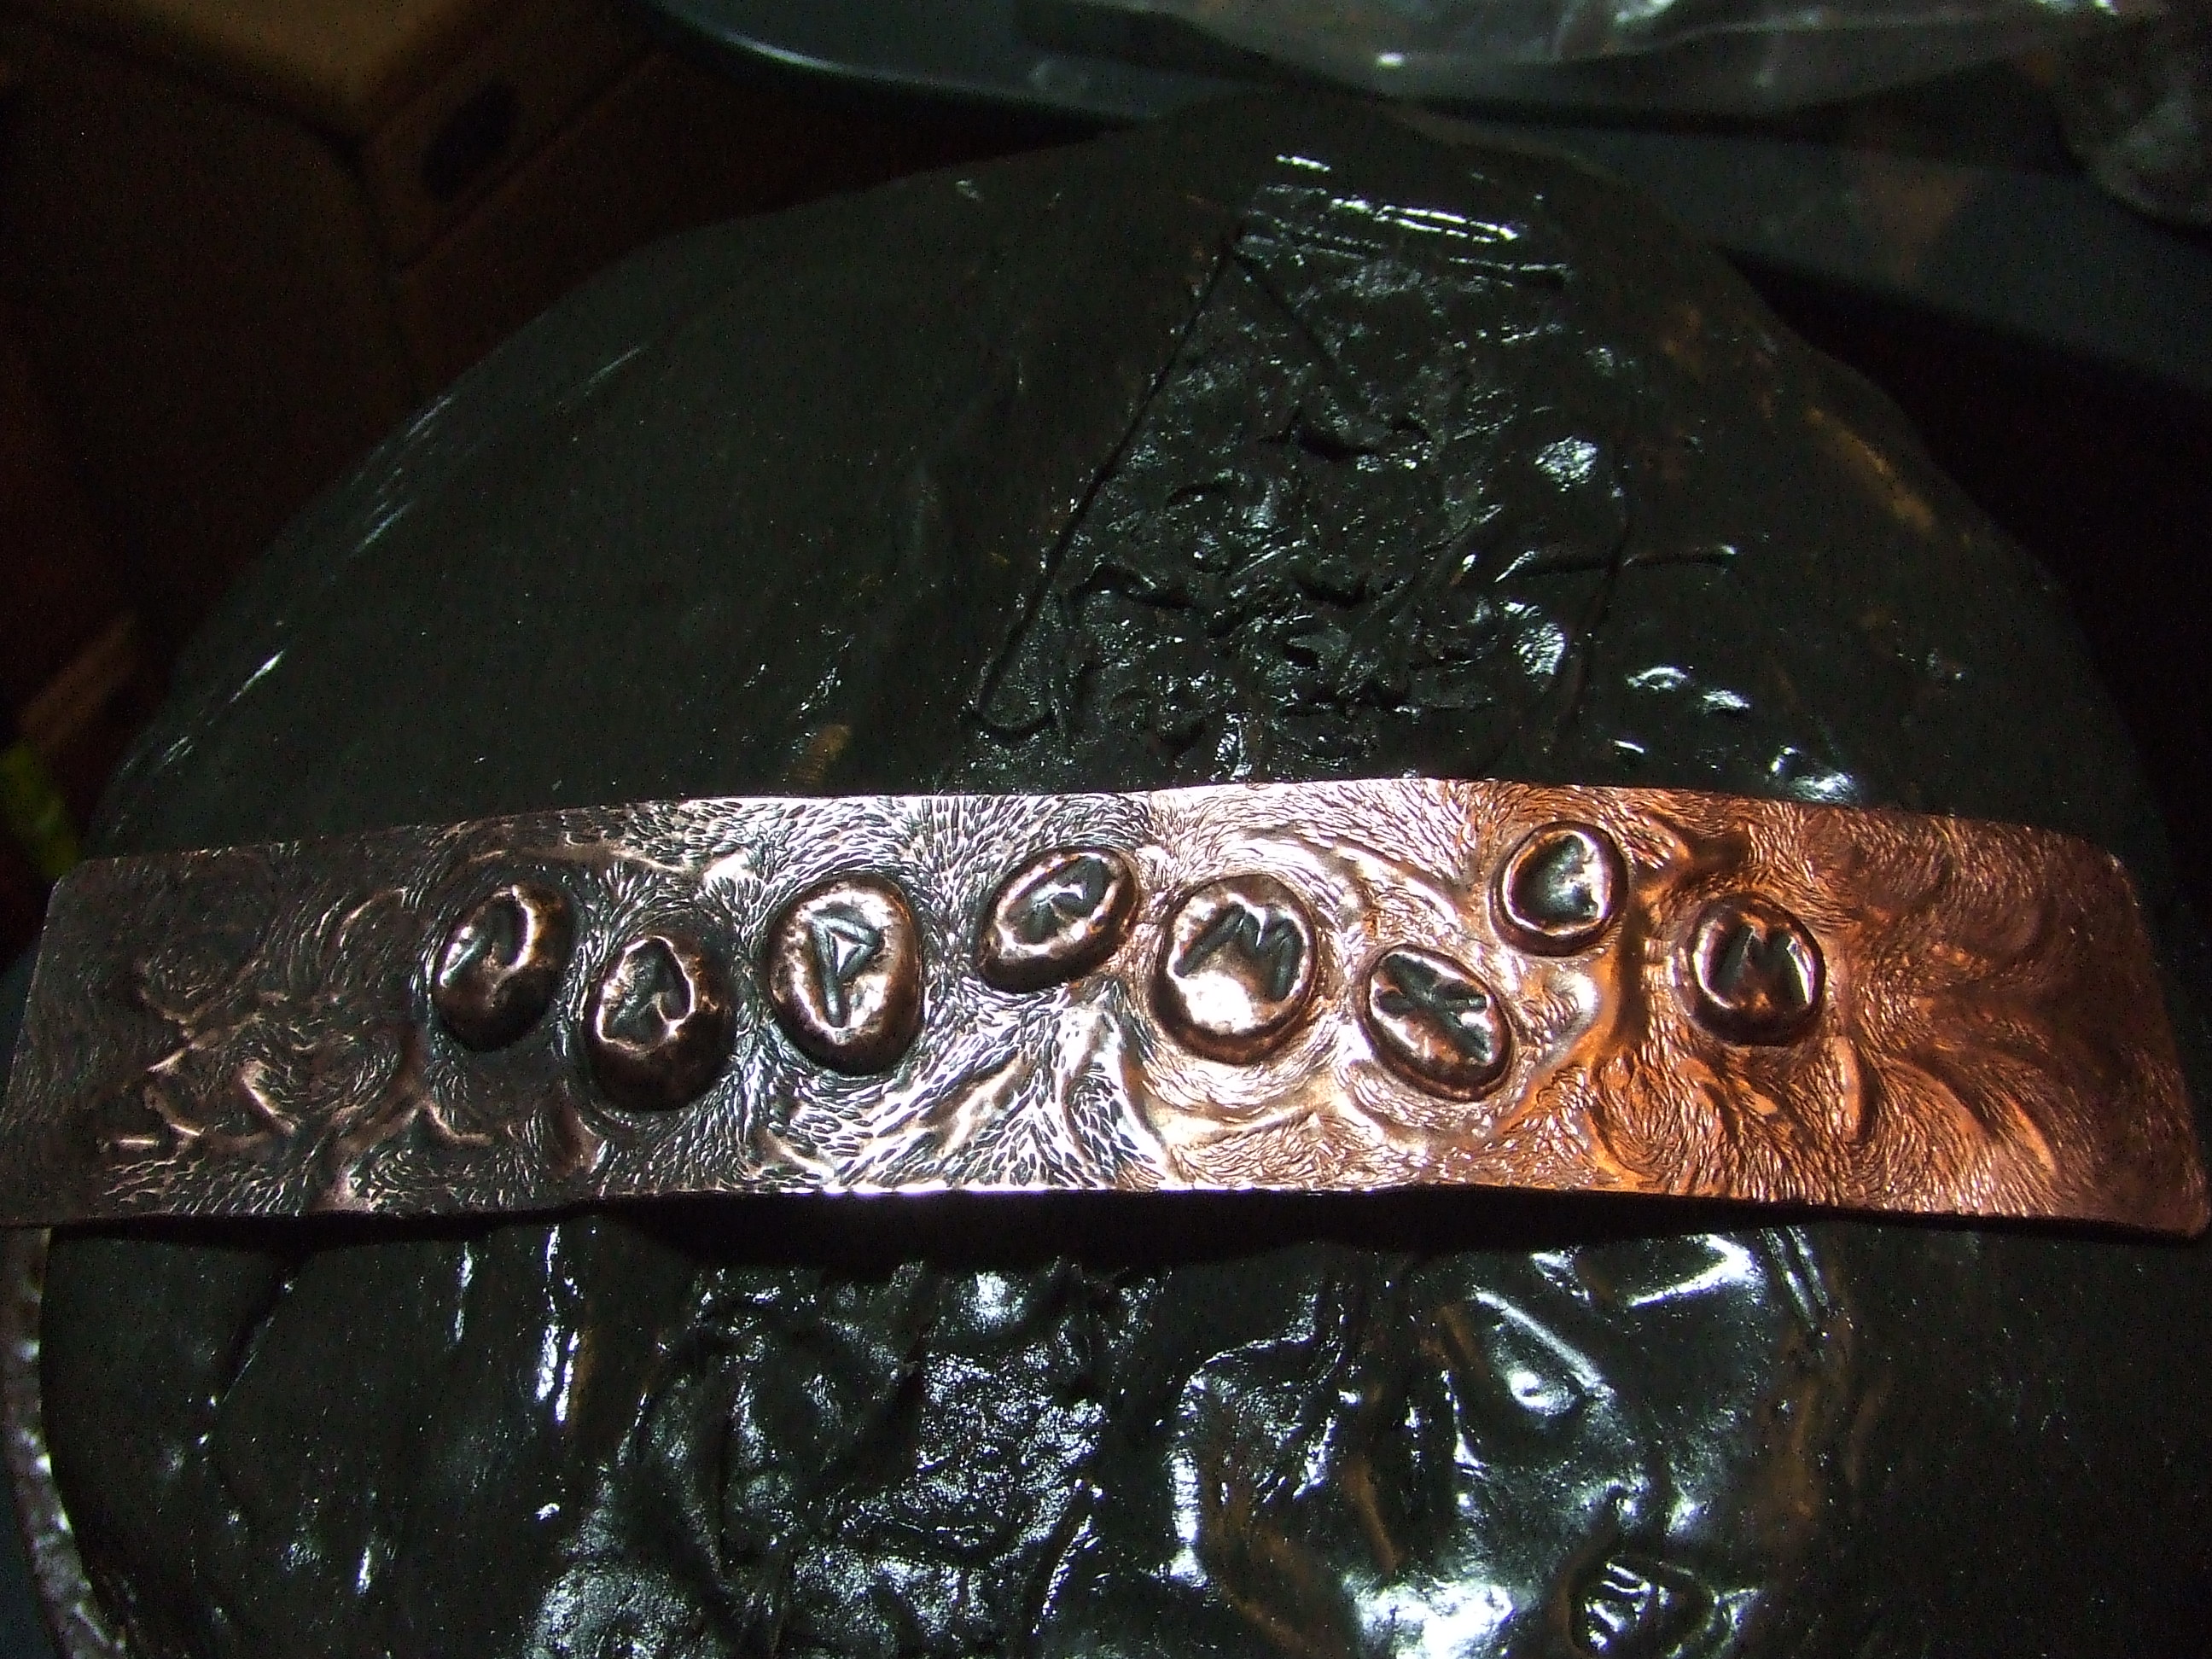
Patinated and high spots removed with the wire wool.

DSCF3305

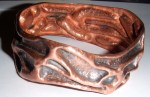
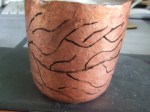
In 0.6mm copper, not very durable, nonetheless a good example of what could be if the chap decides he wishes it made in silver. This is a great example of my approach to ‘sketching’. I could not draw this, no problem making it though, it is a communication tool that allows me to have a dialogue with a person as they finger the surface and are able to better communicate what they want through seeing a representative model first.

DSCF3306

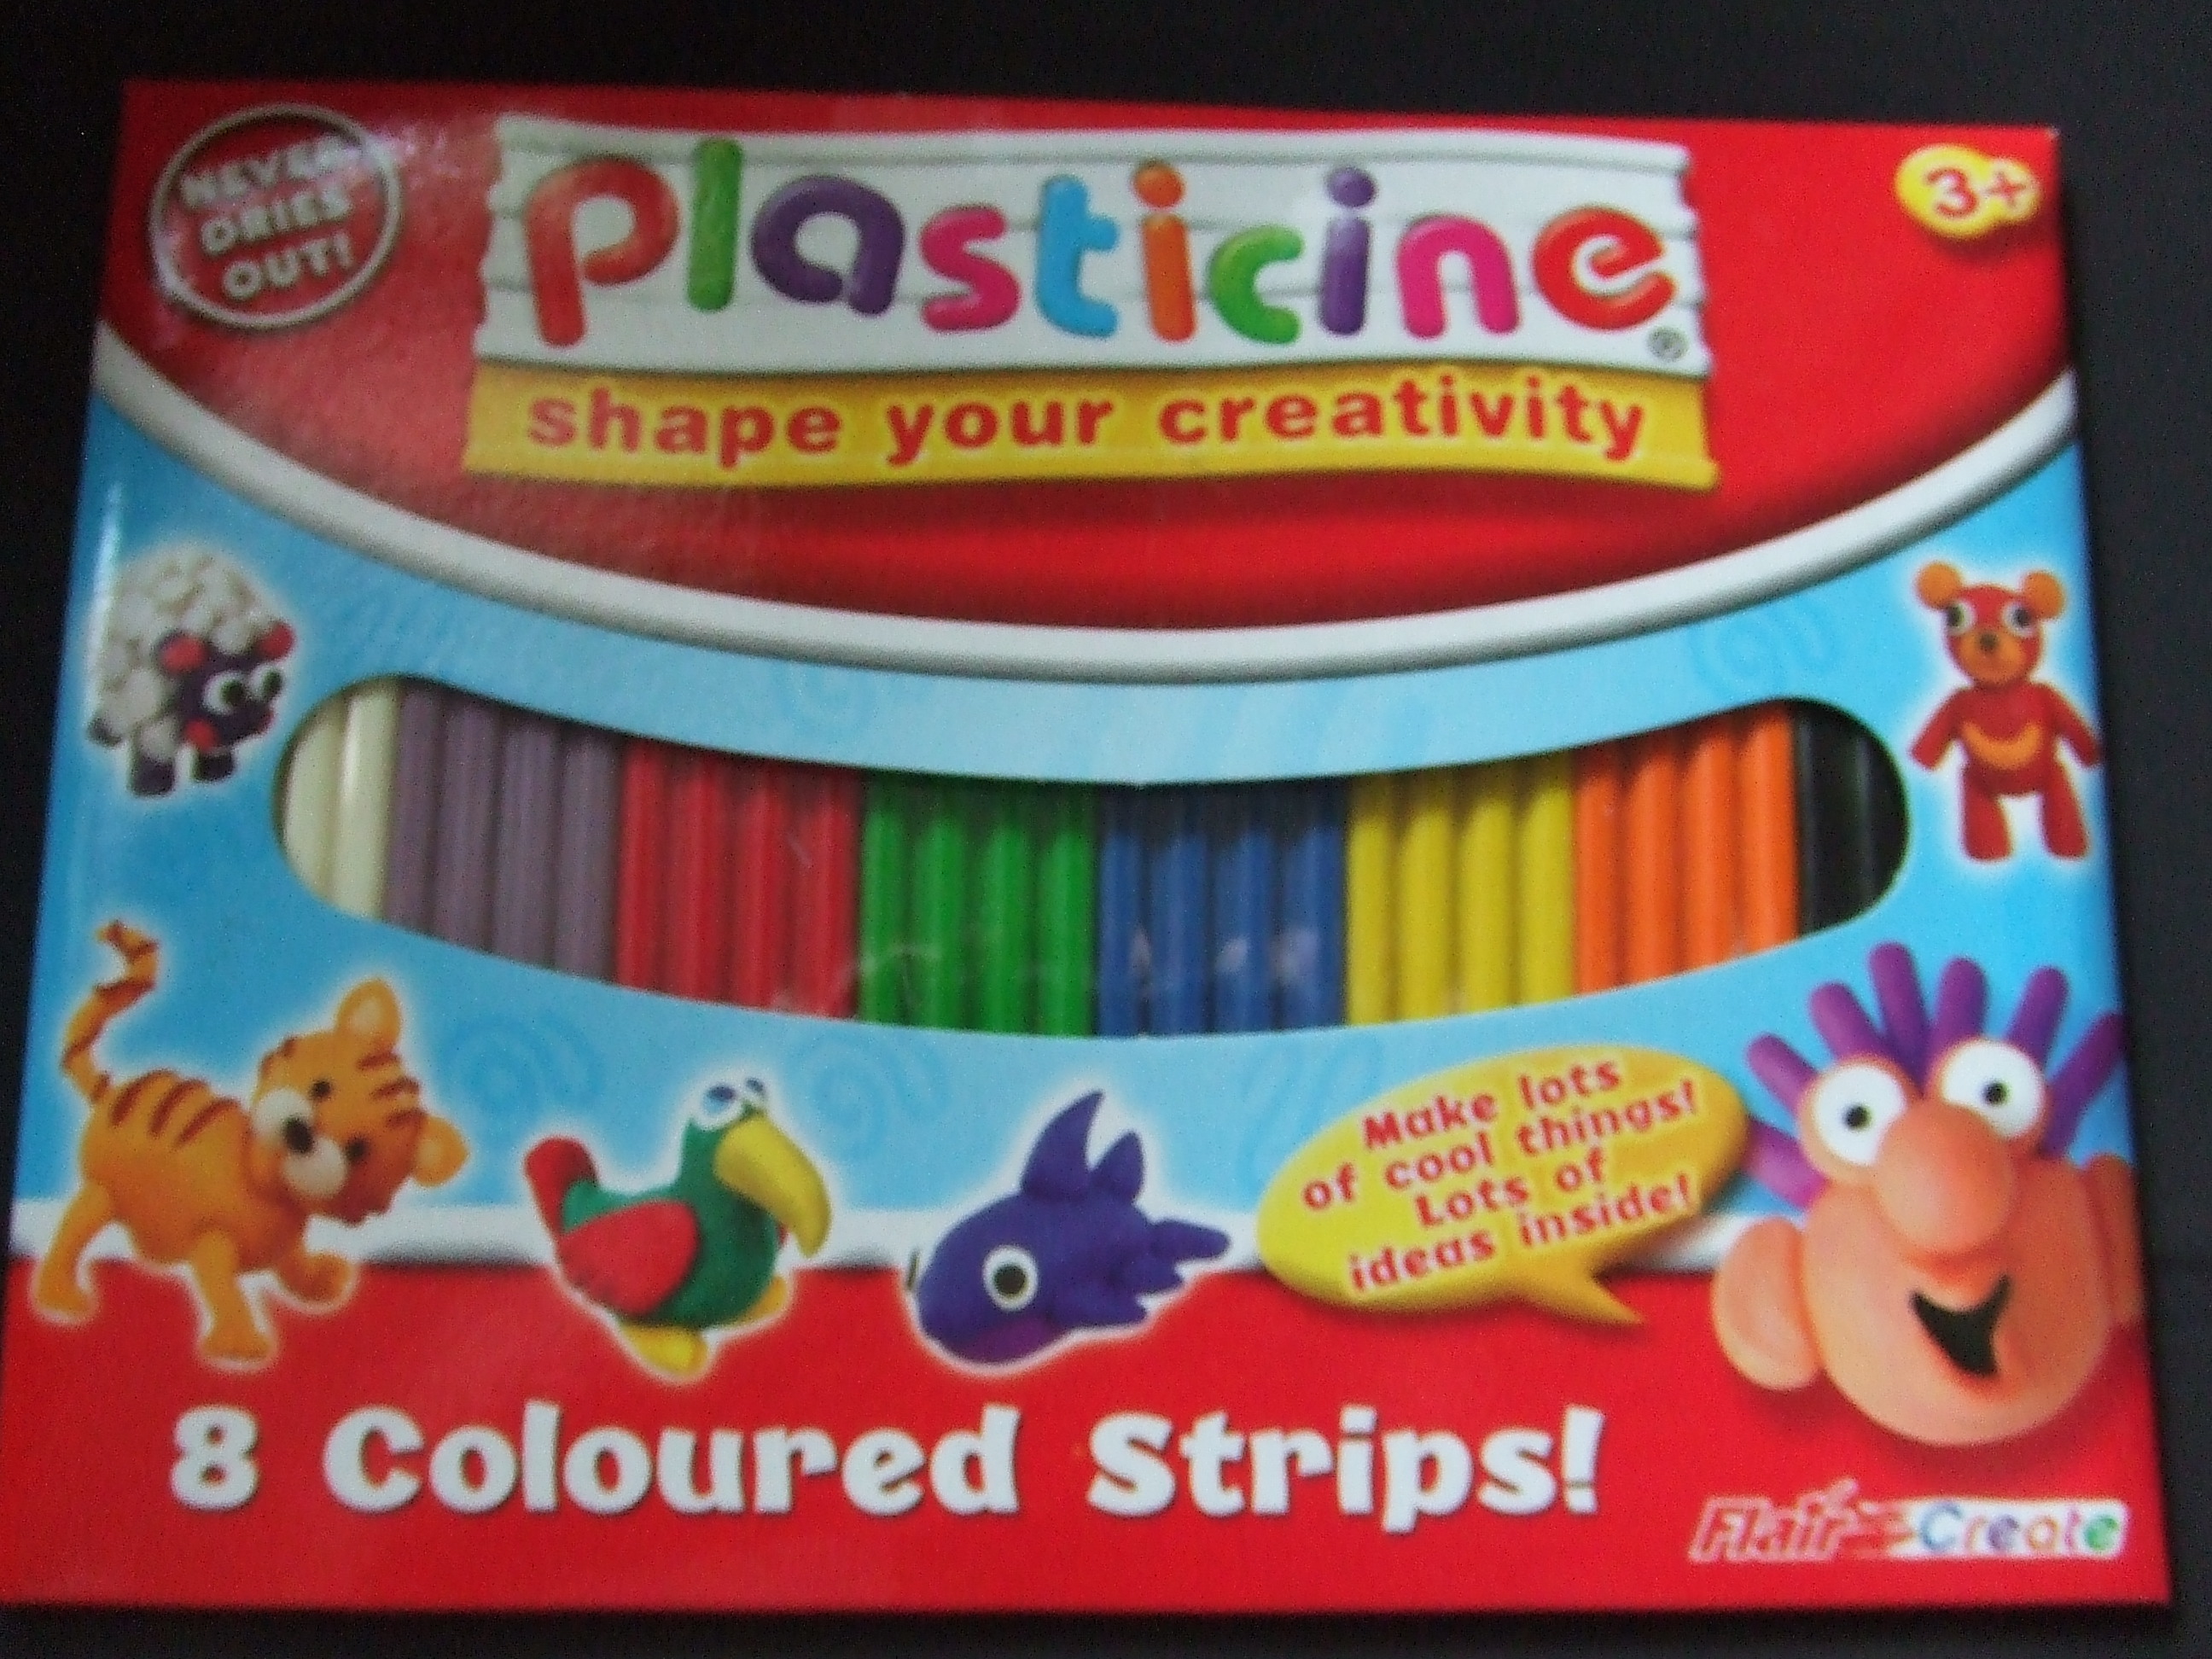
I have added this image of a packet of Plasticine. If you go to an art shop and ask for the generic equivalent , you get much more for your money.
As a thought for the people who wish to dip their toe in the repousse and chasing water, without going to the expense of purchasing pitch and the associated equipment needed to use it, I have had a thought. If you push the plasticise firmly into the depression you wish to add detail to, perhaps experiment by putting it in the fridge of freezer, this will stiffen up the plasticine, obviously you will have to work out how much support this will give, making allowances and decisions when to return the piece to the cold as it warms.
The pitch is very much more supportive, better to use for limited amounts of puffing that traditional low relief chasing and repousse require. The higher relief style I like, I find the plasticine saves time by yielding more, giving me more bang for the annealing buck as it were. Also the pitch will give a pretty accurate indentation for the tool used. Imagine poking your finger up inside a stretched piece of fabric. Your finger will make an impression of a tent as the material around is also pushed up. Depending on the pitch mix/hardness this effect can be, to a greater or lesser degree, avoided, making for crisper definitions of elements. The plasticine will drag material from further around the initial tool impression making ‘hills’ if you like.
If anyone does experiment with cold plasticine, I would be very interested to hear how you get on.

Wato wato

I thought this example of a commission I have received will help to better understand the chasing and repousse methods I use. Better still I sincerely hope it will encourage you to have a go, please do ask me for any further clarification should you need it. I would also be thrilled to see anyone else’s work if they would care to share it.

Lawerence is a fantastic chap who is into shamanism, ooooookkkayyyy I hear you say. I know I know, perhaps a little eccentric, better that than the abundance of dullness I say. A thoroughly decent and nice chap to boot as well and someone who I am very glad to say I now call friend.

Lawrence saw Clairs bangle, you know the pebble one, look back or go to my Facebook page if you need reminding. He came up with the idea of having his name in runes, the drawing in the first photograph will give you the gist.

I will let the pictures do the talking, well they do have some explanations attached, as I say, please do ask if I have not been clear.

As for the silver final piece, well I will have to wait as I have you to show this to him for his opinion. Rest assured if he does decide I will post a picture when I have completed it. As I state in the pictures this model was made in very thin, ex copper water tank, 0.6mm. Sterling silver will be the material of choice for the ‘real’ one. It will take, if I’m lucky twice as many annealings as it took to realise the model working as I do in 0.9mm stirling silver sheet. Please bear this in mind if you jump right in with your own projects, it takes very much longer and is much harder to move than the copper shown here.

As many of you already know I’m no artist and find drawing skills frustratingly illusive at this time, though I am still working on it. To my mind this approach is not much more time consuming than a fine rendering in different aspects that a silversmith or jeweller may need to satisfy a client. As a bonus my ‘handicap’ means I am continually learning in my chosen medium by practicing in it most of the time through necessity. Thin gauge models work for me, go on try it, you may like it.

I hope you enjoyed the photographic journey to the end and it encourages you to have a go for yourself.

All my very best wishes.

Stu Art

Advertisement

Cornwall Crafts association – accepted good oh :)

Wato wato,

Fantastic news for me, I have been accepted by the Cornwall Crafts Association to have my work represented by them. The following is a link to ‘my’ page.

http://www.cornwallcrafts.co.uk/view-craftsmaker/221

Here in the U/K we have The National trust that looks after large parts of the countryside, including much of the coast path, and beautiful historic buildings and gardens. I have two of the silliest dogs in all of Christendom. Reen and I like to take them out to the beach or countryside to inflict them upon the innocent from time to time. Trelissick gardens, National Trust, is one such place overlooking the water with great walks and a garden to explore, is one such place we enjoy very much.

http://www.nationaltrust.org.uk/trelissick-garden/

Cornwall Crafts Association has a gallery there, my work is now offered for sale alongside a diverse range of makers from ceramics, fine woodworking, woodturning, fabrics and paintings to name a small section, all handmade in Cornwall. Have a look, I feel sure you will gain much inspiration from the different makers, not only silversmiths and jewellery makers, presented as it is, in this exciting and vey attractive building in a sublime setting.

Fingers crossed that this will be the progression I need to take my craft to the next level, being as it is very important to sell so as to fund other ideas. As I feel sure you realise, materials are an expense that cannot be ignored. Without the outlets, sales are very difficult to realise.

When I started this blog I wanted to share my journey towards becoming a practicing, read productive and self funding, art metal practitioner. I am bound to say this is still somewhat of an ambition, rather than a reality at this time of writing. I found, indeed I still do find information and direction still very elusive, regarding how best to square the circle of finding outlets that best suit ones way of working. This is the start of a challenge that leads onto how best to present your wares to said outlets, making you stand out above the many other people wanting the same as you, to be represented and given the opportunity to support yourself in a chosen creative field.

To date not many have come forward with suggestions, or pointers, that can be shared with everyone as to how best to maximise your chances, I hope that will change. I wish to, eventually, be able to pass on, through experience, better still a combination input from readers and other craftspeople I meet up with along the way, better strategies. Helping to avoid the soul destroying hours of wasted time that are a result of, effectively, groping in the dark, looking for answers to questions that are only partly understood to start with.

I say this to the point of being repetitive and boring to the people who are unfortunate enough to know me personally. Practice does not make perfect, whatever people tell you this is not true. Think about it, if you do the wrong thing over and over, you will just get better at doing the wrong thing. You will perhaps become adept with a way that works for you. You may even be able to wear you ‘achievement’ like a badge, ‘thats the way I do it’.

I feel like I have become good at the wrong way, no need I feel. The trick is, like all learnable skills, finding the right place to gain the knowledge you need. I reiterate, I wanted to receive feedback that would enable be to ‘practice’ more productively , be it through the metalworking skills, or indeed the ability to ‘put yourself out there’ as it were.

I feel the professional images I had taken of my work really made the difference. I am pretty sure that had the photographs not been up to scratch, then I would not have been invited to submit a sample of my work for consideration.

Once I was invited I gave a broad range of my offerings to the panel. Bit of a panic as I was overjoyed to be invited, I was at a low point at the time and did not expect it. The application was borne out of desperation after a rather salty setback regarding my future as a maker. A lesson to all that beastliness by individuals should not be endorsed by capitulation. SOMEONE WILL LIKE WHAT YOU DO, if your approach is a little left field, you too may be unfortunate enough to suffer humiliation. Please think of it at their problem, not yours. To destroy takes little thought, why would you dwell on thoughtless people, stick to your goal and forge ahead I say.

I had some forged wire bangles that I have not photographed yet. They were not hallmarked at the time. I sent them anyway with a note explaining that I had just made them. I sent these to show that I could work in a different style to ensure that, should I be rejected, I could have asked for feedback as to how better to attract the panel. If I had not sent them and been rejected, then an opportunity to learn would have been missed. I still don’t know if it was perhaps the forged style that swayed them, perhaps they were more drawn to them rather than my repousse´ and chasing work, I will let you know!

So after all my ‘fishing’ I put in an application just days before they closed consideration for new makers for the remainder of the year. I did not try too hard, just sent off the form with the minimum of writing (no really!), the result was a fantastic achievement for me and one I hope you don’t mind me sharing. I have every bit as many hang ups about the desirability and validity of my work as the next person. In a sea of 360 degree landless horizons, if you stay floating long enough the sea will eventually lead you to land. A bit new age I know, however I feel it is a relevant thing to say in my situation up to this point. To embellish it a little more, the people who are in ships who throw things at you, trying to make you go under are cursing in that sea. Rest content in the assumption that they are lost also, but will not get off their boat.

All my very best wishes.

Stu Art 😉

Victoria Lansford picture of the month July Repousse´ cuff


Pebbles

Pebbles

I am fortunate enough to get another mention from Victoria Lansford, picture of the month of July to go with June 2013, good oh.

Again this is a chased and repousse´ cuff that was first soldered round, then worked with punches made specially for this piece. Two recognisable models exist, other experiments to refine tools and technique are long since in the re cycling.

After the New Designers show I am fast appreciating, with advice from industry people and other outlets, that I’m basically kicking a dead horse sticking to this sort of work if I wish to support myself.

I intend to still make new ones from time to time, however it would appear that more demand exists for working in larger forms, such as sculptural pieces and vessels. Advice leads me to give jewelley less of a priority for the future, concentrating more on larger scale work.

As ever I will share the journey. Till next time, all my very best wishes.

Stu Art

http://www.victorialansford.com/Pic-of-the-Month.html

Opinion please for finish on chased and repousse pendant

Number 1 matt, polished craters

Number 1 matt, polished craters

Number 2 all over polish

Number 2 all over polish

Number 3 Oxidised, polished craters

Number 3 Oxidised, polished craters

Number 1 matt, polished craters

Number 1 matt, polished craters

Number 3 Oxidised, polished craters

Number 3 Oxidised, polished craters

Number 2 all over polish

Number 2 all over polish

Wato wato

Another quickie, please could you look at the pictures of the same chased and repousse silver pendant and kindly let me know which finish you prefer. I would be very grateful as I can’t decide which one I like best.

Silver repousse cuff bracelet ready at last!

Wato wato

At last this cuff is finished! After completely messing up the first one and having more than a few challenges with this version I am happy to see it go to its new owner. I call this piece ‘wear your heart on your sleeve’. If you are in the area it is on show at the White Out exhibition in Truro until Friday.

It now belongs to Paul Pennington. You may recall his wife runs the Jewellery Workshop in Porthleven. He wanted this design to compliment the pebbles bangle I made for Clair that is shown in a previous posting. For those interested in the name it came about as a result of a College brief.

I thought that hearts abound in fashion, design and jewellery, as a child I was always fascinated by the very small. Typically beastly boy always muddy, grubbing about in the soil and ponds looking at amphibians and insects. When I discovered microscopic images I was blown away by the complexity and beauty of the hidden world right in front of us that we are not able to see with the naked eye. As an adult I was fortunate enough to be given a microscope for a birthday present, I wish I had more time to look at it, ah well the time constraints and pressures eh!

I went on-line and looked up microscopic images of heart muscle. At relatively low magnifications the heart muscle is like interconnected worms, well thats how it looks to me anyway. I took this set of images and interconnected them to make it more visually interesting and came up with the design you see here. As a bit of fun and a total fluke, the theme allows me to use the old saying of wearing your heart on your sleeve, I find I’m as chuffed about that as anything else about it. I love the fact that whoever wears it will be able to play guess the theme with whoever is looking at it.

Being a very highly raised design it stands out very well, not one for shrinking violets 😉 Being a chap I had given no thought to the gross factor that some of my lady peers expressed at the thought of wearing a representation of heart muscle, is it me?

The good news is that most people who view it for the first time associate it with interconnected vines or tree roots, good oh eh, far less embarrassing for me and another fantastic fluke.

Going on like this, I hope to give you some idea that beautiful accidents do happen. Think design opportunities, not mistakes. Again this is another creation of mine that has not universally won all popularity contests.The way I see it is that if you try to please everyone, not only is this not realistic, it is also timid.

When I bump up against a creative wall as it were, my long suffering supporter, best friend and brutally honest wife Reen has taken to telling me; ‘Just @*ing hit it” This has served me well on more than one occasion.

I respectively pass on her words of ‘encouragement’ to you as I am easily paralysed by indecision, as I’m sure many of you are. Know this however if you make a mess, at least you made something and a lesson was learned by you empirically in a world seemingly paralysed by academia, theory and the fear of getting it wrong. In a world of armchair experts it’s your opportunity to plough your own furrow and enter a wonderful, thrilling and ultimately sometimes scary world of the unknown that holds the promise of great adventures yet to be discovered. Until next time, JUST *@ING HIT IT 🙂 All my very best wishes. Stu Art.

Repousse and Chased cuff bracelet, a journey from copper to silver

Wato one and all

The year is going at a gallop as my course is up in June so time to get my finger out and settle upon a design I will be using for my final projects and the precious metal bursary that I was fortunate enough to receive from Goldsmiths Hall London. I have, to this point, just keep things pretty much technical in this blog, I find this relatively easy but will stretch myself in future to share some of the roller coaster  journey that this course has presented to me. As you can imaging this will be largely subjective and in no way verifiable or necessarily relevant. Perhaps even unrecognisable to others who have walked a similar path. One of the attractions of this blog, for me, was the opportunity for others to be candid and open with differing views that will inevitably lead to other perspectives; perspectives that I may not relate to. However all comments will bury themselves somewhere in the unconscious. This will only serve to make me more aware and rounded as an individual, difficult as I appreciate it sometimes is to be open face to face, the relative anonymity of this vehicle allows me to be open. I hope you will find it similarly conducive to getting your candid opinion accross safe in the knowledge that we will likely never share the same physical space. I very much look forward to being pushed and challenged, after all nothing can be forged without heat, come on, turn up the burner 🙂

This cuff bracelet was made for very dear friends as a birthday present for Clair. In another post I will introduce the extraordinary force of nature that is Paul and Clair Pennington of the Jewellery Workshop in Porthleven Cornwall.

http://porthlevenjewelleryworkshop.co.uk/

It would take too long to tell the story, suffice to say that in less than a year has seen them become such a successful team that it can be called nothing less than an inspirational tale of guts and determination.

Paul is enrolled on the same course as me and was taken by my, wear your heart on your sleeve, bracelet design. He commented that the inside looked like pebbles on a beach and the forming process left a pleasing sand like look on the inside. As Clair is a lover of such subjects Paul asked me to look at ‘just doing a reverse heart on your sleeve’!!!

The exclamation marks are to warn the unwary of being complacent, on the face of it nothing could be simpler, right? I show the original copper model of this piece to show you what Paul saw in the original design, I will now explain the journey.

The copper model was one of many, actually this is one of two rounded models, the other being a lesson :/ (hideous). Along with this were many flat copper experiments to test punched that I made to try to replicate the effects. I have mentioned this before but it pays to repeat. Working in thin gage copper, approximately 0.6-0.7mm thick is very different and far easier than the 0.9mm Stirling Silver sheet used here. The silver is very much harder to move and requires more annealing stages to obtain similar results, don’t go too far too soon, give yourself more time than you would in copper.

Not shown her is the initial lining as I wanted the stones to look placed on the surface the lines on the outside would spoil the effect. I lined the outlines when the silver was flat on a bench block before bending it to shape with a bracelet mandrel and soldering it together.

Here lies another challenge with a closed form, if you recall it is best to keep the chasing and repousse punches near vertical for them to work at their best. Now you will have to work from either opening of the bracelet. Shown here on my plaster scene, I try to use this as much as possible as the pitch stage is time consuming to set up and messy to clean up.

I chose to anneal often and not go too fast as the unequal stretching that working from either side made overstitching and miss shaping a real danger, so slow and steady. The challenge with this is to keep concentrating on the future as each annealing stage can be a little soul destroying when completed as it appears you have not achieved that much as the rounds count up.

Now as the shapes are coming along nicely the problem presents how best to separate the pebbles from the background. Working from the inside using push tools and planishers define the surroundings of individual elements.

After you have gone as far as you can from the inside consideration turns to the front. I did not want to mark the pebbles as I wanted to keep the finish more subtle, now comes the fiddly part that you have to work out as you go. Using bits of wood and plastic or delron nylon extruded bar shaped with saws and filed to fit a the recesses, carefully knock back the background. As you see from the pictures this still will not define the shapes as separate, for this you will need to undercut each stone from the surrounding.

As one of the last stages it is also a very nerve wracking process. As you can imagine as all these elements were raised from the surrounding sheet. As a result they have streatched and thinned, any careless blows will likely be met with a break through, tearing the silver and necessitating a time consuming repair, worse a piece of scrap, nasty lesson learned.

You see the ‘moats’ or ‘troughs’ surrounding the pebbles. With the undercutting punches I used surrounding material and pushed it towards each element. My reasoning was that as it was moved from untreated areas it would pool up against the edges. This was to ensure that sufficient material was present at the edges of each stone, reinforcing it if you will and making the undercutting process less hazardous, less likely to result in breakthrough. Good luck or practice, I know not what, I had no issues and all went well.

The cutting and finishing of the wavy pattern was done with a jewellers fret saw, files and sanded to acceptable standards before returning to the pitch for final texturing. After putting on the pitch it was left to cool so as to create a hard stake like effect that would support the shape, preventing distortion whilst the texture was applied with liners and planishing punches.

The deliberate break in the pattern was made to ensure that I had enough material to be able to make the piece smaller as I was concerned that with the extreme shaping would result in a possible modification. I feel bound to say that when Clair found it was indeed too big I was glad I did. Fair to say the sawing of it in half and removing a section before soldering back together was another lesson learned. If you find yourself in a similar situation may I suggest that you anneal the piece before you saw it in half. All the forces that had built up whilst final forming and texturing made it distort when I cut through it. I kid you not it took an age to straighten it up and re join it, this would not have happened if I had annealed it first as it would have equalised the forces and made it far easier to modify.

I hope you like it, better, I hope it inspires you to try something for yourself. The next time I will start to show examples of hand raising and making bowls, until then.

All my very best wishes.

Stu Art

Chasing and Repousse work; examples of work created with punches previously shown

Wato wato

I’m now bright eyed and bushy tailed back from my holiday to Dorset. Walking in the woods I saw three deer, two one day and one another. Such a treat, I’m truly amazed they were not spooked by the dogs, probably had more than a clue that they would not catch them if they tried. I am originally from Sussex and moved to Cornwall when I was fifteen. Cornwall is a fantastic and varied county, Sussex has some great ancient woodland that I very much wish Cornwall had more of. To be sure in the future I will be looking at ways to incorporate woodland elements into my own designs.

I live near Truro, the museum occasionally has exhibitions, sometimes very high profile. I went to see side by side edge to edge, a silversmiths exhibition; in fact I will mention this another time and introduce you to some of the silversmiths that were represented there who I really admired.

Back to the wood theme;

http://www.seamusmoran.com/

This fascinating and thoroughly nice chap had an exhibition of his work, I attended a lecture he kindly gave there and was blown away by his vision and technical expertise. Please look him up, I know some of his work is a little dark, gothic even, but you need grit to make a pearl right? To give you a brief introduction to his work he combs woodland looking for the last thing to rot when trees decay, the knots. He cleans them up, makes moulds and casts them, selecting the ones that best go together to make sculptures. Do yourself a favour and look him up. I can vouch for the fact he is someone who is looking to connect with others and will, I feel certain, not hesitate to answer any questions you may have. A quick disclaimer, I do not know him personally, mores the pity, I just like to think of more people getting to see his creations.

Well, I guess I better explain some of the images eh, I will try not to be too dry, here goes. The first image is of a test piece in copper I made into a brooch. The valleys are deep and abruptly up and down, as you can imagine a full bodied planishing punch will damage the opposite side as you work on the piece. If you look back to the first round punch you will, I hope perhaps better see what I was trying to communicate in the previous post.

The next picture shows an early experiment that led to the stirling silver cuff bracelet in the last pictures. I show it here to also show the added challenges present as you introduce curves into your designs. Imagine trying to planish all of this with a single tool, too big and you would damage the curved section, too small and it would be difficult not to make the finish more irregular. The next image is to show you that repousse work can be incorporated into rings by wrapping the work around a normally made ring shank.

The Celtic design here was used by me to help to create tool profiles that would work for most of the jewellery work I may wish to make in future. This is a bit of wishful thinking as the requirements for future jewelery designs can never be known, new challenges will always require a rethink regarding type of tool or different approaches to using existing ones. See, fantastic this game, you can never be bored you know. All the profiles were used here, look up close and you will see where the teardrop, rectangular and the rest will be used. The quality of this was not a concern, being as it was only a metal sketch to enable me to create tool profiles, hence I was not very precious about it, a little like the following.

This seed pod like design was arrived at through a College brief to design a piece of jewellery using seed pods as an inspiration. At this time we were trying our hand for the first time at hand raising a vessel, so what I hear you say. Well, when you raise (I will cover this in detail in future posts) you start with a square sheet, mark a circle and cut it out. What you are left with is four curved triangles. Most of my classmates were throwing these off cuts into the scrap pile. I thought they looked like a pod and forged a few to come up with this design. Some of you may have noticed that the work I have presented so far has very little by the way of soldering included in its fabrication. It was a concept that has crept up on me, in no small part by the process of chasing and repousse, inasmuch as I aim for most of my work to ‘grow’ if you will. This design was fashioned on an ancient technique of forging a fibula brooch, all from a single piece of metal. The pin and retainer were all forged and fashioned into the shapes you see here with the help of a rolling mill and hammers. The raised repousse vine that is both the pin and retainer means it has no beginning and no end, shame it broke then eh! I will make this again in silver as I liked the concept and realised where I went wrong. It is put here to show the combination of planishing and undercutting to raise the vine with liners and pushers, working from the front, before planishing with most all of the shapes I have introduced previously.

Last but not least and a bit of an unconscious theme here the circle of life cuff bracelet shown here. To this point I try not to use much by the way of abrasives to finish. I made this cuff, trying to give a flavour of moving water. I used large pushing and planishing punches to create the form I was looking to achieve, high into low and visa versa. When happy I used differing sizes of round and other shaped planishing punches to create a feel of ripples on water. Not everyone who has seen it is impressed with its finish, I mention it here so you take courage in your own work. Others think it is beautiful, you can’t please all the people, whatever you do someone will love it. Please don’t let critics steer you away from what you wish to create, if you do you will spent the rest of your journey never settled jumping from one foot to another trying to be accepted by people who don’t care if you succeed or fail.

I will show some other work next time with more examples of tools used. Again please do let me know if I am hitting a chord or perhaps there is something you think you would like me to mention.

Until next time, all my very best wishes.

Stu Art ; )

Repousse and chasing planishing, texturing punches for silversmithing and art metalwork

Wato to one and all.

On my holidays next week, off to sunny Dorset, well Dorset anyway. A great place to go for the Jurassic coast and all the fascinating fossils just laying around on the beach. A good place also to look for some inspiration for repousse and chasing work. Some of the fossil forms, I feel, lend themselves well, replicating the textures and surface undulations to create interesting silver or copper jewelery. The copper may be best when combined with some patination to give an old world look that would compliment well with the subject matter.

As I said previously I will now introduce some basic planishing shapes, this is not exhaustive as I will explain later. To begin with lets look at the round planishers If you look to the left you will see the disc is paper thin. Try to imagine a tight valley that meets with another, a little live a V shape if you will. This it the only way to planish each side without interfering with the other. I will give examples next time of my work that uses the different planishers. The next one is polished on the sides and slightly rounded. This allows you to go up to a ridge and planish up to it without damaging the raised part as you flatten the surrounding material. This is why I polish all of the punches that come into contact with the metal to as near a mirror shine as I can, preventing unintended tooling marks. The next two  are degrees of concavity that allows me to planish into curved, bowl like, depressions. I waist the end of the punch to make it easier to see where I’m going and where I’ve been as I planish the depressions in a design. Notice I did not polish the sides of these, no need as they will never contact the work. Lastly the very small tool is used for tight corners and texturing. Please keep this in mind as if you are after a smooth finish the larger the tool the better. The fact you can create interesting textures with this tool over larger surfaces will help you to understand; for smooth surfaces at least, the larger the overlap of the tool the smoother the overall finish will be.

Next the oblong or square planishers. All the tools shown here will have the sharp edges rounded of to prevent digging in and scratching. This is especially important to address for these shapes and the following as they all have degrees of straight lines and points. Your style as well as the piece you are working on will determine the degree of both flatness and rounding of the corners. When you explore the working surfaces of these punches with your fingers you should kind of glide around the tool rather than meet with obvious and sharp directions. It should feel like the elements blend together. All of my planishers have a very slight rocker profile to minimise the danger of striking the tool edge on and creating a whelp in the piece of jewellery of hollowware I’m working on. This should not be so pronounced as to make the tool more like a push tool, shown in a previous post.

The tear drop and triangular planishers are made and used in a similar way as the square, oblong types, up to and defining raised elements from flat surrounding areas.

I put the texture punches last as they, to my mind anyway, are filed under the beautiful accident category. The three you see here were the result of my early attempts at making the first type of round planisher at the start of this post. Hardening and annealing, essential tool making skills for the silversmithing fraternity, need to be understood. I will cover this topic in a future post if anyone is interested, please let me know if you are.

When tool steel is hardened it becomes very brittle. If not properly annealed then it will shatter or just snap off at the weakest part. As I put the pronounced waist into these punches the forces concentrate themselves to this weakest part of the punch, look who didn’t anneal his punches properly. But wait, before you get disheartened because all your hard work has resulted in a broken tool, useless now right, just throw it away and be more attentive when annealing next time right. Well, no not really, look at my moon series and most of these punch textures are created with these ‘useless’ tools. The gnarly one was reduced down on a bench grinder to facilitate better access up to the domes on the smaller earrings. Now I deliberately ‘do it wrong’ to create more texture punches as I need them.

The fresh snapped off portion of these punches will eventually dull. The metal has a very coarse christaline looking rough texture that lends itself well to texturing, it will pull at your skin when fresh and become softer over time. I will show examples of these subtle changes of finish another time.

Sorry to prattle on a lot with this post, it is difficult to convey what is needed to be understood without delving a little deeper into language to hammer home the point, no pun intended 😉

The next time I will give examples of work I have created using these tools so you can cross reference the images and writing here with completed works to enable you to go forward and make your own marks, pun most definitely intended.

Until next time all my very best wishes.

Stu Art

Chasing and Repousse push punches

Hello again, in this post I will try to give a little more information for people wanting to start chasing and repousse in their jewellery or silversmithing work.

Pictured is a selection of the push tools I use. These tools are not exclusively used on the reverse, repousse stage, many are used to define the design from the front, chasing I’m sure you remember. I will not highlight the distinction again as I’m sure all will now be aware of the differences between chasing and repousse.

On the left you see the inclusion of a doming or dapping punch. I was advised that these make good starting out tools. I would advise caution if you choose to use different sizes to get you going as pitfalls await, fine if you want to achieve the results that they give, they remain a part of my tool kit, I will include pictures of items of jewelery I make using them to give examples.

I have marked in pencil the ‘sharpness’ of a doming punch. Obviously this is a relative term. To illustrate the point have a scrap piece of thin gage copper, silver if you are flash enough, and gently tap the punch into the piece whilst supported on pitch or felt, plaster scene. Use anything that will give a little, old telephone directories of thick leather will work also. As you try to control a straight line you will notice it wandering as the point of contact is small and being round it cannot find any purchase from previous blows, it being more likely to be deflected by the previous depression.

Another challenge this presents is the thinning of the metal at this, relatively, sharp point. This can cause problems later on if, like me, you are a little heavy handed it becomes more likely that successive blows it’ll perhaps lead to the punch breaking through. Also imagine the shape from the front. If you want to achieve a mountain like profile, then this is a good choice. Put your finger in the middle of some fabric and you may get what I’m trying to communicate.

The other tools all have gentler slopes that work more of the metal at each blow. Overlapping blows are easier to place as the tool is easier to guide by using part of the previous blows new shape as a guide for the next strike of the tool. Also straighter sides are easier to attain and thinning of the metal is kept to a minimum, the material being more moved than stretched to the centre of the high spot.

The tools on the right are used, by me, pretty much evenly on both sides. I think it fair to say that this process is very much a feel experience. With the help of having some test pieces of scrap you can envisage the shapes you wish to achieve. If my opinion was sought I would suggest that the newcomer spent much time experimenting with profiles on scrap pieces of metal to obtain their own ‘alphabet’ of shapes that can be combined to work towards making patterns that are in that persons head.

I found the learning curve very steep and demoralising. Being a stubborn old git I persisted, however I would like to stress that I have gone through a lot of blind alleys in my endeavours to communicate in this medium. Please notice I didn’t say mistakes as every one of these blind alleys helped me to create a better map for overcoming later obstacles.

For me the true beauty of this timeless way of working is the way you are forced to learn and discover all the time as your confidence grows and your ambitions for ever more effective ways to communicate overtake your current skill set.

Unlike many things today that we can tick off of our lists as been there got the T shirt and the certificate. Chasing and repousse, along with silversmithing and jewellery making are true lifelong journeys, never destinations.

Until next time then when I will show examples of work created with doming punches, this is to show that I am really a fan of them, not as it may be interoperated in this piece.

Very best wishes.

Stu Art

Hammer chased beaker example of air chasing with modified hammers

Hello, I had a thought that perhaps I could show an example of a lesser known chasing technique, hammer, or as it’s sometimes known as air chasing. If this style excites you as it does me then please check out the following master craftsman Hiroshi Suzuki.

http://www.thegoldsmiths.co.uk/exhibitions-promotions/who’s-who-in-gold-silver/designer-makers/hiroshi-suzuki/

Mr Suzuki appears not to have his own website, the Goldsmiths link above should give you a flavour, a Google search will keep you enthralled for hours. No, oh well just me then : )

I approach all of my work by first making models, in copper mainly. I have found that recycling copper domestic hot water tanks is very cost effective and the material is plentiful making me more care free, spontaneous and less conscious of the cost implication of mistakes, oops sorry design opportunities. I will go into more depth as to the pros and cons of this approach in another post. As I have stated drawing is not a skill I possess sufficiently enough to communicate the three dimensional ideas I visualise so I make models and, for want of a better way of putting it, sculpt the design as I go along. I was self conscious about this until I discovered that Hiroshi Suzuki uses a similar approach. I would highly recommend you search out any literature that goes into depth about him as he has a very different and, to me, refreshing spontaneous approach that is remarkable when compared to the design design check and re check before you make approach that many of us take.

The hammers you see in the pictures were all modified from second hand ball peen and cross peen hammers, bought from a local market trader that specialises is house clearance. It is easy to be seduced by the artisans tools that, I’m sure you like me drool over in the tool catalogues. However perfectly serviceable and effective versions can be made with a little elbow grease and some imagination.

The results from this process are very effective and take far less time to achieve. The technique lends itself to more abstract designs giving a good opportunity to imply movement. I have not added texture to this piece as it is only a model and best left to use as a visual reference for me to return to. I will show others later with hammer and punch textures applied to show more.

To help give a personal, visual explanation of this approach I ask you to pinch the skin on the back of your hand with your thumb and forefinger. If you compare what you see with the raised sections of the design then you will have an idea of how it is achieved. First the broader faced hammers are used to create the valleys on either side of the lines drawn. Careful to alternate a little each side of the line to work towards the line. Then using the smaller, less broad hammer profiles you can refine the peaks to create the ridges. I have deliberately left these somewhat ‘soft’ if you will. If you look to some of the Suzuki examples you can see that it is possible to create a very accurate and defined sharp line if your design requires this. The danger with this technique, as I see it anyway, is that it is easy to get carried away with the rapid progress that the hammers make and annealing is neglected leading to a real danger of cracks and tears appearing in the overworked material. Keep this in mind, anneal often as you feel and hear the material, be it silver copper or whatever to keep this risk to a minimum.

Repairs are time consuming and a pain to do. I will show a repair in another post to show that all is not lost, even with the biggest mistakes, time and application of learned techniques can dig you out of most holes.

Silversmithing being a very expensive discipline to learn as the cost of the material becomes ever more expensive, makes silver-plating a direction that you may wish to consider. This would be a very attractive option for larger vessels of sculptural approaches using copper of gilding metal to create your work, sending it off for plating.

Cost in terms of tooling can also be off set by learning some toolmaking skills and make or modify your own. Of course if cost is not a consideration you will save a lot of time by buying off the shelf models. However the satisfaction and learning you gain by modifying or making to your own specifications and needs is priceless in my opinion, also it is a nod to how the greats that precede us have made their masterpieces in a time when tool catalogues did not exist.

Please let me know if there is anything you would like me to cover in other posts. Until next time keep on making. Very best wishes.

Stu Art