
-

- 0.9 copper square. A proper doming hammer above, a re-profiled and polished junk shop ball peen hammer used on this ‘sketch’
-

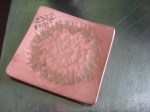
- Mark with compass, hammer overlapping blows around the edge to trap metal.
-
- First round. Forgive the roughness as I just wanted this piece to be a demo and to show you don’t have to be precious all the time to try out something.
-
- Annealed and the edge hammered and hardened again.
-

- The beauty of freshly annealed and pickled surface, same for silver, is the matt finish that shines as you strike it.
-

- As seen here the advantage is that you can clearly, both, see where you have been and are going.

-
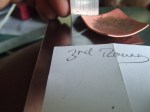
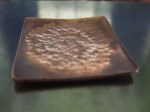
- After the third and final, for this sketch, round
-

- I picked a square to show the possibilities with straight edges.
-

- The underside, you could planish, or be more careful than I have been and leave a pleasant hammer texture
-

- I show these early ‘sketches’ I made in copper to create a fibula brooch. The shrinking I will explain in another post. For now think fold forming and you will get some idea.
-

- As can be seen here quite gentle curves can be created without stakes.
Wato wato
I have to get a silver vessel ready for a show in Truro the week after next and have neglected my commitments here. As promised, I will illustrate a way to create curves or bowls without stakes or depressions to form into.
The piece of copper was from a scrap corner of a disc I cut to make a raised copper bowl, more on that in a future post. I deliberately made it square to help you to think about curves in a different way. If I cut a circle then, perhaps, you may think why not just use a doming block or punch? If you try this with a square you may find the points don’t behave as you think they would, tending to crumple and become marked by the doming block, no such challenges with this way.
Please be aware that this is ‘a’ way; not ‘the’ way to approach making effects photographed here. I am minded to think of when I started and looking at all the stakes and hammers on offer, which one? How many? I feel certain you will have experienced just such confusion. I offer this way to you as I feel sure you already have, of can inexpensively come by the tools shown here to experiment, creating your own sculptural shapes, adding to your deeper understanding of how to problem solve when you hit a creative wall as it were.
A steel bench block and a ball peen hammer are all you need, good oh eh 😉 if you are just ‘sketching’ as I do, then you will not even have to worry unduly about the surface finishes of the block or hammer. In fact you may be able to produce some beautiful effects with less than perfect surfaces, unique to you. It just gets better don’t you think.
I deliberately did not freshly anneal the piece to start. If you look further along the sequence you will see I have highlighted the help that a freshly annealed and pickled surface give to you as a guide to facilitate more accurate placements of your hammer blows. You may wish to start with a freshly pickled surface, your choice.
The idea behind this, and I will descend into metaphor to help explain to you how I see it; Again, before I do I am bound to say that this is how I see it, if anyone knows a better way please please do let me know and I will alter to be clearer and less confusing. Metal works like slow motion clay, also it flows a little like water under the hammer blow making a small ‘wave’ of material. If you hammer quite hard with the ball end of your hammer on a freshly annealed piece of material, copper silver or other types, on a steel block you will notice the contact point sunk with a ring of material surrounding the mark. Try it with a cross peen and again the ‘moat’ or wall of material will surround where the hammer has struck. This is the softer, un work hardened material being squished away from the compressed area. The outside edge that I hammered to start creates a ‘moat’ or barrier of work hardened material. When you then go from the middle, overlapping blows you are trapping the soft state, not yet hammered and work hardened material towards it, eventually meeting a barrier it cannot cross. As the distance is covered the ‘wave’ is larger and will cause the material to curl as it gets closer to the edge.
Where the analogy with clay breaks down a little here is the one shot deal you get with metal. Metal will not stand repeated blows and will eventually crack if continually hammered on the same spot without annealing. For safety sake it is best to do one round, re anneal, pickle and start again. This way you will not be likely to cause the material to fail by overworking. Another bonus is that you will become far more accurate as you become aware of sticking to this one hit rule and using the colour change as a guide as the struck area becomes shiny.
I have only done three rounds to show what is possible, nothing to stop you taking it further if you wish. You will come up with limits eventually as you continually thin the material, as a result this is perhaps best left to create shallower forms. By holding the sheet at increasing angles as you strike it you can alter the depth, even making different depths on a single piece.
The other photographs illustrate this as they clearly show the way I have held the brooches at shallower and steeper angles to the block to obtain the transitional curves seen here. The ‘shrinking marks’ shown are made with a cross peen. I will explain how this works with examples an another post. To get you thinking about shrinking, (a poet and didn’t know it 🙂 think fold forming. I hope to show you why I think of metal as a kind of slow motion clay, try to think ‘barriers’ stretching and compressing waves.
Thank you again for reading and the kind messages. Until next time.
All my very best wishes
Stu Art
