

Painted stirling silver sheet cut to the size required to make the closed cuff bracelet
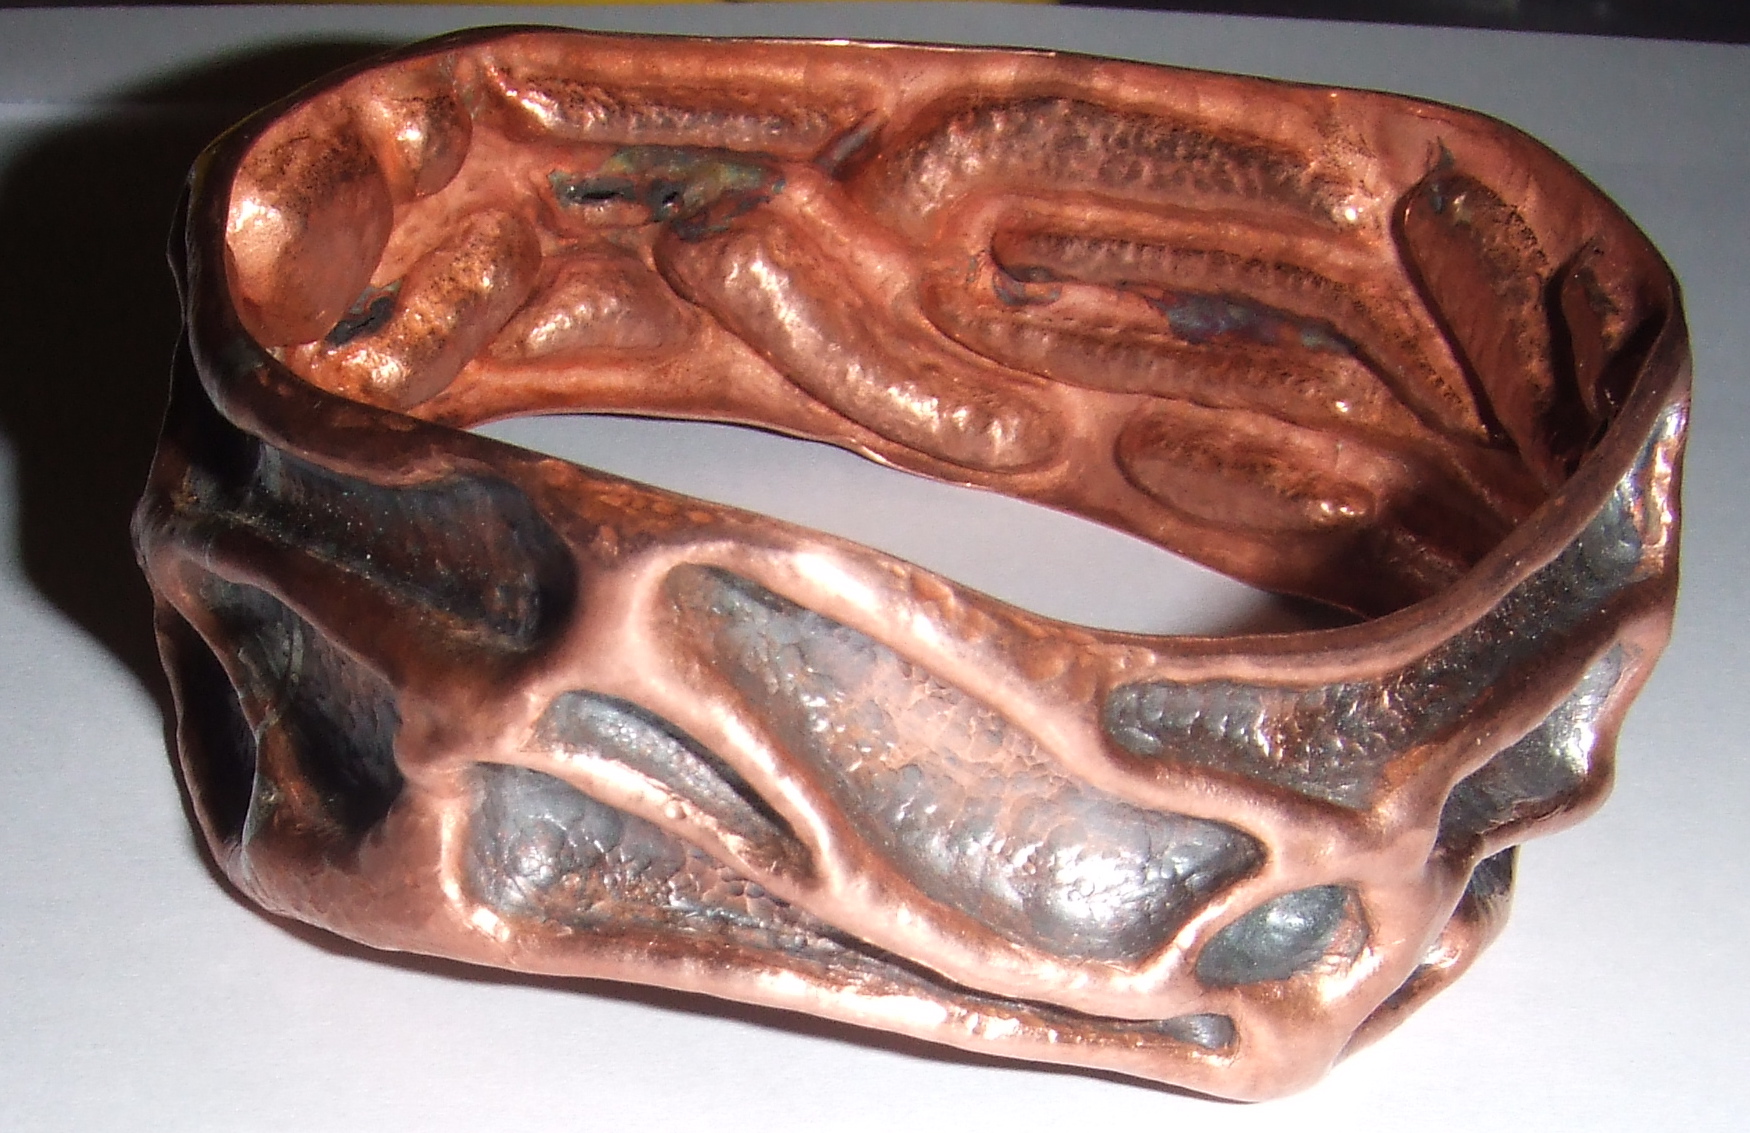
 Start of the design before final trimming, shown is the copper prototype

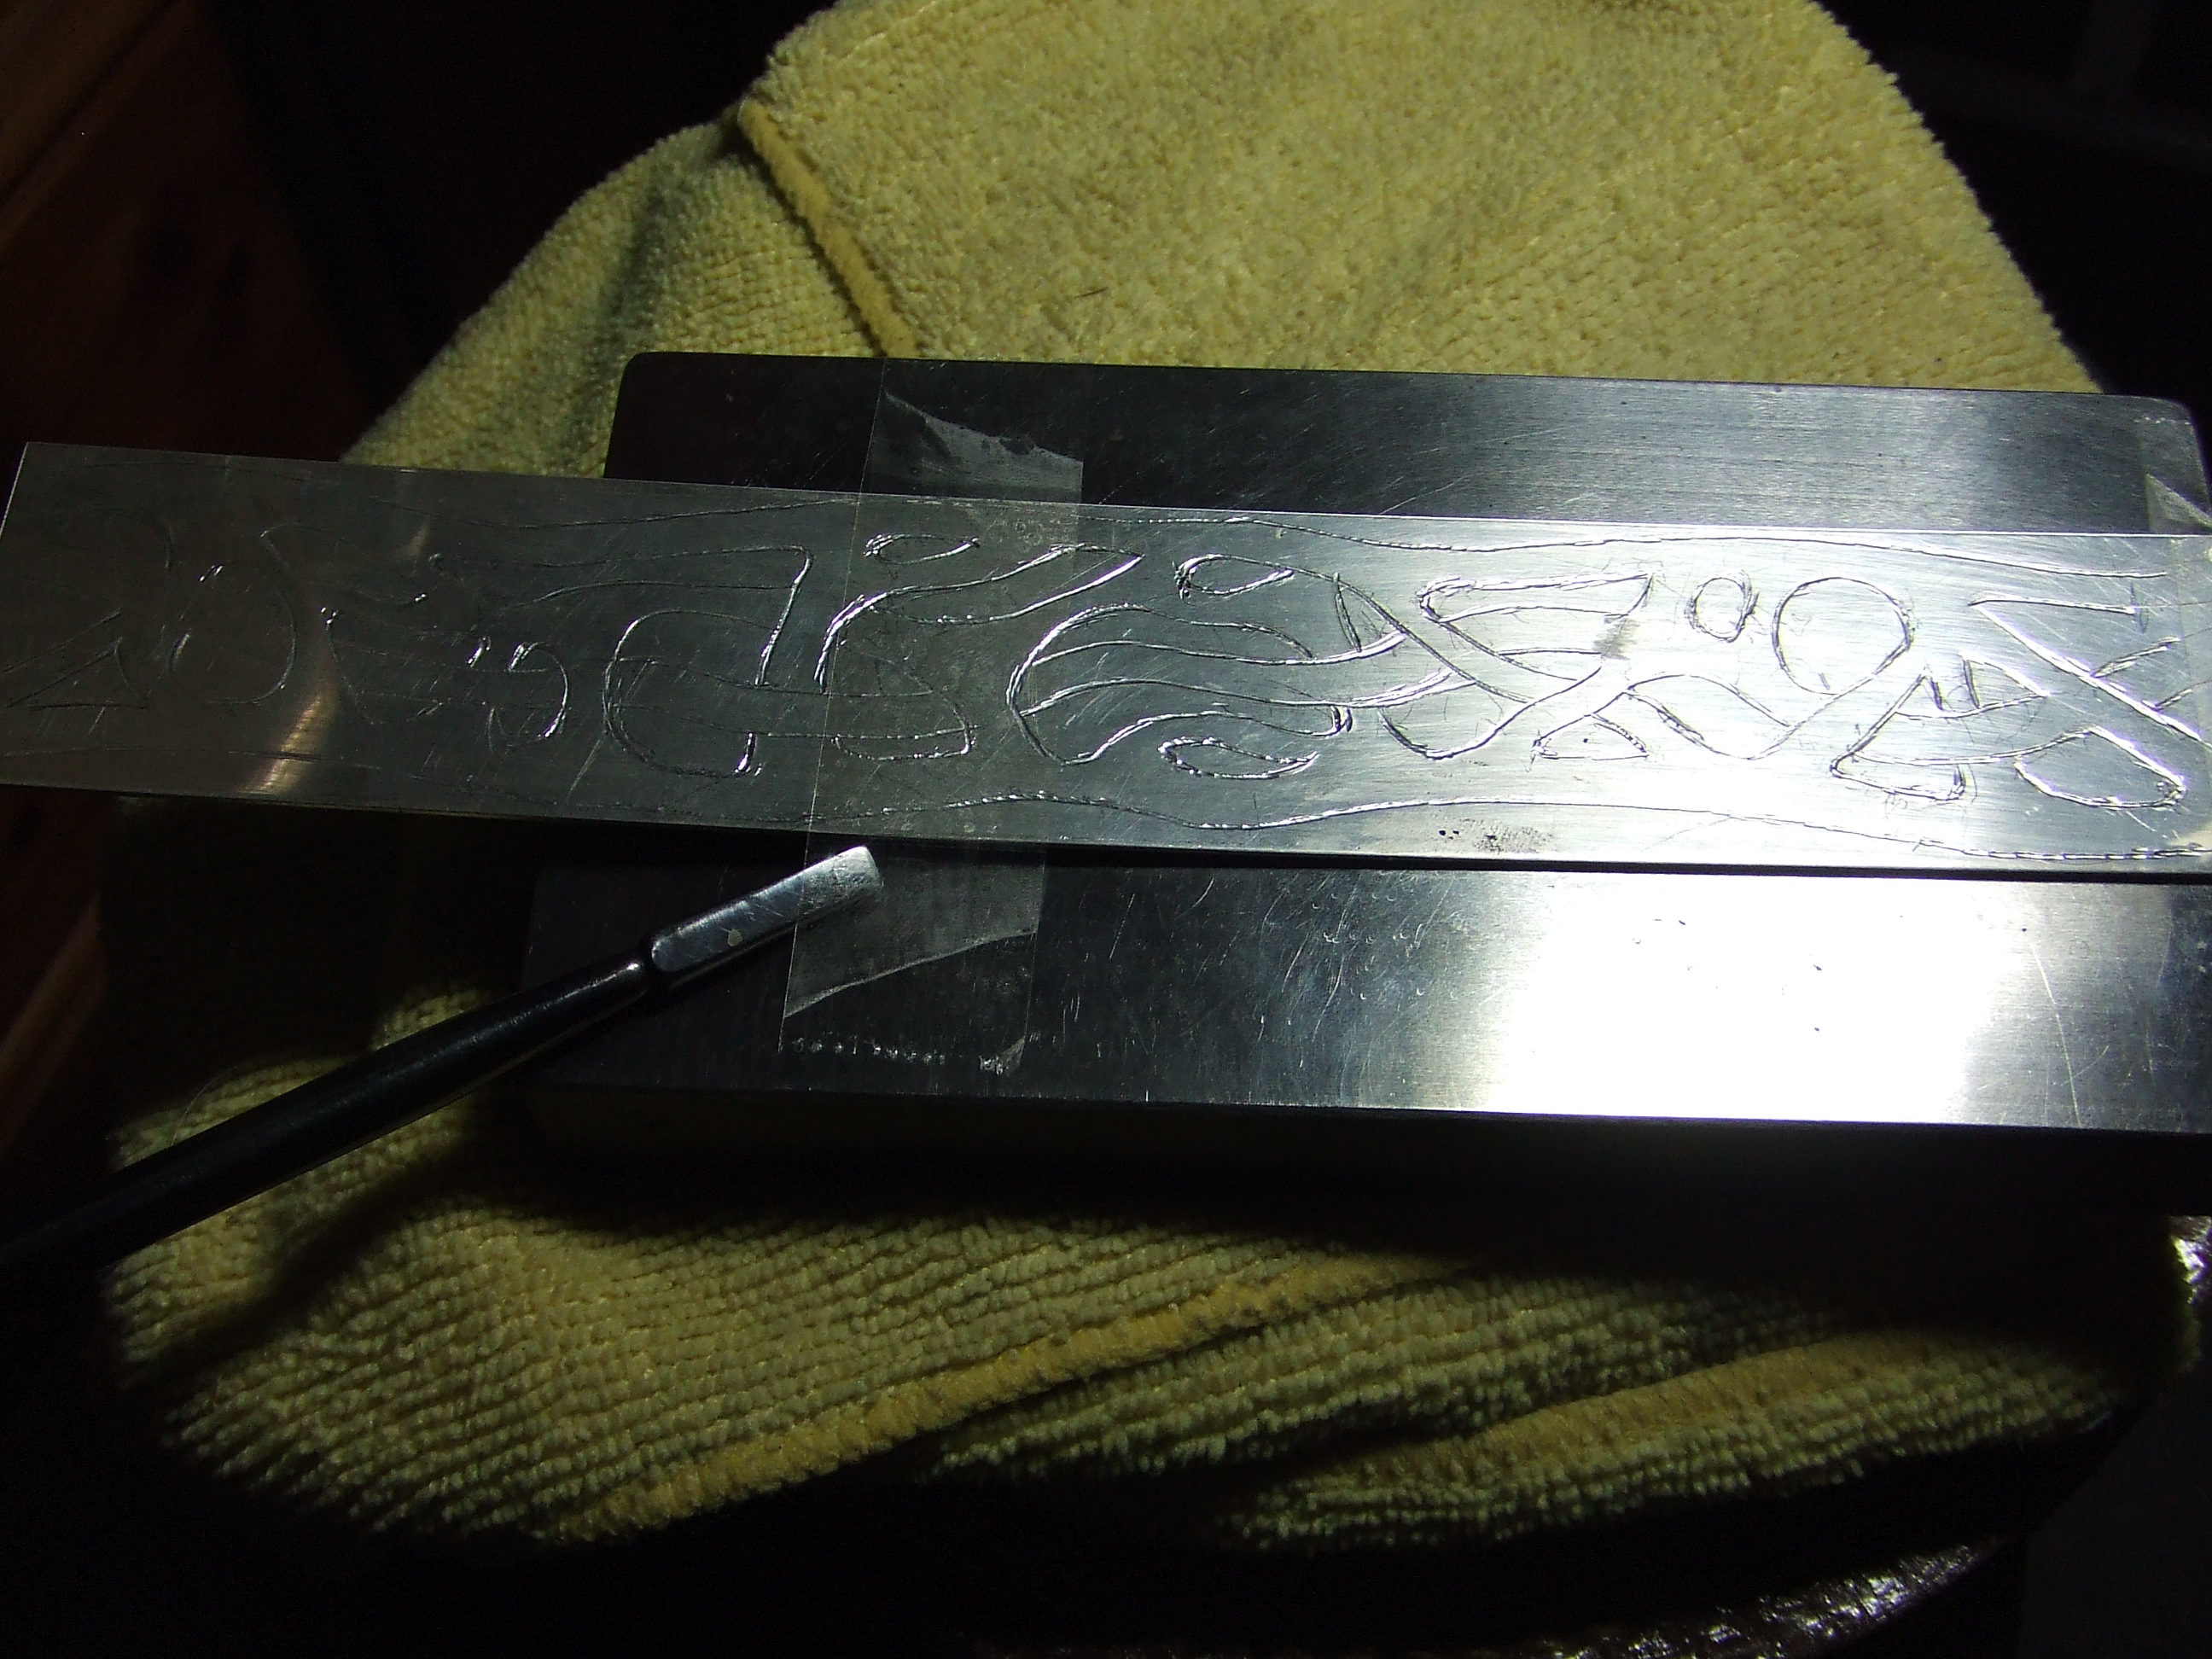
The two lining tools used to complete this sheet. The ‘skeleton’ of the pattern can be seen here. See text for explination

Lining under progress, this was done with two sizes of lining tool. I hindsight I should have used curved liners, I would have been easier. I will introduce you to these in a later post.
Lining completed before rounding on a mandrel to solder together, making the closed form. Not shown here id the ‘ghost’ impression of the lining process that is visible from the reverse. This is vital for the repousse stage as it shows the boundaries to keep within.
I introduce here the lining tool and the processes I use to transfer designs to sheet silver, copper or whatever metal takes your fancy.
You can use gouache paint, as here, or draw directly onto the silver. I have has some great results using Rotring isograph drafting pens on silver. When the ink dries it is quite durable and the lines are super accurate and regular.
The template I drew was for the heart on your sleeve bracelet, modified after the copper prototype. I made the strip actual size, joining the ends to ensure that the ends met so that after lining I would be able to solder together the ends safe in the knowledge that the design would work.
I used a scalpel to cut out the low spots, this was to help me to better see the result of the design, making alterations easy at this paper stage before committing to the stirling silver sheet. Once happy with the look and flow of the design, I taped the paper to the silver and drew around it with pencil to transfer the lines onto the dry white gouache layer ready for the lining tool to impress the line into the sheet. The paint was only applied to give the pencil something better to key to and make the lines more visible.
Shown here are only two types of lining tool, I will post again to give examples of more types. For now, so as not to go into too much tool detail this will serve to give a broad understanding that will make the understanding of these tools easier in upcoming posts.
I used a polished steel plate, taped the silver sheet to it to stop it moving around. You do not have to do this, less intricate designs and larger pieces may not require you to need to do this. I found it helped with this design.
I will go into more detail later about holding the tool, and other aspects of this early stage next time.
